WordPress Toolkit
WordPress Toolkit is a single management interface that enables you to easily install, configure, and manage WordPress.
Installing WordPress
To install a new WordPress copy, go to Websites & Domains > WordPress and click Install. The following installation options are available:
- For an express installation, click Install. The latest version of WordPress will be installed, and default settings will be used.
- For a custom installation, click
 and select Install (Custom) from the menu. This enables you to select the domain on which WordPress will be installed, set up the administrator user, specify the database name, and more. The latest version of WordPress will be installed.
 - To install a particular version of WordPress, click
 > Install Version, and select the desired WordPress version from the menu. This results in a custom installation, as described earlier, but the chosen version of WordPress will be installed instead of the latest one.
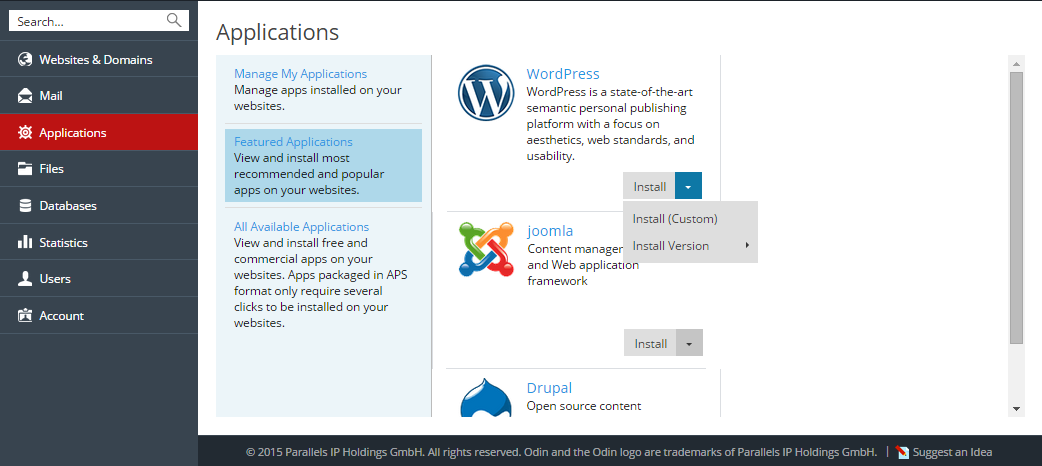
Integrating WordPress Installations with the WordPress Toolkit
All WordPress installations added using the WordPress Toolkit, or through the Applications page, appear in the WordPress Toolkit automatically; those installed manually need to be attached to WordPress Toolkit. If you have upgraded from an earlier version of Plesk and you used WordPress, you should also attach existing WordPress installations to the WordPress Toolkit.
To attach WordPress installations to the WordPress Toolkit, go to Websites & Domains > WordPress and click Scan. Note that if you install new copies of WordPress manually after the scan, these WordPress installations will not be attached to the WordPress Toolkit.
All WordPress installations added using the WordPress Toolkit, or through the Applications page, are permanently attached to the WordPress Toolkit. You cannot detach them from the WordPress Toolkit; you can only remove them completely. To remove such a WordPress installation, go to Websites & Domains > WordPress, click the WordPress installation name, and then click Remove.
Manually added WordPress installations cannot be removed by means of the WordPress Toolkit; you can only detach them from the WordPress Toolkit. To detach a WordPress installation, go to Websites & Domains > WordPress, click the WordPress installation name, and then click Detach. Note that a detached WordPress installation will be attached to the WordPress Toolkit again after you perform a new scan for WordPress installations.
Logging in to WordPress
To log in to a WordPress installation, go to Websites & Domains > WordPress, and click the Log In button corresponding to the desired WordPress installation. Note that for a manually added WordPress installation, you will need to provide the administrator’s username and password, unless you specify them in Websites & Domains > WordPress > installation name > Access Credentials first.
Managing WordPress Installations
To change the database user name, the administrator's email, the site name, or the interface language for a WordPress installation, go to Websites & Domains > WordPress, click the name of the WordPress installation > Change Settings.
To change the administrator's access credentials, go to Websites & Domains > WordPress, click the name of the WordPress installation > Access Credentials. Here you can specify the password for the administrator account of the WordPress installation - it will be used to log in to WordPress from Plesk. If there is more than a single administrator account created for the WordPress installation, select the one that will be used for logging in to WordPress from the list. If you do not remember the password for the administrator account, you can reset it here.
Updating WordPress Installations
To check if updates for WordPress and installed themes and plugins are available, go to Websites & Domains > WordPress > Check for Updates.
To update one or more WordPress installations, go to Websites & Domains > WordPress, select the checkboxes corresponding to the WordPress installations you want to update, and click Update.
To set up automatic updates for the WordPress installations, go to Websites & Domains > WordPress > Auto-Update, select the WordPress installations for which you want to set up automatic updates, and click Switch On Auto-Update.