Using Docker
summary: Docker is a platform used to run applications in containers. It enables you to use specific software, such as Redis or MongoDB, or a specific version of software, which might not be supported by your operating system or might need compiling.
Docker is available as a Plesk extension. With it, you can run and manage containers based on specific Docker images, and to use Docker both on the local host and on remote servers.
In this topic, you will learn how to create, configure, and manage Docker containers in Plesk. You will also learn how to control remote Docker hosts from Plesk.
Requirements and Limitations
Warning: The Docker extension downloads images from Docker Hub as they are and does not preconfigure them in any way. Some Docker containers or software in them are intended for trusted environments only and can require additional security setup. Before launching these downloaded images in Plesk, you need to enhance their security yourself. For specific instructions, refer to the documentation of the container or software vendor. For example, see the security section in the Redis documentation.
-
Docker is supported in Plesk for the following operating systems: CentOS 7, Red Hat Enterprise Linux 7, Debian 10, Debian 11, Ubuntu 18.04, Ubuntu 20.04, Ubuntu 22.04, AlmaLinux 8.x, Rocky Linux 8.x, and Virtuozzo 7 with Update 1 Hotfix 1 (7.0.1-686) or later.
In Plesk for Windows, you can use Docker installed on a remote machine (see **Using Remote Docker** further in this section).
-
You cannot use Docker in Plesk that is deployed in a Docker container.
-
To use remote Docker services in Plesk, you need an additional license. It can be purchased either separately or as a part of the Hosting Pack, Power Pack, or Developer Pack.
-
Docker runs only on x64 systems.
-
Docker containers in Plesk cannot be migrated or backed up. However, you can back up data used by containers (see Volume Mapping below), or download snapshots.
-
Virtuozzo 7 with Update 1 Hotfix 1 (7.0.1-686) or later installed is supported. Note that starting with this update, new containers based on CentOS 7 are created with the firewall enabled by default due to Virtuozzo pushing for increased security. Plesk administrator must manually configure the firewall to ensure that ports necessary for Plesk to operate are open.
Prerequisites
Before you can start using Docker, the Docker extension must be installed on the Plesk server:
- If you are the Plesk administrator, install the extension from the Extensions Catalog.
- Otherwise, contact your hosting provider and ask them to install the extension for you.
Once the extension is installed, you are ready to begin. You will see the Docker option in the Navigation Pane.

The Image Catalog
In the catalog (Docker > Docker Image Catalog), Plesk displays images from https://hub.docker.com/explore. By default, only recommended images are displayed. To view more images, use the search box or filters.
For each application, multiple versions can be available. You can run a specific version by selecting the appropriate tag, as shown below:

To use filters:
-
Click the arrow
 next to the search box.
 -
Specify both or one of the following: image name and repository.
The repositories that you can select:
- Local repository - contains local images. These are images that have already been downloaded and are now stored on the server with Docker. For details, see Managing Local Images further in this section.
- Docker Hub - https://hub.docker.com/explore.
To run a container:
-
Go to Docker > Docker Image Catalog.
-
Use the search box or filters to quickly find applications in the catalog.
-
To view the application description and documentation on Docker Hub, click the image name. This does not apply to local images.
-
To run a specific version, click the arrow next to the Run button, and select the application version.
-
To run the latest version of the selected application, click Run.
If the image is stored locally, the button appears as Run (local).
Plesk creates a container and prompts you to specify its settings, such as environment variables, and then runs it. You can cancel running by clicking Cancel on the Settings screen. For details about the settings, see Container Settings later on this page.
-
The container appears in the list of containers at the top of the Docker Catalog page.
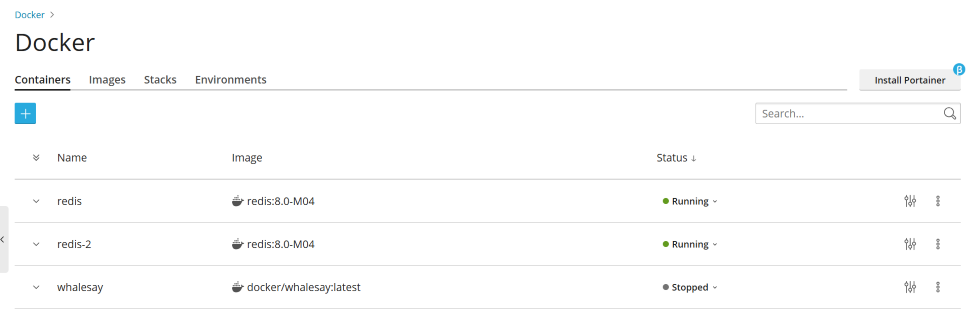
See the log (Logs) to find out what settings the container needs to run successfully.
Container Settings
Note: If you want to change container settings, you do not need to stop the container: When you save new settings, Plesk recreates the container.
To edit container settings, go to Settings or Details > Settings.
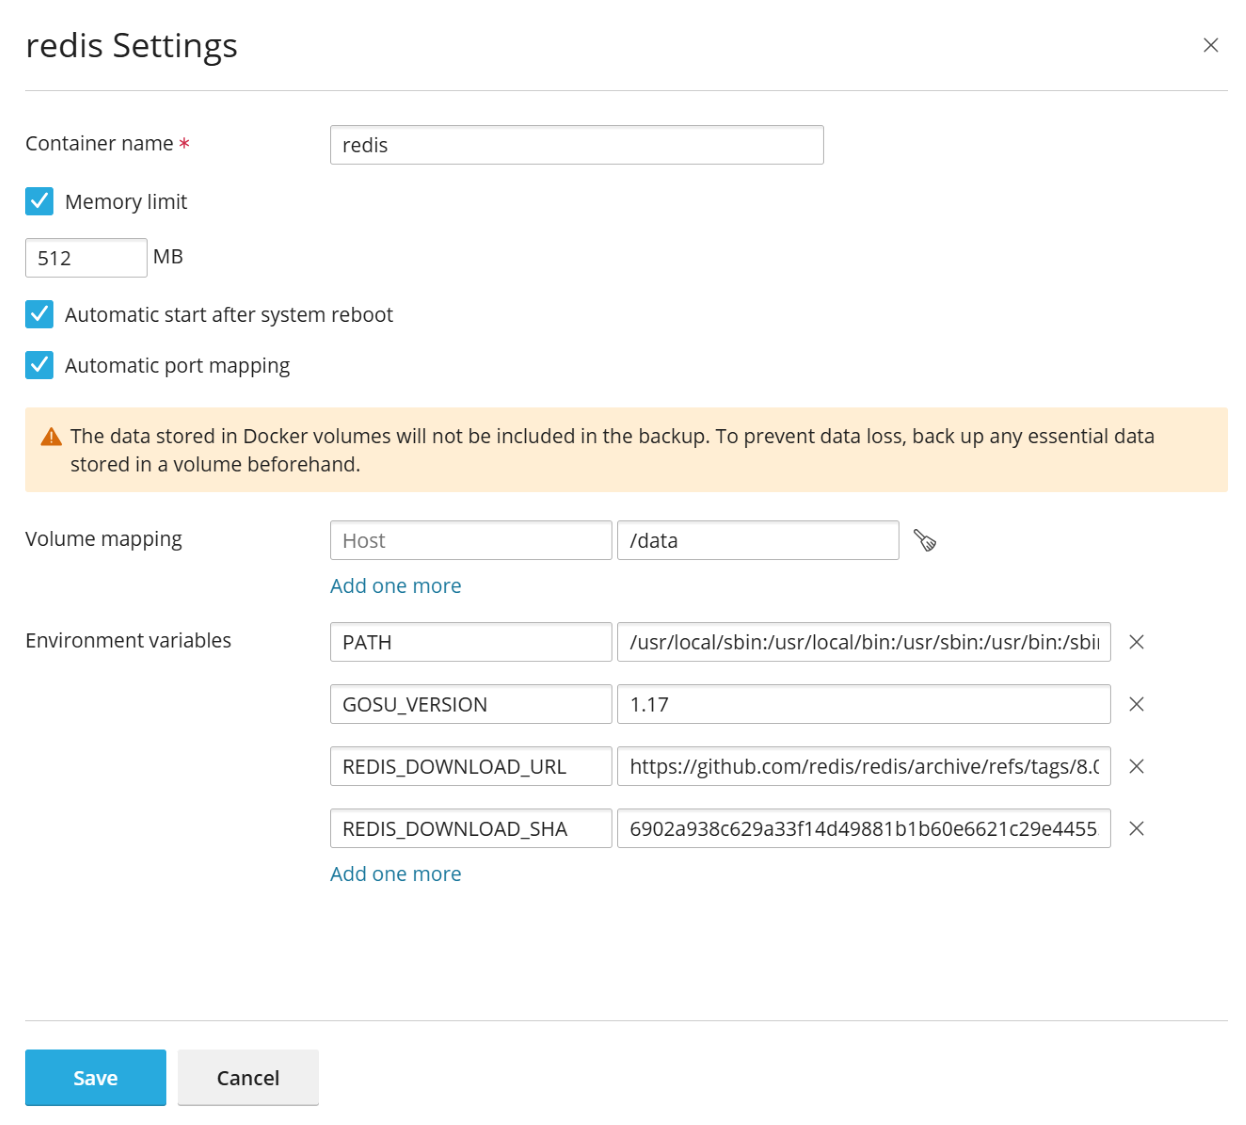
Limiting memory
By default, using RAM in a Docker container is unlimited. To limit using RAM, clear the Unlimited checkbox and enter the limit value in megabytes in the Memory limit field.
Note: CPU and Disk usage cannot be limited for a Docker container at the moment.
Note: Docker containers are administrator-level objects, and are not controlled by subscription-level cgroup limits (CPU, RAM, Disk usage).
Automatic Start
If the option Automatic start after system reboot is not selected, then after system reboot the websites that use this container might be down and you will need to start the container manually.
Port Mapping
By default, Automatic port mapping is turned on and the container’s internal port is mapped to a random port on the host system (for example, 32768).
To change the port on the host system, clear the option Automatic port mapping and specify another external port in Manual mapping. If no Manual mapping appears when you clear the check box, it means that the container does not expose ports.
When using manual mapping, by default Docker only binds to the specified port on the host system’s localhost interface (127.0.0.1). This way, the port is inaccessible from the Internet, and the application inside the container is safe from attacks. To have Docker bind to the specified port on all network interfaces of the host system, clear the “a private port on the host” checkbox. If you do, the application inside the container becomes accessible from the Internet, and can be reached on the specified port via any of the host system’s IP addresses.
Warning: Docker presumes that authentication is carried out by the application itself, but sometimes it is not so (for example, MySQL/MariaDB does not allow anonymous access by default, but redis does). Making the application inside a container accessible from the Internet may result in the application being attacked by a malicious actor.
Volume Mapping
Docker volumes are directories on your server mounted to a Docker container, so that you have persistent storage that can be accessed from your host system. The data in Docker volumes can be backed up, and, more importantly, it is not deleted when you stop or delete a container.
For more information about data in containers, refer to the Docker documentation.
To add a volume mapping, specify the following:
- In the left “Destination” field - the absolute path to a directory inside the container.
- In the right “Source” field - the absolute path to the directory on the server that you want to mount in the container.
To map more directories, click Add Mapping.
Setting Environment Variables
Environment variables are used by the application inside a container. You might need to add more variables or edit existing variables. Plesk allows you to add as many variables as required.
Operations with Containers
You can do the following with containers:
-
Restart (Restart) or stop (Stop) a container. In these cases, the container will be recreated with the current settings.
Note: If you did not save the data to the mounted volumes (see the Volume Mapping section below), the data will be lost.
-
View logs and resource consumption (Details).
-
Change container settings, such as environment variables or volume mapping (Settings or Details > Settings).
In Plesk on CentOS, you can set a memory limit for a container (Settings > Memory limit).
-
Rename a container (Settings > Container name).
-
Recreate a container using the same or another version of the image (Details > Recreate).
-
Create an image based on a container with your custom settings (Details > Save as Image).
-
Take a snapshot of a container (Details > Download a Snapshot).
-
Remove a container (Remove or Details > Remove).
Recreating a Container
Usually, you need to recreate a container when you want to update the application to a newer version. In fact, you can rebuild a container using any application version available in the catalog, not only a newer one.
Custom settings are preserved during recreation. To preserve data used by the application inside a container, you should specify volume mapping before you recreate a container. Volume mapping enables you to have access to directories used inside a container (see Volume Mapping in container settings).
To recreate a container:
- Go to Docker and click Details below the container you want to recreate.
- Click Recreate in the container settings and specify the image version, and whether to use default environment variables.
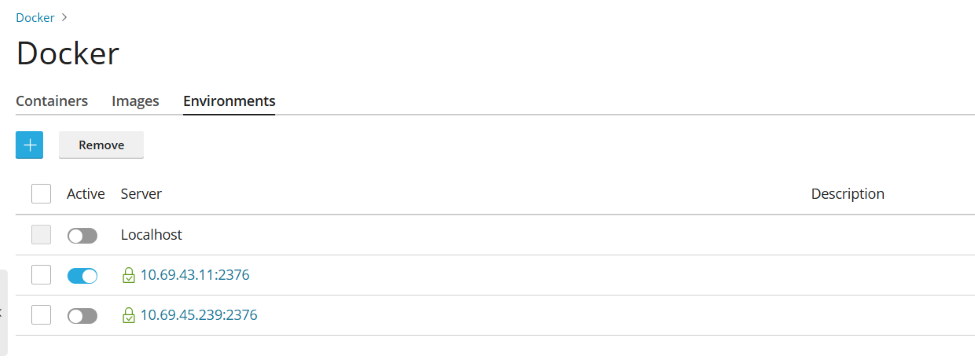
Using Remote Docker
By default, Plesk uses Docker installed as a Plesk component. However, you can use one or more Docker services installed outside of Plesk. Note that you can use only one service at a time. The hostname of the selected server is displayed in the title of Docker Catalog in Plesk.
Note: Managing remote Docker services requires a Plesk license key add-on. Without this add-on, you can only manage the local Docker service, which is running on the Plesk server.
Configuring Remote Services
Configure the remote server that runs Docker as described in the Docker documentation to use it as a remote server in Plesk.
Managing Remote Services
The following steps are applicable to both Plesk for Linux and for Windows.
To start using Docker that runs on a remote host:
- Go to Tools & Settings > Docker (under Server Management).
- Click Add Server and specify the settings of the remote server with Docker.
- To start using this Docker service in Plesk, leave Set active selected.
The link to Docker will appear in the Navigation Pane.
To switch between Docker services:
- Go to Tools & Settings > Docker (under Server Management).
- In the list of servers, select the server that you are going to use and click Set Active.
Alternatively, you can set the server as active while editing its settings.
Creating Images with Custom Settings
If you want to create a new image based on the changes that you have made to a container, use the Save as Image command. This takes a snapshot of your container, which appears as a new image in the image catalog. In this way, you can create images with custom settings such as environment variables.
To create an image from one of your containers:
Go to Docker > Details under the container name > Save as Image, and optionally specify:
- Image name. By default, an ID will be generated and used as the name.
- Tag. You can specify the image version here. By default, the version will be “latest”.
The created image appears in the image catalog and is marked Local image.
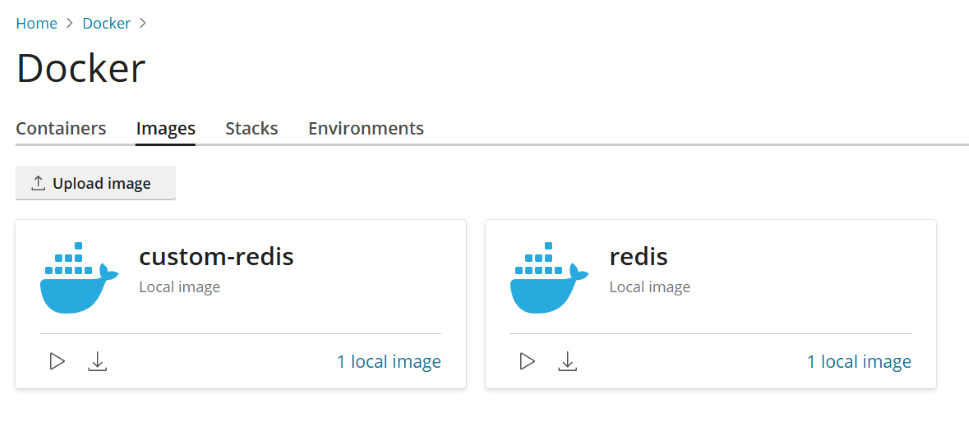
Managing Local Images
Local images are images that are stored by Docker on a local disk, so there is no need to download them from the Image Catalog.
An image becomes local in the following situations:
- You have selected any version (tag) of an image and the image has started downloading. If you either later run a container or cancel running (in the Settings screen), the image is saved locally.
- You upload an image to Docker catalog in Plesk (Upload Image in Docker Image Catalog).
- You have created a custom image from a container (see Creating Images with Custom Settings).
- You have built an image using the command line interface.
If Docker has at least one downloaded version from a group of versions belonging to an image, this image is marked Local image in the catalog. Run (local) means that the latest version was already downloaded. Plesk also shows how many local images exist for a product.
To view local images and remove outdated local images:
-
Go to Docker > Docker Image Catalog.
-
To find all local images, click the arrow next to the search box and select Local in the Repository filter.
-
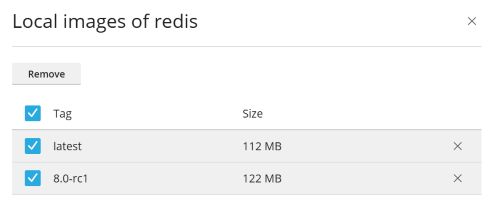
To view all local images of a specific product, click the link under the product name. All local images’ tags and occupied disk space will be displayed.
-
To remove all images, click Clean All Images.
-
To remove a specific image, click the Remove
icon
next to the image that you want to remove.
 icon
next to the image that you want to remove.
icon
next to the image that you want to remove.Setting up nginx to Proxy Requests from Domains to a Container
Some Docker containers expose ports so that applications in containers could be accessible via those ports.
When you use an application in Docker container on your website, you may find it inconvenient to specify the non-standard port in its URL. To avoid inconvenience, you can set up nginx to proxy requests from domains to that port, so domains can use a standard port (such as 80) and there is no need to explicitly specify the port in URL.
Requirements
- nginx must be running in Plesk.
- You must map the port inside a container to a port on the host system (for example, 32768) manually (Docker > select a container > Settings > clear the option Automatic port mapping).
After you have mapped the port inside a container manually to some port on your system (for example, 32768), you can set up nginx to proxy requests from domains to that port, so domains can use a standard port on nginx (for example, 80). To make this possible, add a rule for nginx in the domain settings in the following way:
Go to Websites & Domains > the domain > Docker Proxy Rules > Add Rule and specify the following:
- URL. Specify the URL of the website that uses an application running in a container. It can be either the main website or a part of it.
- Container. Select the application running as a Docker container.
- Port. Select one of the mappings that was specified in the container settings (a port inside a container mapped to a port on your system). Nginx will proxy requests to the port on the system.
Proxy rules are implemented in the web server configuration, e.g., in
the website’s
file nginx.conf (in /var/www/vhosts/system/$domain/conf/):
#extension docker begin
location ~ ^/.* {
    proxy_pass http://0.0.0.0:9080;
    proxy_set_header Host             $host;
    proxy_set_header X-Real-IP        $remote_addr;
    proxy_set_header X-Forwarded-For  $proxy_add_x_forwarded_for;
}
#extension docker end
Proxy rules should work fine on servers behind NAT.
Note: Docker containers connected via Proxy Rules to a website are not counted towards the subscription’s disk space usage. An exception to this would be when a website directory is mounted to a Docker container as a volume, as in this case all files located in the container will be counted towards the disk space usage of the website.