添加与移除域名
观看视频教程
如果您的托管软件包包括一个以上的域名(网站),那么您可轻松添加域名到您的服务器。在您开始添加将使用二级域名的新域名时,如 example.com ,请务必注册该域名。如果您的主机提供商会提供域名注册服务,您可如下描述在客户面板中进行此操作。否则,您需要通过其他域名注册机构注册您的域名。
您可通过 Plesk 设置下面不同类型的网站配置:
-
使用二级域名地址的网站。 网站可用下面的服务:
- 唯一的互联网地址(域名),如 example.com 。
- 其他域名(域的别名)。
- 子域名 - 一个网站的分支,其地址很容易记住,可添加至主网站,如 mail.example.com。
- 用于网站内容合作的独立 FTP 帐号。针对每个 FTP 帐号,您可指定访问的目录。
- 使用 Presence Builder 创建内容。
- 应用程序的简化部署,例如添加内容管理系统、相册、购物车、博客平台、论坛等等。
- 通过 SSL/TLS 协议的安全数据交换。这需要网站托管于一个不与其他用户和网站共享的专用 IP 地址上。
- 邮箱与邮件列表。
- 查看有关网站访问量的统计。
-
网站与三级域名的网站分支(子域)。 这通常是现有网站的分支。三级域名的互联网地址由点号隔开的三个部分组成。子域可用下面的服务:
- 文档根与主网站分开。文档根是服务器上存储网页的目录。
- 通过 FTP 访问内容管理。
- 使用 Presence Builder 创建内容。
- 应用程序的简化部署。
- 通过 SSL/TLS 协议的安全数据交换。
- 查看有关网站访问量的统计。
添加更多域名
托管一个新的二级域名网站:
-
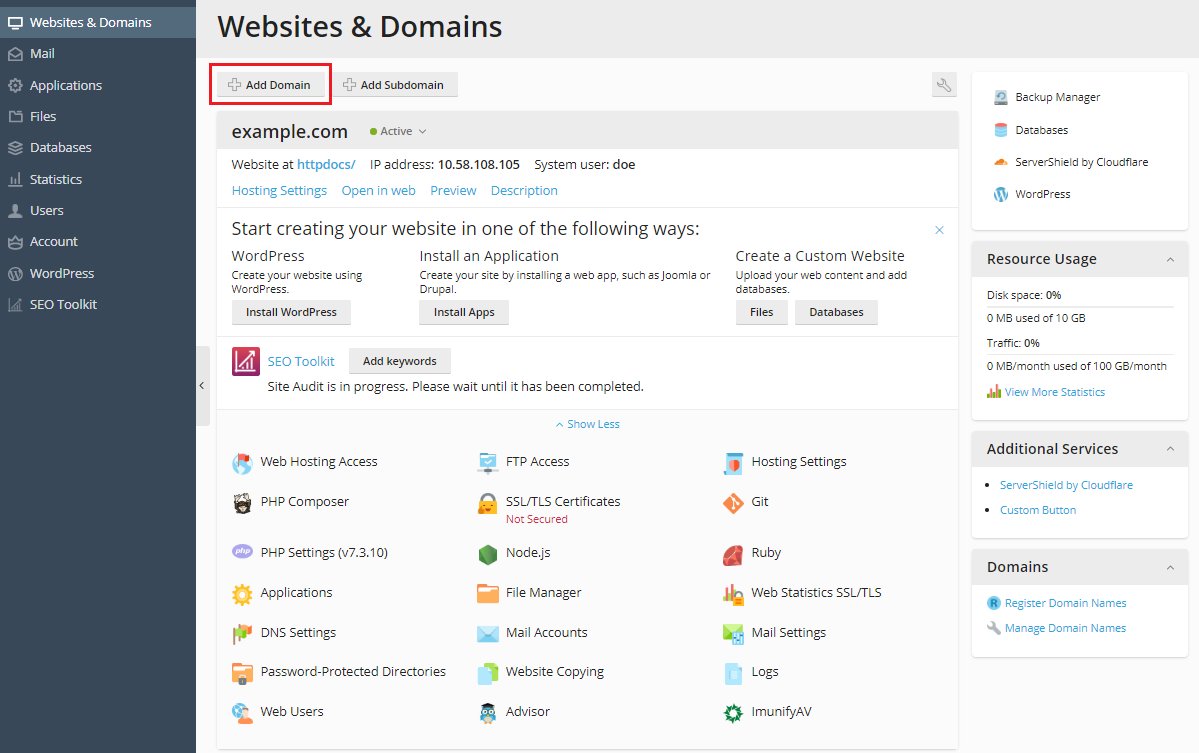
转入 网站与域名 ,点击 添加域名 然后根据屏幕上的说明操作。
注解: 因 Plesk 的版本,您可以在 添加域名 屏幕上指定的信息可能会不同。
注解: 如果您选择推荐选项,则应该把相关的 DNS 设置以及您的域名与注册方的域名相连接。如要实现此操作,需输入 Plesk 名称服务器 IP 地址到注册方相应的 NS 记录里。有关如何获得 IP 的说明如下:请转到 网站与域名 > 域名 > DNS 设置 ,找到 NS 记录,然后找到 NS 记录值相应的 A 记录。
例如,如果 NS 记录是
example.com. NS ns.example.com*,
找到带有
ns.example.com的 A 记录,如ns.example.com. A 192.0.2.12
结果值,
192.0.2.12,就是您需要的 Plesk 域名服务器 IP。 -
点击 确定 。
现在在屏幕底部显示新的域名。
-
如果您的帐号可更改主机设置,那么您可点击新网站的域名查看或更改主机设置,可参照小节 更改主机设置 。
现在您可开始使用 Presence Builder 创建网站,或上传您的网站内容至新订阅,可参照小节 网站内容 。
选择一个域名视图模式
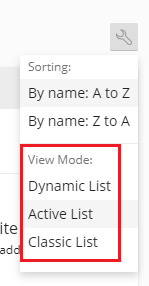
“网站与域名” 屏幕可能会因您选择的域名视图模式而所有不同(布局、可视的控件和总体 UX):
- Dynamic List is the best choice because it combines advantages of two other view modes: the laconic layout with a large number of domains and an expandable list containing all available controls. Dynamic List is also the only mode that shows domain favicons.
- 如果您有多个域名且想要使用所有可用的控件,最适合选择活动模式。
- 如果您有很多域名(多于 100 个)适合选择经典模式。但是并不是所有控件都可见。

若要选择视图模式,请转入 网站与域名,点击 
Adding a Domain Favicon
A domain favicon is a small image Plesk shows next to a domain name if you use the Dynamic List view. You can see favicons on the following screens:
- (For Power User view) Websites & Domains
- (For Service Provider view) Domains and Subscriptions
Once you create a domain, Plesk generates and shows a default favicon based on the first two characters of the domain name.
However, you can add your custom favicon, for example, the same one you use as your website favicon shown on the browser tab. Custom domain favicons help you to do the following:
- Find the desired website more easily.
- Tell one domain from another.
To add a Dynamic List domain favicon:
-
Choose a PNG, SVG, or ICO image you will use as the favicon.
-
Give the favicon image any of the following names:
favicon.svgfavicon-32x32.pngfavicon.pngfavicon-16x16.pngapple-touch-icon.pngfavicon.ico
-
Using File Manager, upload the image to one of the following website directories:
- The document root directory, which is, by default,
httpdocs(unless you set a custom document root) -
/imagesin the document root directory -
/assets/imagesin the document root directory
注解: It is essential that you upload a favicon to one of the directories mentioned above. To show a custom favicon, Plesk non-recursively searches for exact file name matches in the directories. If you upload the
favicon.svgfile to the/images/favicondirectory, Plesk will not find the image because/images/faviconis a subdirectory of the required directory. - The document root directory, which is, by default,
You have uploaded your custom favicon image. To have Plesk show your favicon, wait a while or refresh the Plesk page.
注解: If your website runs on WordPress, you can create both the website and domain favicon at the same time using the Favicon by RealFaviconGenerator plugin. Plesk detects a website favicon created by the plugin wizard and automatically sets the favicon for the domain in Dynamic List view.
For Plesk to find a favicon, you need to correctly name a favicon image and put it into the designated directories as described in the procedure above.
However, you can set custom location and custom name for a favicon using the panel.ini file.
To set a custom location for the Dynamic List domain favicon:
-
Open the “panel.ini” file for editing, which is located here:
- (Plesk for Linux)
/usr/local/psa/admin/conf/panel.ini - (Plesk for Windows)
%plesk_dir%admin\conf\panel.ini
您还可以使用`Panel.ini Editor <https://www.plesk.com/extensions/panel-ini-editor/>`__ 扩展在Plesk界面中编辑该文件。
- (Plesk for Linux)
-
Add lines of the following pattern and save the file:
[domainManagement]
favicons.customPaths[] = path/to/custom_favicon_name.ico
If you set a custom location for a favicon, favicons generated by the Favicon by RealFaviconGenerator plugin will stop working. To bring them back, you need to add the default custom path for Favicon by RealFaviconGenerator:
[domainManagement]
favicons.customPaths[] = path/to/custom_favicon_name.ico ; your custom path added earlier
favicons.customPaths[] = /wp-content/uploads/fbrfg/favicon.ico ; default custom path for Favicon by RealFaviconGenerator
If you do not want to see any domain favicons (neither custom not default ones) in Dynamic List view, you can disable favicons.
To disable Dynamic List domain favicons:
-
Open the “panel.ini” file for editing, which is located here:
- (Plesk for Linux)
/usr/local/psa/admin/conf/panel.ini - (Plesk for Windows)
%plesk_dir%admin\conf\panel.ini
您还可以使用`Panel.ini Editor <https://www.plesk.com/extensions/panel-ini-editor/>`__ 扩展在Plesk界面中编辑该文件。
- (Plesk for Linux)
-
Add the following lines and save the file:
[domainManagement]
favicons.enabled = false
移动域名
您可以移动以下项:
- 现有或新订阅的附加域名(订阅第一个域名后创建的域名)。移动到新订阅的附加域名将成为新订阅的主域名。
- 现有或新订阅的附加域名(订阅第一个域名后创建的域名)。移动到新订阅的附加域名将成为新订阅的主域名。
移动包括您的域名和订阅,以及那些属于您客户和代理商的域名和订阅。
将附加域名移动到现有订阅有助于执行以下操作:
- 在客户和代理商之间重新分配域名。
- 从 Plesk 早期版本和其它主机面板迁移后,正确地分配域名。
- 将过渡网站与生产网站分开然后将网站从开发状态移为生产状态。
- 将错误创建的域名移动到正确的订阅。
- 更有效的使用订阅的资源。
向新订阅移动附加域名可用于以下情况:
- 您要拆分一个带有多个域名的订阅以销售其中一个域名。
- 某个订阅接近于允许的资源限制。
- 您需要隔离安全受到威胁的域名。
通过将主域名移动到现有订阅,您可以将多个订阅合并为一个订阅,这有助于实现以下操作:
- 更有效地使用资源。
- 管理一个订阅而不是多个。
- 在迁移期间重新排列在订阅之间分散的域名。
域名会连同其内容、配置文件、日志文件、PHP 设置、APS 应用程序外加子域名和域名别名(如果有)一起移动到其它订阅。
注解: 您想要将域名移动到的目标订阅必须有足够的资源(网站、子域名、域名别名或邮件名称)。
若要将域名移动到现有的或新的订阅,请如下操作:
-
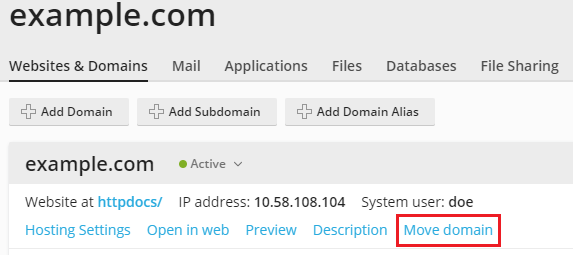
转到 网站与域名,找到您要移动的域名并点击 移动域名。
-
选择移动域名的位置:
- 若要将其移动到现有的订阅,请选择一个可用的订阅并点击 移动。
- 若要将其移动到新的订阅,请选择 “创建新订阅” 选项,指定系统用户名和密码(在相应字段中),然后点击 移动。
移动完成后,您的域名将被分配给选定的订阅。
已知问题和局限性
移动域名有许多问题和局限性。所有移动操作(附加域名和主域名)都可能有大部分的问题和局限性。而其它一些局限性会在仅移动附加域名或仅移动主域名时产生。
所有的移动操作
-
无法将域名移动到没有主机的订阅。
-
只有下列用户才能将附加域名移动到新订阅,将主域名移动到现有订阅:
- Plesk 管理员。
- 具有“在服务器管理面板中创建订阅以及在客户面板中创建域名”权限的代理商。
-
如果目标订阅存在有相同文档根目录的域名,则无法移动域名。若要移动该域名,请更改其 “文档根目录” 值(在主机设置中)。
-
无法将有邮件服务的域名移动到没有邮件服务的订阅。
-
如果具有自定义的其它 Apache 或 nginx 指令的域名被移动到了另一个订阅,则这些指令会被保留,您可能需要对其进行检查。
-
如果您移动有以下两项的域名:
- 已安装的 web 应用程序(WordPress、Joomla! 或其它)
- 和设为应用程序管理员的 Plesk 其他的用户,
其他的用户将失去对应用程序的访问权限。应用程序管理员的登录名和密码将被更改(您可以在应用程序设置中查看)。
-
如果您将带有邮件用户的域名移动到属于其它所有者的订阅,电子邮件地址将会与该邮件用户分离。
-
如果您将域名移动到有不同 PHP 设置的订阅,将会锁定目标订阅。
移动附加域名
- 以下项不可移动:
- 没有父级域名的子域名。
- 没有父级域名的域名别名。
- 移动安装有 web 应用程序(WordPress、Joomla! 或其它)的域名不会自动移动应用程序的数据库。这不会影响网站,但是您可能想要手动将数据库移动到现在分配了域名的订阅。
移动主域名
- 以下项不可移动:
- 其订阅有附加域名的主域名(创建订阅时创建的域名)。
- 有 web 用户的主域名。
- 移动安装了 Web 应用程序(WordPress、Joomla! 等)的主域名会自动移动应用程序的数据库和数据库用户。
- 移动启用计划备份任务的主域名将关闭备份任务。
- 移动主域名将关闭为域名设置的匿名 FTP 访问。
- 移动有其他用户的主域名会将用户从源订阅中分离出来,并将其移动到目标订阅。
- 移动有计划任务的主域名会将任务移动到目标订阅。
- 移动一个有其他 FTP 用户的主域名会将用户移动到目标订阅,并保留他们的主路径。
删除站点
当您从 Plesk 中删除域名时,所有与相应网站相关的数据都会从服务器中删除。
注解: 您的订阅的主域名 - 就是为您帐户创建的第一个域名(默认域名),无法被删除;但是可被重命名。
要删除域名,请执行下列步骤:
- 请转到 网站与域名 ,并找到所要删除的域名或子域名。
- 单击 删除网站 或 删除子域名 。
- 请确认删除并单击 确定 。
注解: 从客户面板中移除域名不会取消这些域名的注册。如果您已经注册了这些域名,以后仍可把这些域名用于您的网站。

