Mirroring Plesk Autoinstall Servers
Maintaining a local mirror of Plesk Autoinstall Servers helps you to avoid wasting a lot of time and traffic on downloading the same files again and again when installing or updating multiple Plesk servers. Local mirrors are available via HTTP, and can be specified as sources for downloading Plesk packages in the course of installation or upgrade.
Prerequisites for a Local Mirror Repository
- Virtual host used for mirroring should have all script handlers (php, pl, cgi, py, fcgi etc) disabled.
- Virtual host or directory used for mirroring should have option
+FollowSymLinksset. - Unless the other sources are specified, the following must be
accessible from the machine, where the script is being run, and from
the destination machine:
-
rsync://rsync.autoinstall.plesk.com/autoinstallfor Plesk for Linux, -
rsync://autoinstall-win.plesk.com/autoinstallfor Plesk for Windows.
-
- PHP must be compiled with support of the below extensions on the
machine, where the script is being run (see
http://www.php.net/manual/en/ssh2.installation.php):
- ssh2_connect,
- simplexml,
- XML DOM.
- Plesk for Windows and Plesk for Linux mirrors can not be located in the same folders. Mirrors must be created in separate paths.
Configuring a Local Mirror Repository
-
Download and unzip the Plesk Mirror Setup tool
# wget https://support.plesk.com/hc/en-us/article_attachments/360041549033/mirrorctl-3.1.0.zip
# unzip mirrorctlv2.0.1.zip
# cd mirrorctl
-
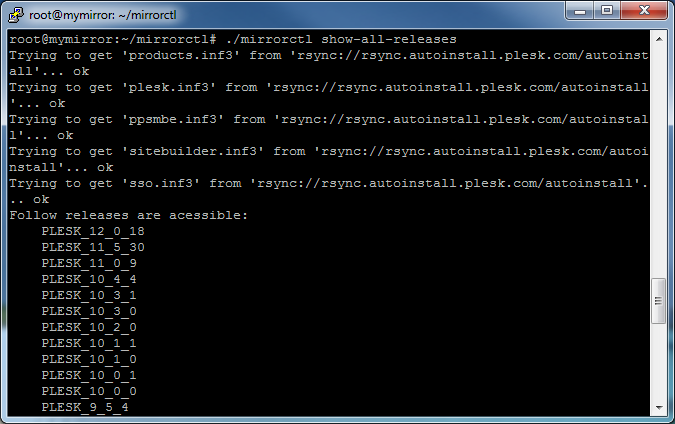
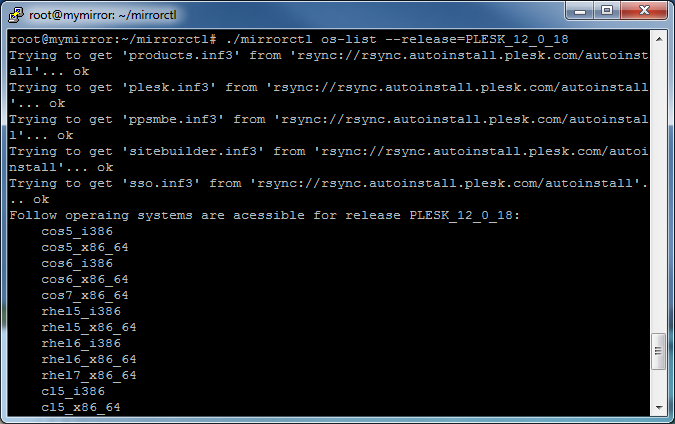
Check for available product versions
Use the
show-all-releasescommand to view available products andos-listcommand to view OSes supported by particular product:# ./mirrorctl show-all-releases
# ./mirrorctl os-list –release=PLESK_12_0_18
-
Select product versions you want mirrored
Use
cfg --addandcfg --removeto edit the list of product versions that are to be mirrored:# ./mirrorctl cfg --add --release=PLESK_12_0_18 --os=cos5_i386 # ./mirrorctl cfg --add --win --release=PANEL_12_0_18_WIN --cfg-file=./plesk_win_mirror
-
Save the configuration of the local mirror repository to a file
Use
cfg --exportto save the created configuration to a file:# ./mirrorctl cfg --export --path=./The configuration will be saved to a file
mirror.xmlat the specified location.<?xml version="1.0" encoding="UTF-8"?> <xml> <release name="PLESK_12_0_18" version="12.0.18"> <os name="cos5_i386"/> </release> </xml>
To load a saved configuration from a file, use
cfg --import:# ./mirrorctl cfg --import --cfg-file=./mirror.xml -
Create the mirror repository
First, create a directory for the mirror:
# mkdir /var/www/html/mirror/
# mkdir /var/www/html/mirror_windows/
Then, use the
updatecommand to synchronize the mirror with the official repository:# ./mirrorctl update --path=/var/www/html/mirror/ # ./mirrorctl update --win --path=/var/www/html/mirror_windows/ --cfg-file=./plesk_win_mirror
Note: This repository can be used to install only the product versions and
OSes, which were specified in the mirror configuration. All other
versions will not be available in this repository for
autoinstaller utility.
Check the list of product versions available in the created repository:
# ./mirrorctl show-all-releases --src-host=/var/www/html/mirror/
# ./mirrorctl show-all-releases --win --src-host=/var/www/html/mirror_windows/

The local mirror repository can now be used in the process of installing and upgrading Plesk.
Using a Local Mirror Repository
A mirror can be used in either of the following ways:
-
by changing DNS resolving and setting up the mirror web host so that
https://autoinstall.plesk.com(for Plesk Linux) orhttp://autoinstall-win.plesk.com/(for Windows) would point to the mirror; -
by specifying the URL to the mirror in the
SOURCEvariable of the/root/.autoinstallerrcfile on the machine where autoinstaller is launched;[root@container ~]# cat /root/.autoinstallerrc SOURCE=http://uri.of.local.mirror/here/
-
by specifying the mirror URL in the
--sourceoption when launching autoinstaller in interactive mode.
Maintaining Remote Mirror Repositories
Plesk Mirror Setup tool can manage repositories that are located on the
same file system as well as on remote servers. To specify remote source
and remote destination mirrors, the --path and --src-host
options are used.
Use --path to specify the remote destination mirror:
-
Using a particular user, password and host:
--path=user:UserSecurePassword@mymirror.tld:344/var/www/html/
--path=user:UserSecurePassword@192.168.100.100:22/var/www/html/
--path=root:RootSecurePassword@localhost:/var/www/html/
-
Using SSH keys authorization (both private and public keys are required):
--path=192.168.100.100:/var/www/html/If default RSA pair (id_rsa & id_rsa_pub) for current user does not exist, then default DSA pair (id_dsa & id_dsa.pub) from
$HOME/.ssh/folder will be used.--path=user@mymirror.tld:344/var/www/html/ -
Using particular SSH keys as additional options for mirrorctl utility:
--path=root@mymirror.tld:344/var/www/html/ --private-key=~/.ssh/id_mirror --public-key=~/.ssh/id_mirror.pub
Use --src-host to specify the remote source mirror:
-
Using rsync via SSH protocol:
--src-host=test@192.168.100.100:/var/www/html/test-mirror/
--src-host=mytestmirror.tld:/var/www/html/test-mirror/
- In the above case it is forbidden to specify user password or SSH port (22).
- In case
--src-hostoption is used, the user who launches the tool must have SSH keys authorization set up for him to be able to connect to the host specified under--src-hostoption and under the user specified via that option. - If the
--src-hostoption is used along with the--pathoption, then, again, the user specified in the--pathoption must have SSH keys authorization set up for him to be able to connect from the host specified in the--pathoption to the host specified under--src-hostoption and under the user specified via--src-hostoption.
-
Using rsync daemon on the source host:
--src-host=rsync://mytestmirror.tld:873/testmirror
Example of rsync configuration:
# head /etc/rsyncd.conf
[testmirror]
path = /var/www/html/test-mirror/
comment = Test repository
# cat /etc/xinetd.d/rsync
service rsync
{
# disable = yes
socket_type = stream
wait = no
user = root
server = /usr/bin/rsync
server_args = --daemon
log_on_failure += USERID
}
Example 1: Setting up periodic updates for the local mirror repository
Goal: make sure my mirror with selected product versions is up to date.
-
Create the mirror configuration by adding the needed product versions and operating systems:
# /home/user/mirrorctl/mirrorctl cfg --add --release=PLESK_12_0_18 --os=cos5_i386 --cfg-file=/var/www/html/mirror/myconfig.xml
# /home/user/mirrorctl/mirrorctl cfg --add --release=PLESK_12_0_18 --os=rhel5_i386 --cfg-file=/var/www/html/mirror/myconfig.xml
# /home/user/mirrorctl/mirrorctl cfg --add --release=PLESK_11_5_30 --os=cos5_i386 --cfg-file=/var/www/html/mirror/myconfig.xml
# /home/user/mirrorctl/mirrorctl cfg --add --win --release=PANEL_12_0_18_WIN --cfg-file=/var/www/html/mirror/windows_myconfig.xml
-
Configure crontab to automatically update the mirror:
$ crontab -l
# m h dom mon dow command
59 23 * * * cd /home/user/mirrorctl/ && ./mirrorctl update --path=/var/www/html/mirror/ --cfg-file=/var/www/html/mirror/myconfig.xml > ./mirror-cron.log 2>&1
59 22 * * * cd /home/user/mirrorctl/ && ./mirrorctl update --win --path=/var/www/html/mirror_windows/ --cfg-file=/var/www/html/mirror/windows_myconfig.xml > ./mirror-cron-win.log 2>&1
Example 2: Adding new operating systems
Goal: add another operating system for a particular product version to my mirror.
-
Import the current configuration of the repository that you created earlier using mirrorctl utility:
# ./mirrorctl cfg --import --path=/var/www/html/mirror/ --cfg-file=myconfig -
Add the new OS for a product version:
# ./mirrorctl cfg --add --release=PLESK_12_0_18 --os=deb6.0_i386 --cfg-file=myconfig -
Synchronize the mirror:
# ./mirrorctl update --path=/var/www/html/mirror/ --cfg-file=myconfig
Example 3: Downloading a particular OS/version
Goal: download a particular OS for a particular product version to my mirror from the official repository without downloading other mirrored versions/OSes.
-
Generate a configuration file containing only the OSes/product versions that you wish to download:
# ./mirrorctl cfg --add --release=PLESK_12_0_18 --os=cos5_i386 --cfg-file=./temp-config
# ./mirrorctl cfg --add --release=PLESK_12_0_18 --os=cos5_x86_64 --cfg-file=./temp-config
-
Download the specified OSes to an existing repository using push command:
# ./mirrorctl push --path=/var/www/html/mirror/ --cfg-file==./temp-config
Example 4: Creating a mirror for testing new product versions
Goal: create a test mirror for a new product version, test that version and upload only that tested version (without the latest official updates, which I have not yet tested) to the main repository.
-
Create a test mirror for all OSes of the new product version:
# ./mirrorctl cfg --add --release=PLESK_12_0_18 --os=all --cfg-file=./test-config
# ./mirrorctl update --path=/var/www/html/test-mirror/ --cfg-file=./test-config
-
Test the new version;
-
Upload the whole product version to the main repository:
# ./mirrorctl push --src-host=/var/www/html/test-mirror/ --path=/var/www/html/mirror/ --cfg-file=./test-config
Warning: If --src-host option is not used, then the new product version
will be uploaded from the official repository and may be different
from the one you have tested.
Example 5: Creating a mirror for testing product releases for new OSes
Goal: create a test mirror with a list of particular OSes for already mirrored product versions with the latest updates, test those OSes and then upload some of the tested OSes to the main repository.
-
Create a test mirror where several OSes will be available for selected product version:
# ./mirrorctl cfg --add --release=PLESK_12_0_18 --os=cos5_i386 --cfg-file=./test-config
# ./mirrorctl cfg --add --release=PLESK_12_0_18 --os=cos5_x86_64--cfg-file=./test-config
# ./mirrorctl update --path=/var/www/html/test-mirror/ --cfg-file=./test-config
-
Get the list of available product releases and OSes from the test mirror created above:
# ./mirrorctl show-all-releases --src-host=/var/www/html/test-mirror/
# ./mirrorctl os-list --release=PLESK_12_0_18 --src-host=/var/www/html/test-mirror/
-
Generate a new configuration file containing only those releases and OSes from the test mirror, which you would like to add to the main mirror:
# ./mirrorctl cfg --add --release=PLESK_12_0_18 --os=cos5_i386 --src-host=/var/www/html/test-mirror/ --cfg-file=push.xml -
Check the created configuration file for the availability of the releases/OSes in the test repository:
# ./mirrorctl cfg --check --src-host=/var/www/html/test-mirror/ --cfg-file=push.xml -
Upload the selected releases and OSes from the test mirror to the main repository:
# ./mirrorctl push --src-host=/var/www/html/test-mirror/ --path=/var/www/html/mirror/ --cfg-file=push.xml
Warning: If --src-host option is not used, then the new product version
will be uploaded from the official repository and may be different
from the one you have tested.
Warning: If the --cfg-file option is not specified, the default
configuration file BUILD/config.xml (relative to the directory
the tool is located in) will be used. I.e. only the versions/OSes
from that configuration file will be uploaded to the main repository.
Warning: If the --cfg-file option is specified incorrectly, the
configuration file specified for the push command will be used.