Installing Plesk on Hetzner
概要: In this topic, you will learn how to create a server in Hetzner (with parameters suitable for Plesk), install Plesk on the server, set it up, and then log in to Plesk for the first time. We will also explain when and why it is a good idea to assign floating IPs.
Step 1. Creating a server in Hetzner
-
Locate the project you want to assign a Plesk server to, and then click CREATE SERVER. If necessary, create a new project.

-
Select a location. If you plan to host small business websites, we recommend choosing the location closest to their geographic location to reduce page load times for local visitors.
注釈: Each location offers different features and products. Before selecting a location, we recommend that you review them. It will not be possible to change the location after creating a server.
-
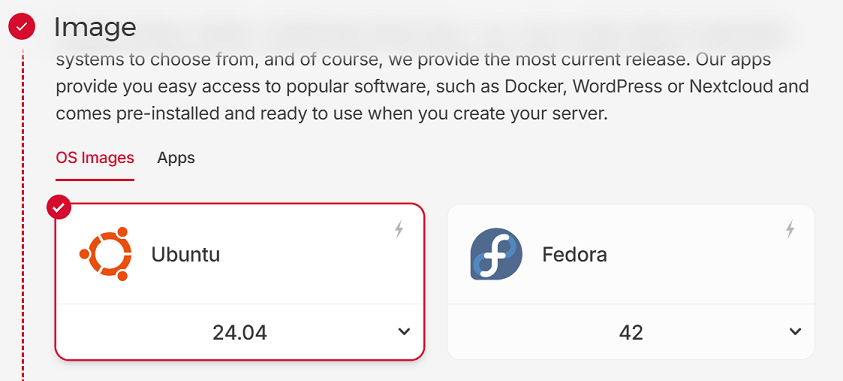
Under "OS Images", select an OS supported by Plesk.
-
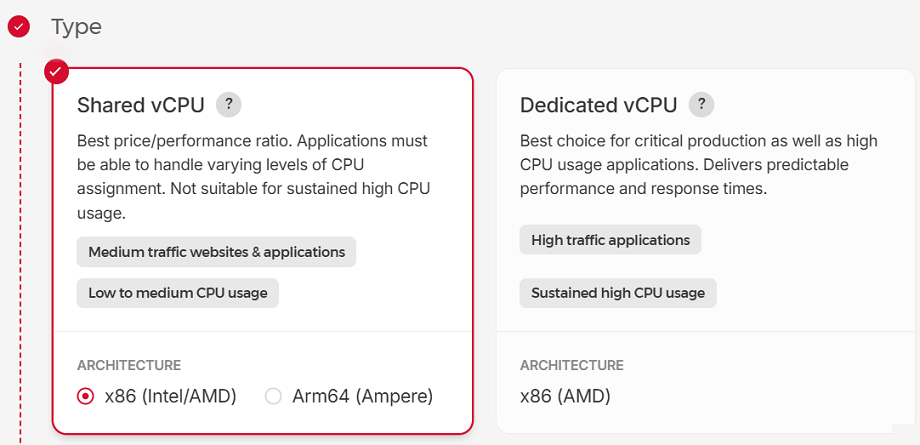
Under "Type", select "Shared vCPU" or "Dedicated vCPU". Plesk supports both server types. Learn how to choose between shared and dedicated types.
-
If you have selected "Shared vCPU" on the previous step, select the architecture: x86 (Intel/AMD) or Arm64 (Ampere).
注釈: To select the Arm64 (Ampere) architecture, you need to choose Ubuntu 22.04, which is currently the only operating system Plesk supports on ARM.
-
Choose a plan paying attention to the number of vCPUs, the amount of RAM, and the SSD capacity included.
-
Under "Networking", keep the "Public IPv4" option selected because it is a required prerequisite for Plesk to function. The other features ("Public IPv6" and "Private networks") are optional. You can select them if necessary.
-
To log in to your server, we recommend using SSH keys instead of the default password-based authentication. SSH keys are more secure than passwords but using them is slightly more complicated.
To set up logging in via SSH keys, click Add SSH key, insert your public SSH key, give it a name, and then click Add SSH key.
-
If the SSD capacity of the plan you have chosen is not sufficient, you can add volumes. There is no need to add a volume now. You can add one later and attach it to the server after it has been created.
-
Plesk has its own built-in firewall, which protects your server at the server level. You can also enable the firewall provided by Hetzner, which serves as a second layer of protection at the cloud level for all Hetzner servers. To enable the Hetzner firewall, click firewall-22tcp-port. Further configuration depends on your setup:
- If you choose to use only the Plesk firewall (without enabling the Hetzner firewall), no additional configuration is needed. The necessary rules are preconfigured by default.
- If you enable the Hetzner firewall, you will need to manually configure it by allowing access to the ports used by Plesk.
-
To enable backups provided by Hetzner, select the "Backups" option. Hetzner backups incur an additional fee, do not include volumes, and are not flexible in terms of selecting which data to back up. Alternatively, Plesk offers its own backups, which have the following benefits:
- Plesk backups include all necessary data, regardless of which disk the data is stored on.
- Plesk backups are more granular: you can choose exactly what to back up — the entire server, specific subscriptions, only databases, only mail messages, and more.
- You can choose where to store your Plesk backups: locally on the Plesk server, on a remote FTP server, or in remote cloud storage services (such as Amazon S3, Google Drive, Microsoft OneDrive, or any other S3-compatible storage).
注釈: If you opt for S3-compatible storage, you can choose one from Hetzner. To store your Plesk backups in Hetzner's S3-compatible storage, you need to create a bucket first.
- Plesk backups are free. You only need to pay in the following cases:
- To store scheduled backups in remote cloud storage services (such as Amazon S3, Google Drive, Microsoft OneDrive, or any other S3-compatible storage). Manual backups to these services are free.
- To buy additional storage if you store backups localy (on the Plesk server) and you are running out of disk space.
-
You can skip the "Placement groups" options because this feature is not applicable to Plesk.
-
To organize and manage resources (for example servers and volumes), you can add labels.
-
To execute scripts during server creation, you can add a cloud-init configuration.
-
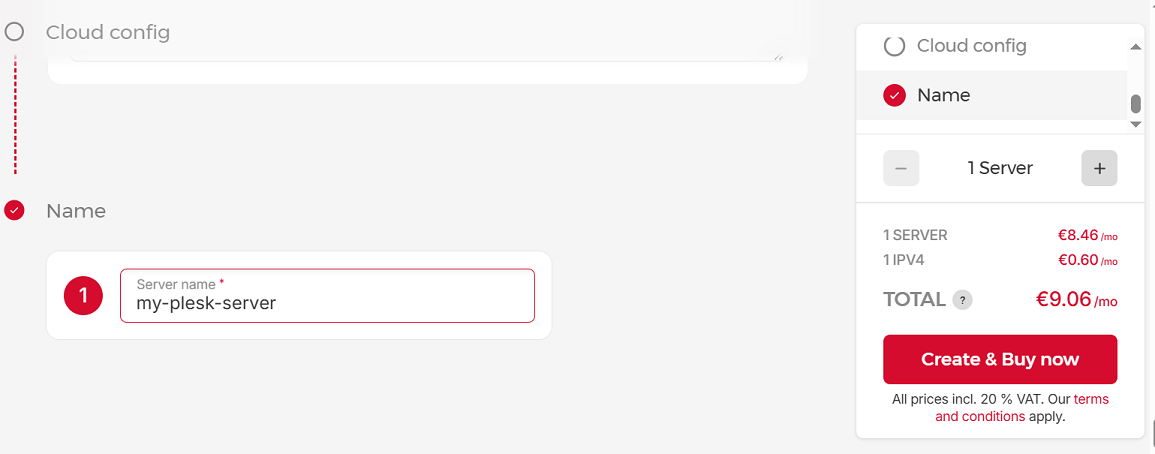
Give your server a recognizable name, and then click Create & Buy now.

Your server is being deployed. Once the deployment is finished, you can install Plesk on the server.
Step 2. Logging in to the server and installing Plesk
-
Find the server IP address you need to connect to. You can see it in the email sent by Hetzner after the server was created or in Server in the left menu bar.
-
Access the server command line via SSH using one of the following:
- The login and password provided in the email from Hetzner.
注釈: After the first login, you will be required to change your password.
- The SSH key you added when creating the server.
注釈: To access the server command line via SSH, you can use an SSH client (such as, PuTTY, iTerm2, or Terminal) or the Hetzner console.
-
以下のコマンドを実行します。
sh <(curl https://autoinstall.plesk.com/one-click-installer || wget -O - https://autoinstall.plesk.com/one-click-installer)
This will download and run the Plesk Installer on your server. The installation takes, on average, around 15 minutes. Once the installation is complete, you will see the following message followed by two login links. You will use them on the next step.

Step 3. Setting up Plesk and logging in
-
Browse the first login link shown in the success message from the Plesk Installer, for example:
https://lucid-hugle.192-0-2-1.plesk.page/login?secret==wJTcwiSAUd9CrJpZbLvmtdG8QGA8-Fb-sUXO6zkjsgVqMcrr.注釈: If the first link with the hostname does not work for any reason, open the second link with the IP address (for example, https://192.0.2.1/login?secret=hlHH450sx%2FAlSJHj1VWJC2qKxK6gqVxtsMkYG6bf6wc%3D). In this case, you will see the "Your connection is not private" warning in your browser. Ignore the warning and proceed. It is safe to do so because the connection to your Plesk server is actually secure and encrypted with a self-signed SSL/TLS certificate.
注釈: If your login links have expired or are not usable for any other reason, you can always generate new one-time login links by running the following command:
sudo plesk login. -
You will be redirected to the Plesk welcome screen. Provide your contact name and email and set an administrator password.
注釈: Next time you log in to Plesk, use that password and the
adminusername. -
(Optional) If you are setting up Plesk for a third-party administrator and want them to change the administrator's password on the next login, select the "Reset admin's password on the next login" checkbox. For example, you can do it for security purposes.
-
ライセンスを選択する:
- If you have already purchased a Plesk license, paste the activation code you received in the "Proceed with a paid license" field. If not, you can buy a license in Plesk Online Store. You will then receive an email with your activation code.
- Before purchasing a paid license, you can evaluate Plesk for 14 days and try it out with up to 3 domains. To do so, choose the "Proceed with a full-featured trial license" option.
-
エンドユーザライセンス契約(EULA)を読み、チェックボックスをオンにして確定し、[Plesk にログイン]をクリックします。

After a short set up, you will be logged in to Plesk. Congratulations! Your journey of installing Plesk on Hetzner is complete. You can now get started by creating your first website.
注釈: We also recommend assigning a floating IP address to your server, as described in the section below.
フローティング IP アドレスを割り当てる
Public IPv4 and IPv6 addresses from Hetzner are static. You can reboot your server, switch it on and off, or rebuild it — the static IP address is lost only if you destroy the server. Those IP addresses are enough for staging websites or for trying Plesk.
However, for hosting production websites, we recommend that you assign a floating IP address to your server and back it up. Unlike static IP addresses, floating IPs can be moved between servers. Additionally, you can assign a floating IP to a server in one location and later reassign it to another server in a different location in the same network zone.
If your server breaks down or if you accidentally destroy it, your website will be unavailable until you fix the server or create a new one. The easiest way to avoid downtime is to move the floating IP to the backup server. This will immediately bring your website back up with no need to change DNS settings.
注釈: When you assign a floating IP address, make sure to do so on a permanent basis. Hetzner also supports assigning floating IP addresses temporarily. This configuration is not suitable for web hosting because it does not persist after a server reboot.