Using Additional Administrator Accounts
Содержание
The default administrator account has a wide range of privileges in Plesk. The person using it can manage both the server and the hosted websites. If more than one person is managing the server, for security reasons, we strongly recommend that an individual additional administrator account is created for each such person.
In this topic, you will learn how to create, suspend, activate, and remove additional administrator accounts.
Общие сведения об обновлениях
Depending on the circumstances, you may want multiple people to be able to access Plesk to manage the server and the hosted websites. If this is the case, we strongly recommend that you create individual additional administrator accounts for each staff member or contractor that needs access to Plesk.
An additional administrator account has its own login and password. It can be either restricted or unrestricted, which determines the following:
The level of access to the server the additional administrator account has.
The scope of tasks the person using one can do in Plesk.
Осторожно
An unrestricted additional administrator account effectively has the same level of privileges and access to the server as the default administrator account. Do not give access to an unrestricted additional administrator account to anyone you would not trust with the default administrator account.
The actions of all additional administrator accounts are written to the Action Log. However, unrestricted additional administrator accounts are able to make changes to the log. Thus, only the actions of restricted additional administrator accounts can be reliably tracked this way.
Creating Additional Administrator Accounts
To create an additional administrator account:
Go to Tools & Settings > Additional Administrator Accounts (under «Security»).
Click Add Administrator Account.
Set the account’s login and password.
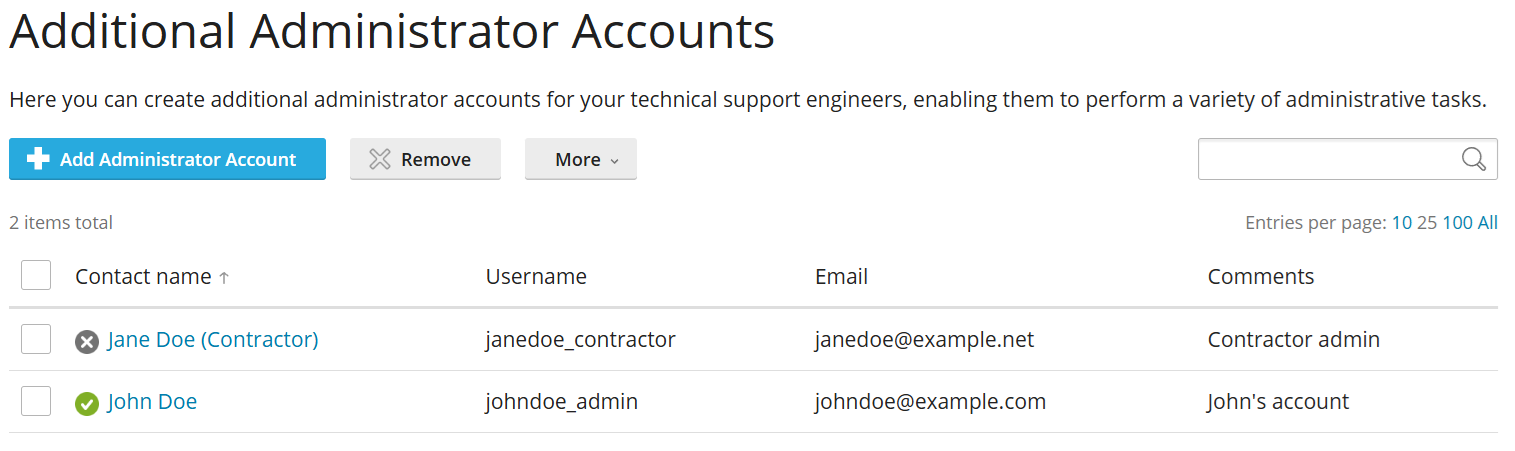
Enter the email address and the name of the account’s owner. You can also add a comment to better differentiate between additional administrator accounts, or to add the context for the account’s creation.
(Optional) Select the «Activate account by email» checkbox to make it so that the account is created in the «suspended» state. To activate the account and be able to log in to Plesk, its owner will need to click a link in the email that would be sent to the email address specified during the previous step. The account can also be activated manually.
-
(Optional, recommended) Select the «Enable Restricted Mode» checkbox to restrict the account. Doing so will limit what actions the account’s owner can take in Plesk, but also reduce the potential damage an unauthorized user would be able to cause if the account is compromised. The specifics of what a restricted account can or cannot do are governed by the Restricted Mode settings currently in effect.
Осторожно
For maximum security, and to make sure that additional administrators do not have the ability to remove the restrictions from their accounts, we strongly recommend that you perform the steps from the isolating restricted additional administrator accounts section.
Примечание
The Restricted Mode settings are applied to all restricted accounts. There is not a way to customize Restricted Mode settings on a per account basis.
(Optional) Select the «Force Power User view for additional administrator» checkbox to restrict the account to Power User view. The account’s owner will only be able to see and manage the websites owned by the administrator accounts (both the default administrator and any other additional administrators).
Click OK to create the account.
The additional administrator account is created. Unless the «Activate account by email» checkbox was selected, the account’s owner can now log in to Plesk.
Suspending and Activating Additional Administrator Accounts
An additional administrator account can be suspended at any time. Anyone trying to log in to Plesk under a suspended additional administrator account would see the «Your account is inactive» message instead.
To suspend one or more additional administrator accounts:
Go to Tools & Settings > Additional Administrator Accounts (under «Security»).
Select the desired account(s), click More, and then click Suspend.
The additional administrator accounts are now suspended. Logging in to Plesk under any of those accounts is not possible.
A suspended additional administrator account can be activated at any time, restoring it to full function.
To activate one or more suspended additional administrator accounts:
Go to Tools & Settings > Additional Administrator Accounts (under «Security»).
Select the desired account(s), click More, and then click Activate.
The additional administrator accounts are now active and can be used to log in to Plesk.
Removing Additional Administrator Accounts
An additional administrator account can be removed at any time.
To remove one or more additional administrator accounts:
Go to Tools & Settings > Additional Administrator Accounts (under «Security»).
Select the desired account(s), click Remove, and then confirm the removal.
The additional administrator accounts are now removed.
Isolating Restricted Additional Administrator Accounts
To ensure that a user logged in under a restricted additional administrator account cannot elevate their privileges, a number of additional steps must be taken. These steps need to only be taken once, and once that is done, all restricted additional administrator accounts, both existing and those created afterwards, are isolated.
To isolate restricted additional administrator accounts:
-
Добавьте следующие строки в файл panel.ini:
[extensions]
blacklist = "panel-ini-editor","diskspace-usage-viewer"
Go to Extensions > the «My Extensions» tab and make sure that the «Panel.ini Editor» and «Diskspace Usage Viewer» extensions are not installed. If any of these extensions are installed, remove them.
Make sure that no extensions from sources other than the Extensions Catalog are installed. If any such extensions are installed, remove them.
-
Go to Tools & Settings > Restricted Mode Settings (under the «Plesk» section), and then make sure that the following checkboxes are not selected. If any of these checkboxes are selected, clear them:
«Scheduled tasks», «Event Manager», «SSH Terminal», «Locales manager», and «Backup manager»(under «Tools & Resources»).
«Update policy» and «Ability to use remote API» (under «Plesk»).
Нажмите OK.
All restricted additional administrator accounts are now isolated. No user logged in under a restricted additional administrator account would be able to elevate their privileges.