Customizing Error Pages
概要: When a website visitor requests a page that the web server cannot serve, whatever the reason (the page is missing, the visitor does not have the permission to view the page, the web server is experiencing issues, and so on), an error page with an explanation and a standard HTTP error code is shown instead.
Plesk comes with a set of default error pages for all common HTTP errors. Error pages can also be customized on a per-website basis (Plesk for Linux), or on a per-virtual directory basis (Plesk for Windows). In Plesk for Windows, it is also possible to replace error pages with redirects.
In this topic, you will learn how to customize a website’s error pages in Plesk.
概要
Customizing the error pages for a website involves two steps:
- Enabling custom error pages for the website.
- Changing the default error page files, or uploading entirely custom ones written in HTML/CSS, together with the required assets.
Customizing Error Pages
First, you need to enable custom error pages support for the desired website.
To enable custom error pages for a website:
- 登录到 Plesk。
- Go to Websites & Domains, and then locate the required domain.
- Go to the “Hosting & DNS” tab, and then click Hosting.
- Select the “Custom error documents” checkbox, and then click Save.
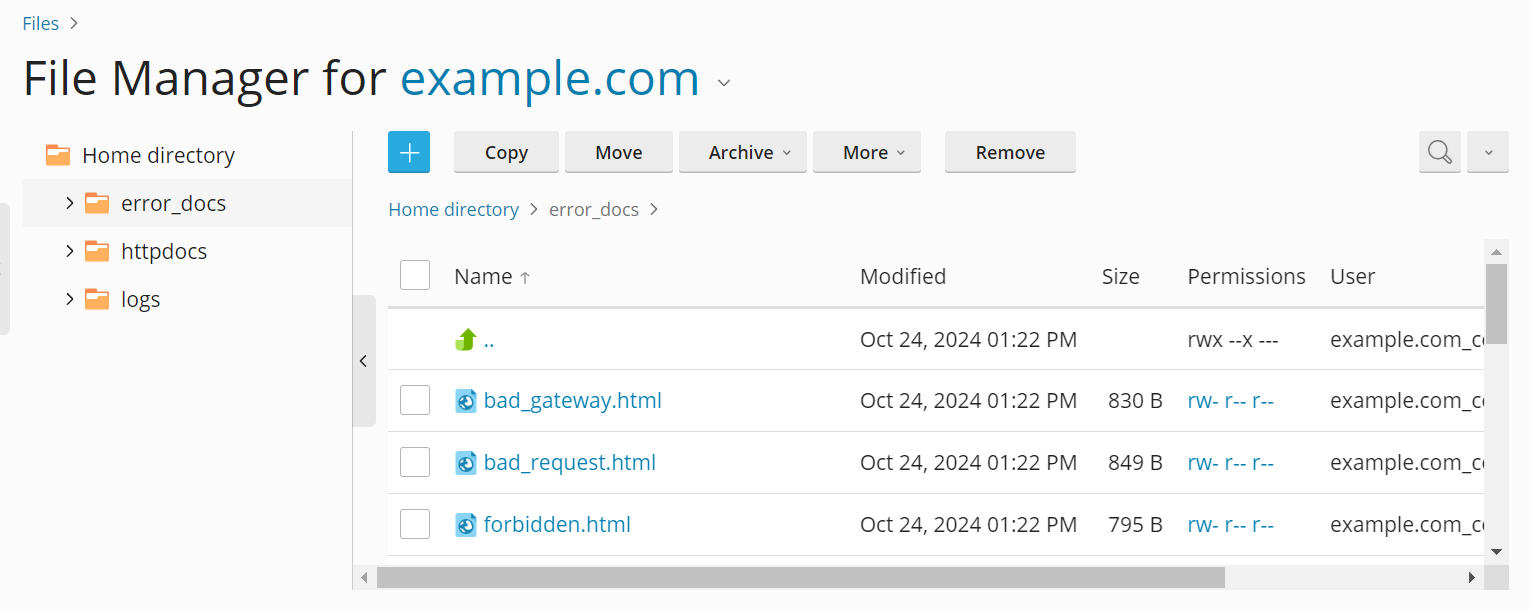
Now, instead of the default error pages, custom error pages will be served for the website. The custom error pages’ files can be found in the error_docs directory inside the website’s Home directory.
By default, the custom error pages’ files are copies of the default error pages’ files. To customize a website’s error pages, either the custom error page files need to be edited, or entirely custom ones need to be uploaded. If you cannot write HTML/CSS code, Plesk File Manager comes with a WYSIWYG HTML editor that can be used to make simple customizations.
注解: (Plesk for Linux) When uploading custom error pages’ files to the server, make sure not to change the file names. For example, if you rename the not_found.html file to not-found.html, the custom error page will not be shown when a website visitor encounters the 404 NOT FOUND error.
注解: (Plesk for Windows) For security reasons, you cannot upload files to the error_docs directory via FTP or File Manager. Use an RDP connection instead, or contact your hosting provider for assistance.
If you remove or rename one or more custom error pages’ files in the error_docs directory, the default error pages will be shown to website visitors encountering the corresponding errors.
To disable custom error pages for a website:
- 登录到 Plesk。
- Go to Websites & Domains, and then locate the required domain.
- Go to the “Hosting & DNS” tab, and then click Hosting.
- Clear the “Custom error documents” checkbox, and then click Save.
Now, the default error pages will be served for the website.
注解: Disabling custom error pages does not remove or alter the custom error pages’ files in the error_docs directory. If custom error pages are once again enabled for the website, any and all customizations made to the custom error pages’ files will once again take effect.
(Plesk for Windows) Customizing Error Pages’ Source
In Plesk for Windows, you can specify any file inside the website’s error_docs directory as the source for an error page. You can also set an URL of a web page (whether hosted on the Plesk server or not) as the source for an error page instead of a file. When you do, website visitors encountering a specific error will be automatically redirected to the specified page.
Another difference compared to Plesk for Linux is that in Plesk for Windows, you can configure error pages on a per-virtual directory basis, not just for the website as a whole. Thus, it is possible to make it so that visitors encountering the same error would see a different error page depending on the specific page they requested.
If you only customize the error page sources for the / virtual directory (which corresponds to the website’s document root, the httpdocs physical directory) without customizing the error page sources for any other virtual directories, they will be used for the entire website.
To customize the source for an error page for a virtual directory:
-
Go to Websites & Domains, and then locate the required domain.
-
Click Virtual Directories, and then navigate to the desired virtual directory, if necessary.
-
Go to the “Error Documents” tab, and then click the
icon corresponding to the error whose source you want to customize.
-
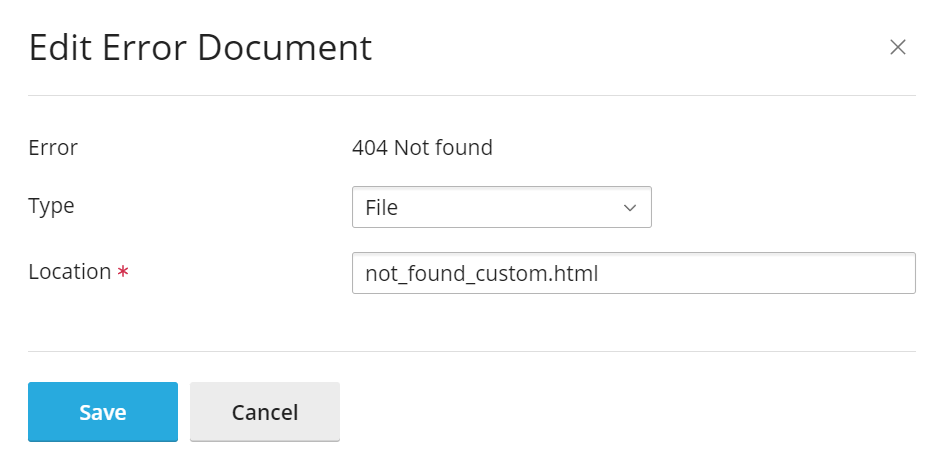
Select “File” under “Type”.
-
Specify the name of the error page file under “Location” (the file must exist in the
error_docsdirectory), and then click Save.
Now, instead of the default error page, website visitors encountering that error will see a custom error page.
To replace the error page for a virtual directory with a redirect:
-
Go to Websites & Domains, and then locate the required domain.
-
Click Virtual Directories, and then navigate to the desired virtual directory, if necessary.
-
Go to the “Error Documents” tab, and then click the
icon corresponding to the error whose error page you want to replace with a redirect.
-
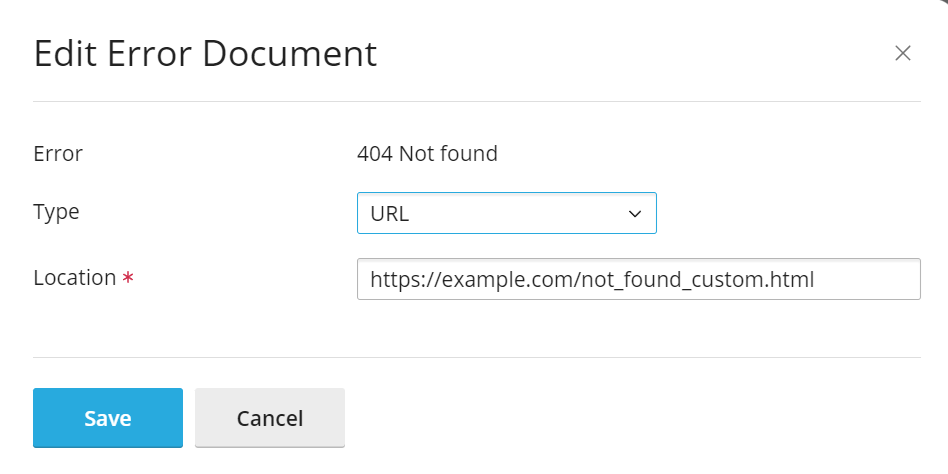
Select “URL” under “Type”.
-
Specify the desired URL under “Location” (the URL may point to a page not hosted on the Plesk server, for example,
https://google.com), and then click Save.
Now, instead of seeing an error page, website visitors encountering that error will be redirected to the specified URL.

 icon corresponding to the error whose source you want to customize.
