Installing Plesk on Google Cloud
Provided Product Configurations
The following Plesk configurations are available on Google Cloud.
| Plesk | Installed components |
|---|---|
| Plesk Onyx on CentOS 7 (WebHost) | Recommended set* (Plesk Backup Manager, Watchdog, Server Health Monitor, Webalizer, and Horde are not installed by default but can be installed later). |
| Plesk Onyx on Ubuntu 16.04 (WebHost) | Recommended set* (Plesk Backup Manager, Watchdog, Server Health Monitor, Webalizer, and Horde are not installed by default but can be installed later). |
| Plesk Onyx on Windows 2012 R2 (WebHost) | Recommended set* (Webalizer and Server Health Monitor are not installed by default but can be installed later). |
| Plesk Onyx on CentOS 7 (BYOL) | Recommended set* (Plesk Backup Manager, Watchdog, Server Health Monitor, Horde, Webalizer, WordPress Toolkit, Advisor, Let’s Encrypt, Git, the resctrl utility, and Docker are not installed by default but can be installed later). |
| Plesk Onyx on Ubuntu 16.04 (BYOL) | Recommended set* (Plesk Backup Manager, Watchdog, Server Health Monitor, Horde, Webalizer, WordPress Toolkit, Advisor, Let’s Encrypt, Git, the resctrl utility, and Docker are not installed by default but can be installed later). |
| Plesk Onyx on Windows 2012 R2 (BYOL) | Recommended set* (Webalizer, Server Health Monitor, Plesk Migration Manager, WordPress Toolkit, Let’s Encrypt, Git, and Docker are not installed by default but can be installed later). |
| Plesk WordPress Edition | Recommended set* (Fail2Ban, ModSecurity, WordPress Toolkit, Advisor, Let’s Encrypt) |
| Plesk Business & Collaboration Edition | Recommended set* (Fail2Ban,d, ModSecurity, WordPress Toolkit, Advisor, Let’s Encrypt) |
Note: *The Recommended components set includes all components necessary for web hosting (a web server, a mail server, a database server, and so on), plus the most popular and widely used features. If you are not sure which image to choose (Plesk WebHost or BYOL), see the topic Choosing Between Plesk WebHost and BYOL.
Installing Plesk on Google Cloud
-
Go to Google Cloud Platform Console > Cloud Launcher.
-
Type in
pleskin the search field and click the image you want to deploy. If you are not sure which image to choose, see the topic Choosing Between Plesk WebHost and BYOL. -
Click LAUNCH ON COMPUTE ENGINE.
-
In the “Deployment name” field, type in the desired VM instance name.
-
Select Zone. If you plan to host small business websites, we recommend choosing the zone closest to their geographic location to reduce page load times for local visitors.
-
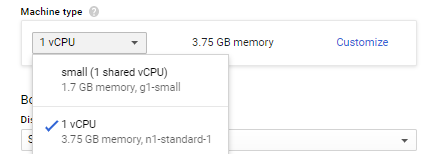
Select the machine type.
When choosing a machine type that Plesk can be deployed on, pay close attention to the amount of RAM it comes with. The more websites you intend to host, and the more traffic the hosted websites generate, the more RAM you will need. Refer to Plesk System Requirements to estimate the amount of RAM your setup will require.
If you want to try out Plesk on Google Cloud, you can choose the minimum possible machine type small (1 shared vCPU), whose resources are sufficient for testing purposes.
For web hosting, if you are not sure which machine type to choose, we recommend starting with the default 1 vCPU and upgrading it later, if necessary.

If later you find that the existing machine type is not suitable for your websites load and quantity, you can change your machine type to one with more resources.
-
For hosting production websites, we recommend keeping SSD Persistent Disk under “Disk type”. For testing purposes, you can select Standard Persistent Disk.
-
Under “Disk size in GB”, specify the amount of disk required for your website. This value highly depends on the website type, popularity, and other factors. You can add or resize the disk space later, after the VM has been deployed. However, we recommend estimating this value as precisely as possible before the VM is deployed.
-
We recommend keeping all the selected checkboxes under “Firewall” because they are Plesk default settings.
-
Click Deploy.
Your instance is now up and running.
To begin using Plesk, you need to perform a short post-install configuration.
Post-install Configuration on a Google Cloud Instance
Whenever a new Google Cloud instance is deployed, it is automatically assigned a so-called ephemeral external IP address, which changes every time the instance is restarted. However, for web hosting a static external IP address is required. To assign it to your instance, promote an ephemeral external IP address to a static one.
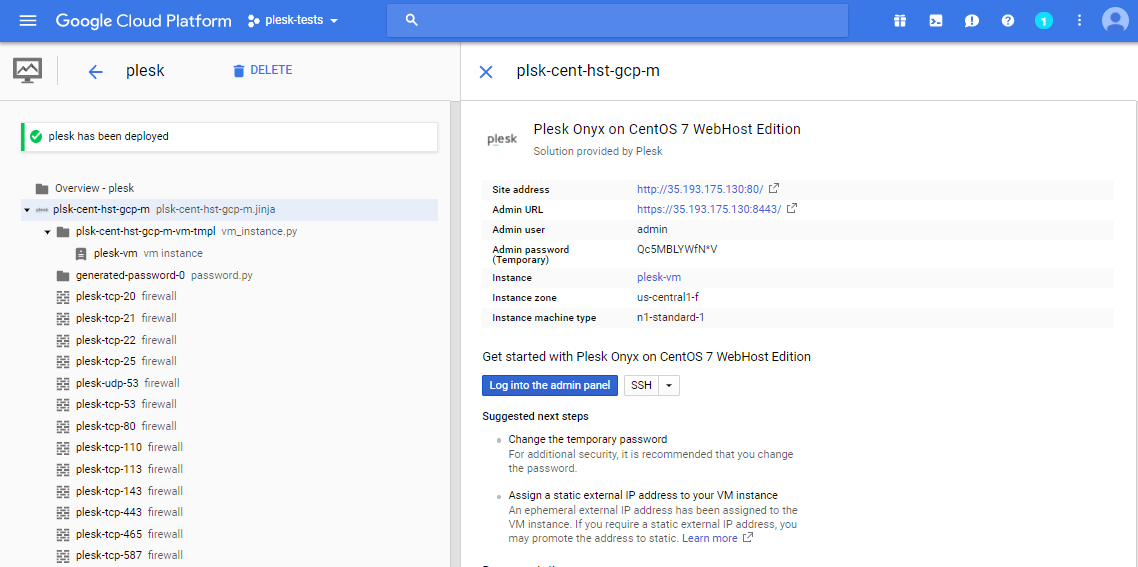
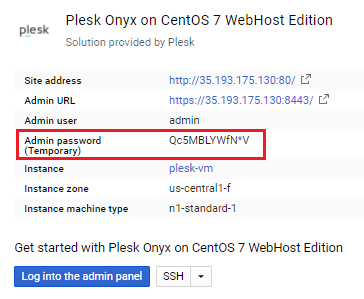
When Plesk is installed on a Google Cloud instance, a temporary administrator password is generated and displayed.
To log in to Plesk:
- Click the Log into the admin panel button.
- Log in to Plesk using the password displayed under “Admin password (Temporary)”.
When you access Plesk for the first time, you are asked to provide the following information:
- Full hostname
By default, Google Cloud generates and assigns a hostname to the instance once you have started it. However, some spam filters (including the default Plesk greylisting) treat mail sent from servers with such hostnames as spam. We recommend using your registered domain name as the server hostname.
- Default IP address
The internal IP address is detected automatically. If you want to host different customers on your Plesk server, set the IP address as shared.
Note: Never register your instance’s external IP address in Plesk. Only the internal IP address must be registered.
For detailed instructions on the Plesk post-install configuration, see Post-install Configuration on a Single Server.
Configuring Email Sending
By default, Google Compute Engine VM blocks 25, 465, and 587 SMTP ports and does not allow outbound connections on them. Your instances can still receive emails, while sending emails from blocked ports is not allowed.
To configure email sending, we recommend one of the following solutions:
-
Use one of Compute Engine’s third-party partners (SendGrid, Mailgun, and Mailjet) to set up and send emails through their servers.
-
Use a Google Apps account to set up a relay service to send emails through Google Apps.
Note: Port 25 is always blocked and cannot be used, even through SMTP relay using Google Apps.
Read more about sending emails from a Google Compute Engine VM.
Multiple Network Interfaces
Every VM instance has a single default network interface. You can add additional network interfaces, however this is a Beta release and it is not covered by any SLA or deprecation policy and may be subject to backward-incompatible changes. Additionally, the use of multiple network interfaces involves certain requirements and limitations.