Attaching a Plesk Server to Multi Server as a Service Node
At this first stage, a Plesk server is connected to the Multi Server, and the system requirements are checked.
-
Log in to the Multi Server management node.
-
Click Nodes to access the service nodes’ management interface. There, click Add Node.

-
Type in the Plesk server IP address and administrator’s password, select the initial node status. Click OK.
Note: Choosing the initial status of the service node (Activeor Disabled) will matter only if the Plesk server contains no accounts or subscriptions. If it does, the node will be added with the status Attached.
-
Here, the system may inform you that there is one or more issues that prevent connecting the new service node, such as:
- Existing reseller accounts,
- One or more necessary components are not installed either at the attached node or at the management node,
- Certain extensions are installed that should not be there.
See the Troubleshooting section below for instructions on how to resolve such issues.
-
Choose the way the new service node will be addressed: by its IP address or its host name. Click OK to complete adding the new service node.
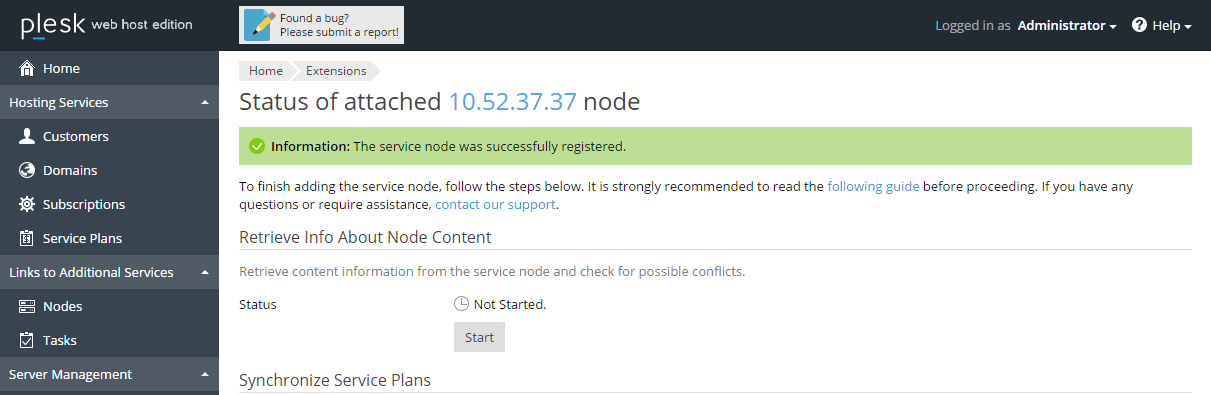
You will be taken to the window Status of attached node.
At this time, the new service node has the status Attached. This means that the data and the configuration from the Plesk server must by synchronized with the Multi Server before the new service node becomes fully integrated and operational. The following section explains how to do that.
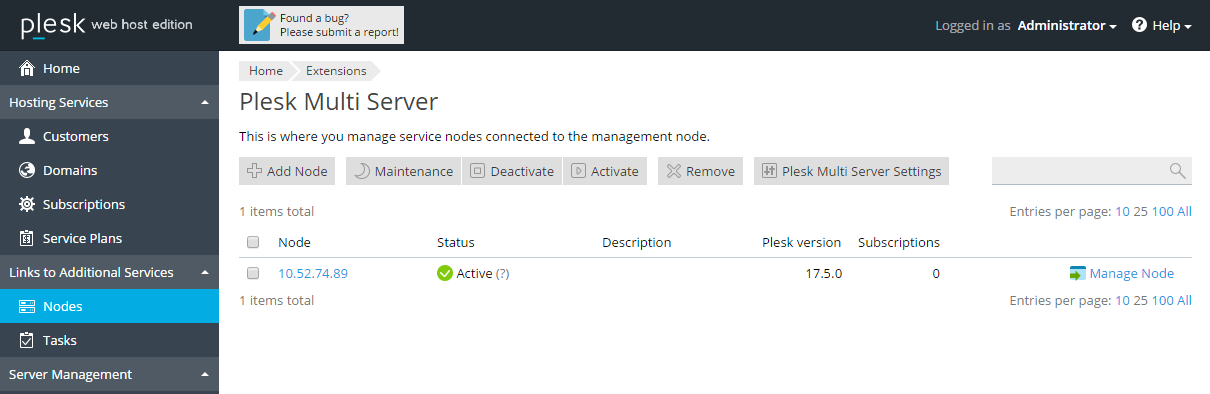
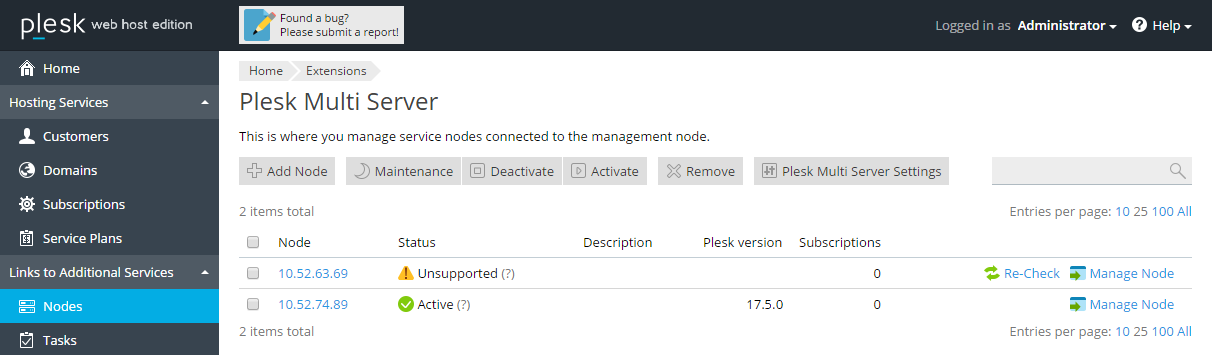
In case the Plesk server contained no accounts or subscriptions, the new service node can skip the Attachedstage, and go directly into one of the following statuses:
- Activeor Disabled– if the Plesk Multi Server add-on license is installed on the node. In this case, the process of adding a Plesk server to Multi Server is complete, and no further steps are necessary.
- Unsupported – if the Plesk Multi Server add-on license is not installed. In this case, click Manage Node, install the add-on license key, then click Re-check.
For more information on the meaning of the service nodes’ different statuses, see Service Node Statuses Reference.