FTP アカウントを追加する
概要: 自社のウェブサイトで他のユーザと共同作業したり、他のユーザにサブドメインをホスティングする場合、他のユーザのために個別の FTP アカウントを作成すると便利です。
このトピックでは、追加の FTP アカウントを追加および削除する方法と、そのプロパティを変更する方法について説明します。
追加の FTP アカウントを作成するには:
-
[ウェブサイトとドメイン] に移動し、関連するドメインを見つけて [FTP] ([ファイルとデータベース] の下) をクリックします。
-
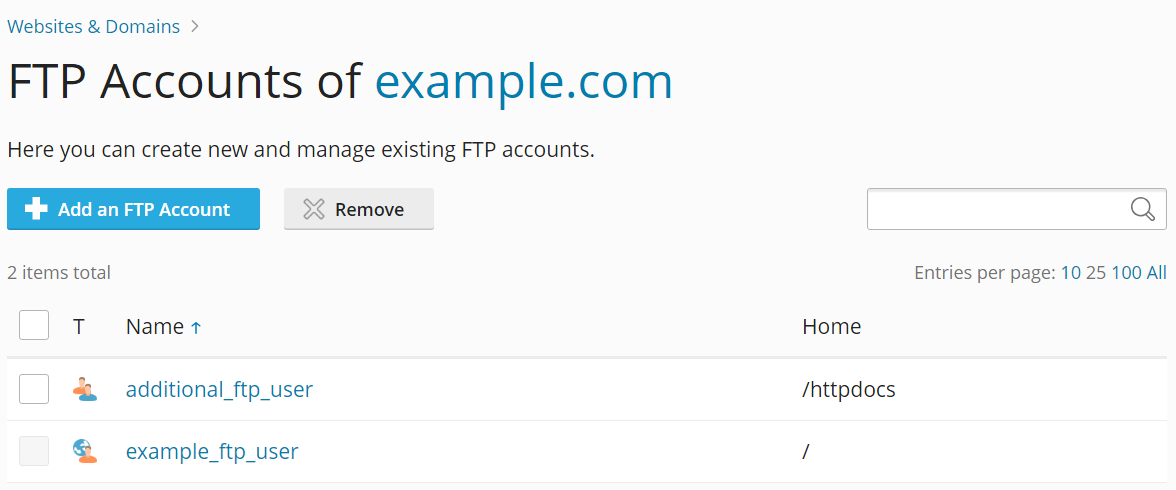
[FTP アカウントを追加]をクリックします。
-
以下を指定します。
-
FTP アカウント名: 必要な名前を入力します。
-
ホームディレクトリ: ユーザが FTP アカウントに接続すると表示されるディレクトリを選択します。
-
パスワード.
-
(Plesk for Windows) ハードディスククォータ: サーバ上で FTP ユーザーが占有できるディスク容量を制限するには、[ハードディスククォータ] ボックスの横の [無制限] チェックボックスをオフにして、ディスク容量をメガバイトで入力します。
-
(Plesk for Windows) 読み取りパーミッション: ホームディレクトリのコンテンツを参照し、そこからファイルをダウンロードする権限を FTP ユーザーに与えるには、[読み取りパーミッション] チェックボックスをオンにします。
-
(Plesk for Windows) 書き込みパーミッション: ホームディレクトリでディレクトリの作成、表示、名前変更、削除を行う権限を FTP ユーザーに与えるには、[書き込みパーミッション] チェックボックスをオンにします。
Windows ホスティングでは、パーミッションを付与しないと、FTP アカウントへの接続が確立されても、ユーザにホームディレクトリのコンテンツが表示されません。
-
-
[OK]をクリックします。

追加 FTP アカウントのプロパティを変更するには:
- Plesk にログインします。
- [ウェブサイトとドメイン] に移動し、関連するドメインを見つけて [FTP] ([ファイルとデータベース] の下) をクリックします。
- 一覧から必要なアカウント名をクリックします。
- 必要な変更を行い、[OK]をクリックします。
追加 FTP アカウントを削除するには:
- Plesk にログインします。
- [ウェブサイトとドメイン] に移動し、関連するドメインを見つけて [FTP] ([ファイルとデータベース] の下) をクリックします。
- 削除する FTP アカウントのチェックボックスをオンにして、[削除]をクリックします。契約のメイン FTP アカウントは削除できません。
- [はい、削除します] をクリックします。