Event Handlers
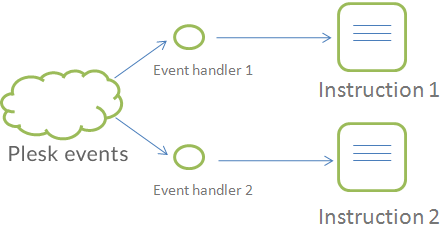
Event handlers are designed to help you receive notifications about Plesk events. The most typical way to use them is as follows: you create a script to be executed upon a certain Plesk event, and then you associate the event and your script using an event handler. Each time the event happens, the event handler will trigger your script.
The instruction to run is not necessarily a script. You can also associate event handlers with a system command or a binary file. In addition, there are two facts to consider before you start using event handlers:
-
Event handlers trigger instructions on behalf of the Plesk administrator.
-
Event handlers have information about a related Plesk object “before” and “after” an event.
When an event occurs, event handlers receive the event details, and you can use these details in your instructions. For example, you can obtain the IP address which was added by the “adding an IP address” event. The event details are passed to your instructions as environment variables.
Note: We strongly recommend that you enter a full path to a script file as
a command to event handlers. Although you can assign direct system
commands, they might not work. Say, commands with output redirection
operators >, <, >>, or | will not work.
Running scripts via event handlers
For example, let’s store the names of new customers on the file system. To do this, first we should find the environment variable that contains the contact name. This variable is listed in the Administrator’s Guide , Appendix > Customer account created.
As you can see, the variable name is NEW_CONTACT_NAME. Now we need to create an event handler.
To create the event handler on Linux:
- Create a shell script (for example,
write-names.sh) containing the following code:
#!/bin/bash
echo "Customer account has been created. Name: ${NEW_CONTACT_NAME}" >> /tmp/event_handler.log
- Log in to Plesk, go to the Tools & Settings tab > Event Manager.
- Click Add New Event Handler and specify the following:
- Event. Select Customer Account Created from the menu.
- Priority. Leave set to lowest (0).
- User. Leave set to root.
-
Command. Specify the path to the shell script created during
step one (for example,
/tmp/write-names.sh).
- Click OK.
To create the event handler on Windows:
- Create a batch file (for example,
write-names.bat) containing the following code:
echo "Customer account has been created. Name: %1" >> C:\Windows\Temp\event_handler.log
- Log in to Plesk, go to the Tools & Settings tab > Event Manager.
- Click Add New Event Handler and specify the following:
- Event. Select Customer Account Created from the menu.
- Priority. Leave set to lowest (0).
- User. Leave set to Plesk Administrator.
-
Command. Specify the path to the shell script created during
step one (for example,
C:\Windows\Temp\write-names.bat) and specify the variable name (as we discovered above, it is new_contact_name) in angle brackets. The result should look like this:
C:\Windows\Temp\write-names.bat <new_contact_name>
- Click OK.
The event handler will be triggered every time a new customer account is created, and will write the customer’s contact name to the specified file.
For more details on event handlers, refer to the Administrator’s Guide, the chapter Event Tracking. This chapter provides instructions on how to create event handlers and describes environment variables related to each Plesk event.