Localizing Plesk
summary: In this topic, you will learn how to translate the Plesk interface into your language.
Overview
Plesk is available in over 30 languages. In this topic, you will see examples showing how to translate Plesk into Esperanto, but you can use the same steps to translate Plesk into any language.
The procedure includes the following steps:
- Exporting the English (en-US) locale files and preparing them for translation.
- Translating UI messages into the target language.
- Importing the resulting locale files into Plesk and registering the new locale in Plesk.
Preparing the Locale Files for Translation
Before you can start translating, you need to export and prepare the locale files.
Preparing the locale files
-
Log in to the server via SSH or RDP.
-
Copy the contents of the following directories (including subdirectories) to a separate location:
- Plesk for Linux
/usr/local/psa/admin/application/admin/resources/languages/en-US//usr/local/psa/admin/application/default/resources/languages/en-US//usr/local/psa/admin/plib/locales/en-US//usr/local/psa/admin/application/smb/resources/languages/en-US/
- Plesk for Windows
%plesk_dir%admin\application\admin\resources\languages\en-US%plesk_dir%admin\application\default\resources\languages\en-US%plesk_dir%admin\plib\locales\en-US\%plesk_dir%admin\application\smb\resources\languages\en-US
The files in these directories contain all Plesk user interface text.
Note: The file
common_cli_messages_en-US.phpcontains only text used by the Plesk command line utilities. Unless you have a specific reason to translate this text, the contents of the file can be left untranslated. - Plesk for Linux
-
Rename the directories and files to match the target language. The names of the English locale files and directories they are in include
en-US. Here is what it means:- The
enpart is mandatory. It is the two letter ISO 639-1 code indicating the language (English). - The
USpart is optional. It is the two letter ISO 3166-1 code indicating the country where a specific dialect is spoken. It is used to tell apart locales for different dialects of the same language, for example, Portuguese (Portugal) and Portuguese (Brazil).
In our example, the Esperanto language code is “eo”, and the language has no country-specific dialects. Thus, we replace every instance of
en-USin directory and file names witheo, like this:/usr/local/psa/admin/plib/locales/en-US/messages_en-US.phpbecomes
/usr/local/psa/admin/plib/locales/eo/messages_eo.phpand so on. Further is this topic, we will call it the “target language code”.
- The
-
Edit the following file:
- (Plesk for Linux)
/usr/local/psa/admin/plib/locales/<target language code>/messages_<target language code>.php - (Plesk for Windows)
%plesk_dir%admin\plib\locales\<target language code>\messages_<target language code>.php
Replace all entries of
en-USwith your target language code. So, in our example, we edit the lineinclude(__DIR__ . '/common_messages_en-US.php');so that it looks like this:
include(__DIR__ . '/common_messages_eo.php');and so on.
- (Plesk for Linux)
-
Edit the following file:
- (Plesk for Linux)
/usr/local/psa/admin/plib/locales/<target language code>/meta.xml - (Plesk for Windows)
%plesk_dir%admin\plib\locales\<target language code>\meta.xml
Here, you declare the properties of the locale that will be shown in the Plesk interface:
-
<language>English</language>Here you need to specify the name of the target language as it will be shown in Plesk. - (Optional)
<country>United States</country>Here you can specify the country in which the specific dialect of the target language is spoken. It will be shown in Plesk. You can omit this parameter if it is not necessary. - (Optional)
<rtl>true</rtl>Specify this parameter if the target language uses a right-to-left script. Omit it otherwise.
Esperanto has no country-specific dialects and does not use a a right-to-left script. So, in our example, the file’s contents will look like this:
<?xml version="1.0" encoding="utf-8"?>
<!-- Copyright 1999-2022. Plesk International GmbH. All rights reserved. -->
<locale>
  <language>Esperanto</language>
</locale>
- (Plesk for Linux)
The locale files are now ready to be translated.
Translating the Locale Files
Now that the locale files have been exported and prepared, you can start translating them.
Note: The locale files provided by Plesk use the UTF-8 encoding. Do not change the encoding, otherwise, the translated messages may not be shown correctly in the Plesk interface.
Plesk locale files are PHP files containing localization key identifiers paired to human readable messages, like this:
'admin-alias.passwordConfirmation' => 'Confirm password',
To translate Plesk, you need to translate the human readable messages into the target language. So, in our example, the translated line will look like this:
'admin-alias.passwordConfirmation' => 'Konfirmu pasvorton',
Note: Do not translate the localization keys, or change them in any other way. Otherwise, the translated messages will not be shown correctly in the Plesk interface.
When translating, keep in mind the following guidelines to make sure that the resulting locale can be imported in Plesk with no issue.
-
Do not remove commas at the end of each string. Otherwise, trying to switch to the translated locale in Plesk will result in an error.
-
If the message text does not contain any quotation marks, enclose the text with either single or double quotes.
-
If the message text contains one or more single quote or apostrophe characters, either precede each one with a backslash or enclose the message (but not the localization key) in double quotes, like this:
'b_add_ip_for_clients' => 'Add IP address to client\'s pools.',or like this:
'b_add_ip_for_clients' => "Add IP address to client's pools.", -
If the message text contains one or more double quote characters, either precede each one with a backslash or enclose the message in single quotes, like this:
'backup__backup_overwrite_file_confirm_text' => 'Backup file with the name \"%1\" already exists. Do you want to replace it?',or like this:
'backup__backup_overwrite_file_confirm_text' => 'Backup file with the name "%1" already exists. Do you want to replace it?', -
Do not translate the variables, like “%1” or “%%ip_address%%”. They are replaced with actual values in the Plesk interface. For example, this message
'The IP address %%ip_address%% was assigned to %%client_name%%.'may look like this in the Plesk interface:
“The IP address 192.168.12.34 was assigned to John Doe.”
-
Some variables are replaced not with numerical values, but with human-readable messages found in the locale files. For example, this message
'If you need help, read our %%link%%.'takes the %%link%% value from this one
'website creation tutorial'and, combined, they look like this in the Plesk interface:
“If you need help, read our website creation tutorial.”
The second, shorter message becomes a clickable hyperlink in the Plesk interface, and therefore it is worded as a call to action. When translating message pairs like this one, consider both parts together, so that they do not clash once translated into the target language.
-
Do not translate HTML entities, such as
<and>. Also, do not translate escape sequences, such as\n.
Importing the Translated Locale into Plesk
Before you import the translated locale files into Plesk, we strongly recommend that you validate their syntax. You can do it by running the following commands for every translated locale file:
- (Plesk for Linux)
/usr/local/psa/admin/bin/php -l <locale file name>.php - (Plesk for Windows)
"%plesk_dir%admin\bin\php" -l <locale file name>.php
The expected output looks like this:
No syntax errors detected in <locale file name>.php
If the output includes one or more lines starting with PHP Parse error, you need to find and correct the syntax errors before importing the translated locale file into Plesk. Otherwise, trying to switch to the translated locale in Plesk will result in an error.
Importing the new locale into Plesk
-
Log in to the server via SSH or RDP.
-
Make sure that all the new locale files are in their proper places:
- Plesk for Linux
/usr/local/psa/admin/application/admin/resources/languages/<target language code>//usr/local/psa/admin/application/default/resources/languages/<target language code>//usr/local/psa/admin/plib/locales/<target language code>//usr/local/psa/admin/application/smb/resources/languages/<target language code>/
- Plesk for Windows
%plesk_dir%admin\application\admin\resources\languages\<target language code>%plesk_dir%admin\application\default\resources\languages\<target language code>%plesk_dir%admin\plib\locales\<target language code>\%plesk_dir%admin\application\smb\resources\languages\<target language code>
- Plesk for Linux
-
Run the following command to register your new locale in Plesk:
plesk db "replace into locales values ('<target language code>', 'true')"So, in our example, the command will look like this:
plesk db "replace into locales values ('eo', 'true')"
Congratulations! Your new locale is now registered in Plesk.
-
You can find your new locale in Tools & Settings > Languages.

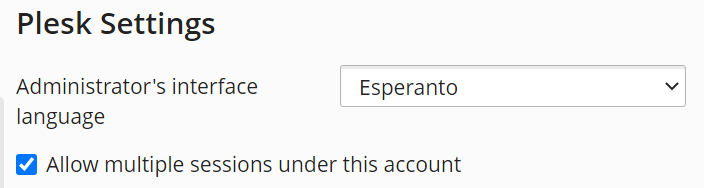
-
You can switch to your new locale in Profile & Preferences by selecting it from the “Administrator’s interface language” menu.