
Deploying Website Content Using Git™
summary
Git is a distributed version control mechanism. It makes it easier for multiple people to collaborate on websites’ code and assets (further in the topic, we call those ”content”), and to keep track of the changes that were made.
In Plesk®, the support for Git is implemented via the free Git extension. You can deploy content to a website by pushing commits to the Plesk server, or pulling commits from a different server to the Plesk server. Content can be deployed both manually and automatically.
In this topic, you will learn how to create and configure Git repositories in Plesk, and how to deploy website content using Git.
Prerequisites
Before you can begin deploying website content using Git, the following prerequisites must be met:
The Git extension must be installed from the Extensions Catalog.
A basic understanding of Git and the way it works is required.
Overview
To be able to deploy website content using Git, the content must be committed to a Git repository. It can be a local repository (for example, a personal laptop), or a remote repository (self-hosted, or hosted on a Git hosting service, such as GitHub®). Once website content has been committed to a Git repository, it is then pushed or pulled to a Git repository on the Plesk server (further in the topic, we call those ”Plesk repositories”), and then, finally, deployed to the website.
Muista
A single website can have any number of Plesk repositories.
At a glance:
When using a local repository, the Plesk repository is the origin. Commits are pushed to it from the local repository.
When using a remote repository, the remote repository will be the origin. You will be pushing commits to the remote repository, and then pulling them from the remote repository to the Plesk repository.
Deploying Website Content From a Local Repository
This scenario assumes that the website’s content is committed to a branch in a local repository on a computer that is not the Plesk server.
The workflow for deploying the content to the website looks as follows:
Changes to the files constituting the website’s content are made, and are committed to a branch in a local repository.
The commit is pushed to origin (the Plesk repository).
Once the commit has been pushed, files are deployed to the website.
Creating the Plesk Repository
Before you can deploy website content using Git, you need to create a Plesk repository for the website.
To create a Plesk repository:
In the navigation pane, click Websites & Domains, and then locate the desired website.
On the ”Dashboard” tab, click Git.
Click Add Repository.
Select the ”Local repository” option.
Give the repository a name. Every repository under the same domain must have a unique name.
(Optional) Grant one or more additional users access to the repository.
-
Under ”Deployment settings”, configure the available settings as desired. These can be changed later in the repository’s settings.
For your first repository, it is fine to use the default values.
Click Create Repository.
The Plesk repository is now created, and can be found on the ”Git Repositories” page.
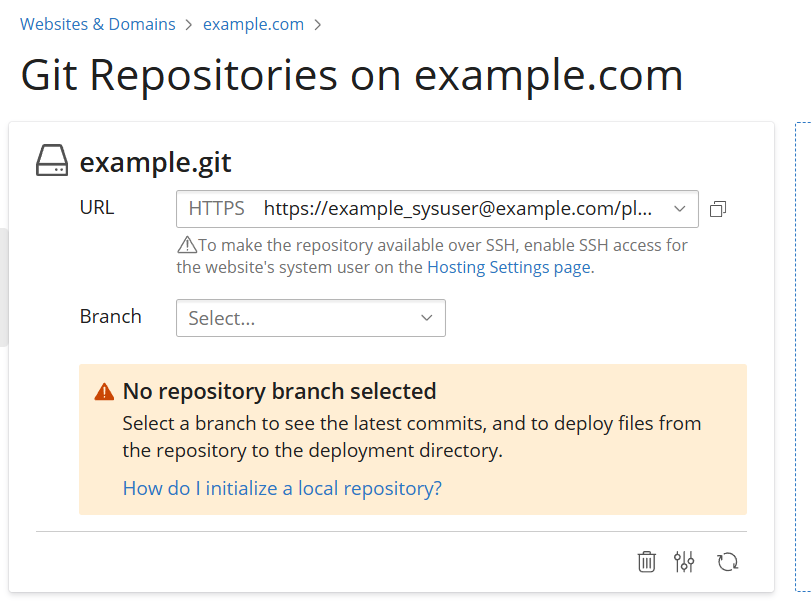
To begin deploying website content, you must first add the Plesk repository as the origin for the local repository where the website’s files are stored. You can copy the Plesk repository’s URL to clipboard on its card.
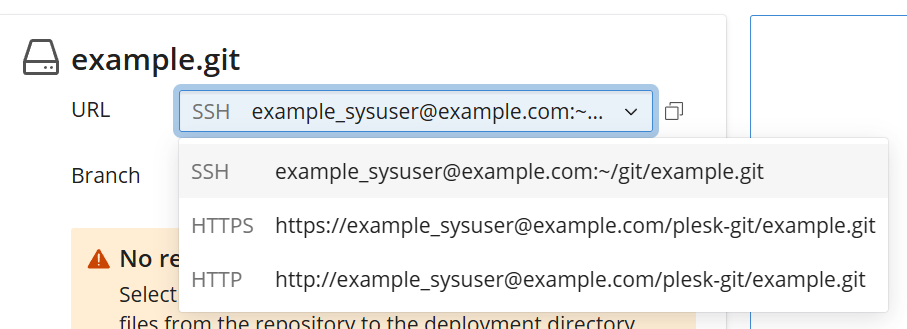
Muista
(Plesk for Linux®) By default, you can only add the Plesk repository as origin via an HTTP/HTTPS URL. To be able to add it via an SSH URL, first enable non-chrooted SSH access for the website’s system user.
Once you have done so, the way the repository’s card looks in Plesk will change accordingly.
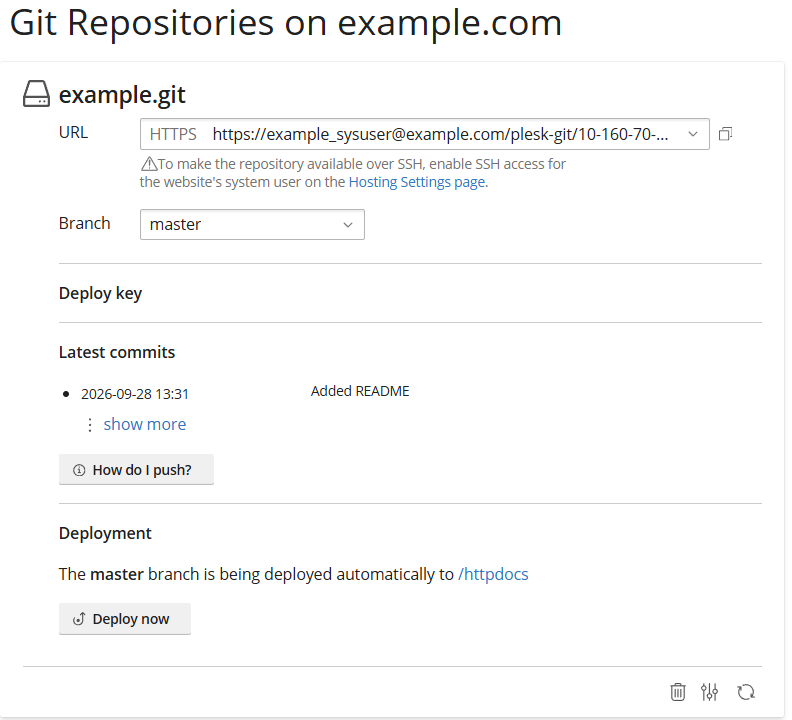
You can now deploy content from the Plesk repository to the website.
Deploying Website Content
Once the changes to the website’s content have been committed to a branch in a local repository, you can deploy them.
Varoitus
When content from a Plesk repository is deployed:
Existing files and directories on the Plesk server with names identical to those being deployed are overwritten with no warning.
If the commit being deployed removes one or more files and directories, those files and directories are removed on the Plesk server with no warning.
This can cause loss of data which cannot be undone.
To deploy a website’s content:
-
Push the commit(s) containing the changes to the branch in the Plesk repository.
Muista
The connections to the Plesk repository must use authentication. Anonymous access is not supported.
If the ”Automatic” deployment mode is configured for the Plesk repository, and the branch that is selected on the repository’s card is the same as the branch that was just pushed, no further action is required. The changes will be deployed automatically. Otherwise, you need to follow the rest of the procedure.
In the navigation pane, click Websites & Domains, and then locate the desired website.
On the ”Dashboard” tab, click Git.
Locate the repository the commit(s) were pushed to.
-
On the repository’s card, make sure that the branch the commit(s) were pushed to is selected, and then click Deploy now.
Muista
If you see ”No deployment” on the Plesk repository’s card, and the Deploy now button is missing, the ”Disabled” deployment mode is configured for the Plesk repository. To deploy content, change it to the ”Manual” deployment mode.
The content will now be deployed to the website.
Deploying Website Content From a Remote Repository
This scenario assumes that the website’s content is committed to a branch in a remote repository hosted online. For example, hosted on a Git hosting service, such as GitHub, or self-hosted on a server accessible from the Plesk server.
The workflow for deploying the content to the website looks as follows:
Changes to the files constituting the website’s content are made, and are committed to a branch in a local repository on a computer other than the Plesk server.
The commit is pushed to origin (the remote repository hosted online).
The commit is pulled from origin to the Plesk repository.
Once the commit has been pulled, files are deployed to the website.
Muista
To be able to create a Plesk repository following the instructions below, the remote repository must be secured by a valid TLS certificate that is not self-signed. Otherwise, Plesk repository creation will fail.
In this case, to create a Plesk repository, use the CLI command plesk ext git –create with the -skip-ssl-verification option instead. For example:
plesk ext git --create -domain example.com -name my_repository -skip-ssl-verification -remote-url http://code.example.net/all_repositories/my_repository.git
Creating the Plesk Repository
Before you can deploy website content using Git, you need to create a repository for the website on the Plesk server.
To create a Plesk repository:
In the navigation pane, click Websites & Domains, and then locate the desired website.
On the ”Dashboard” tab, click Git.
Click Add Repository.
-
Enter the URL of the remote repository you will pull the content from. Both the HTTP(S) and the SSH protocols are supported.
Muista
You cannot change the URL once the repository has been created.
(Optional) When using an HTTP(S) URL, if the remote repository requires HTTP authentication, enter the username and password into the corresponding text boxes.
(Optional) When using an SSH URL, you can use a deploy key for SSH authentication. If you do, make sure to add the public part of the deploy key to the remote repository before proceeding, or you will not be able to authenticate and finish creating the Plesk repository.
Give the repository a name. Every repository under the same domain must have a unique name.
-
Under ”Deployment settings”, configure the available settings as desired. These can be changed later in the repository’s settings.
For your first repository, it is fine to use the default values.
Click Create Repository.
Your repository is now created, and can be found on the ”Git Repositories” page.
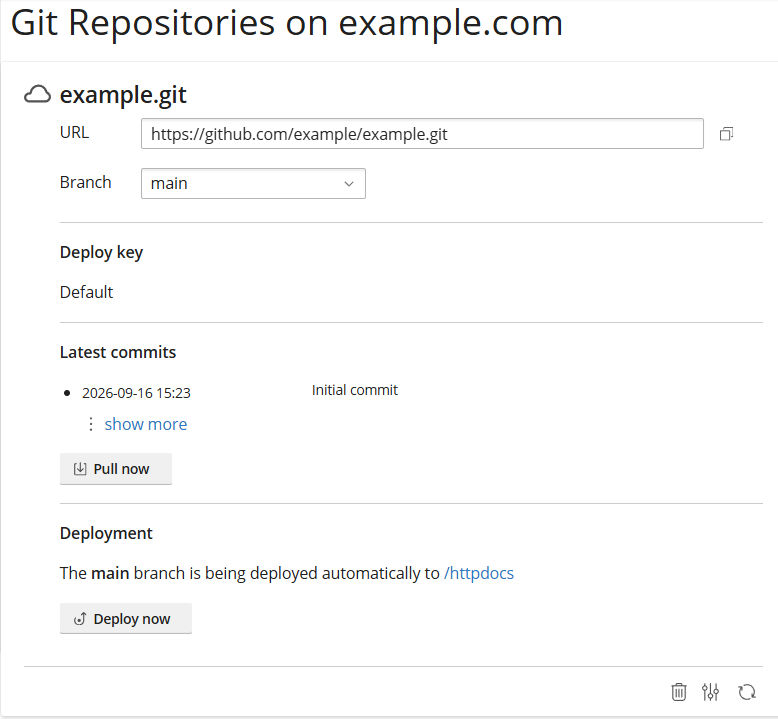
You can now deploy content from the Plesk repository to the website.
Deploying Website Content
Once the changes to the website’s content have been committed to a branch in a local repository, you can deploy them.
Varoitus
When files in the Plesk repository are deployed:
Existing files and directories on the Plesk server with names identical to those being deployed are overwritten with no warning.
If the commit being deployed removes one or more files and directories, those files and directories are removed on the Plesk server with no warning.
This can cause loss of data which cannot be undone.
To deploy a website’s content:
Push the commit(s) containing the changes to a branch in the remote repository.
In the navigation pane, click Websites & Domains, and then locate the desired website.
On the ”Dashboard” tab, click Git.
Locate the repository that uses the remote repository the files were pushed to as origin.
-
On the repository’s card, make sure that the branch the changes were pushed to is selected, and then click Pull now.
Muista
If the remote repository is hosted on a Git hosting service that supports webhooks, you can create a webhook that will pull commits to the Plesk repository automatically once they’ve been pushed to the remote repository.
If the ”Automatic” deployment mode is configured for the Plesk repository, and the branch that is selected on the repository’s card is the same as the branch that was just pulled, no further action is required. The changes will be deployed automatically. Otherwise, you need to follow the rest of the procedure.
-
Click Deploy now.
Muista
If you see ”No deployment” on the Plesk repository’s card, and the Deploy now button is missing, the ”Disabled” deployment mode is configured for the Plesk repository. To deploy content, change it to the ”Manual” deployment mode.
The content will now be deployed to the website.
Configuring Deployment Settings
You can customize the way content is deployed from a Plesk repository by changing the repository’s deployment mode and/or server path, and also by adding additional deployment actions.
The deployment settings can be configured during a repository’s creation. They can also be changed in a repository’s settings at any time. You can access a repository’s settings by clicking the  icon on the bottom of its card.

Choosing the Deployment Mode
For each Plesk repository, you must select the way content is deployed from it to the website. This is called the repository’s ”deployment mode”.
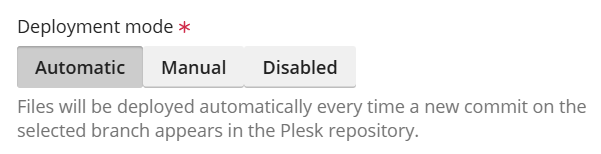
There are three deployment modes to choose from:
”Automatic”. Content is deployed automatically every time a commit is pushed or pulled to the currently selected repository branch. Saves time and clicks, but can result in undesired changes to the website being published if a commit is pushed or pulled to the repository in error.
”Manual”. Content must be deployed manually once a commit has been pushed or pulled to the currently selected repository branch. Requires user action every time changes are made, but the extra step decreases the chance of undesired changes being published to the website.
”Disabled”. A safety feature. No content can be deployed from a repository using this deployment mode.
Setting the Deployment Directory
For each Plesk repository, you must select a directory inside the website’s Home directory / (including the Home directory itself) that will be treated as the root directory when deploying content from that repository. This is called the repository’s ”deployment directory”.

Muista
Two or more repositories under the same domain cannot share the same deployment directory. You can, however, set a subdirectory (for example, /httpdocs/images) as the deployment directory for a Plesk repository even if the parent directory (in this case, /httpdocs) is already used by another Plesk repository.
For example, if a repository’s deployment directory is set to /httpdocs, the files in the root directory of that repository will be deployed inside the website’s /httpdocs directory, and not its / directory.
The deployment directory includes all subdirectories inside it. For example, if the deployment directory for a repository is set to /httpdocs, and a commit adding the /httpdocs/videos subdirectory is deployed to the website, the subdirectory will be created on the Plesk server as well.
Adding Post Deployment Actions
You can add one or more commands that will be run every time the deployment from a repository finishes. For example, if the website is using a framework, such as Ruby on Rails®, you can have a data migration task run automatically after each deployment. We call these ”post deployment actions”.
You can add any number of post deployment actions by first selecting the ”Enable post deployment actions” checkbox in a repository’s settings, and then entering the commands that must be run after deployment, one command per line.
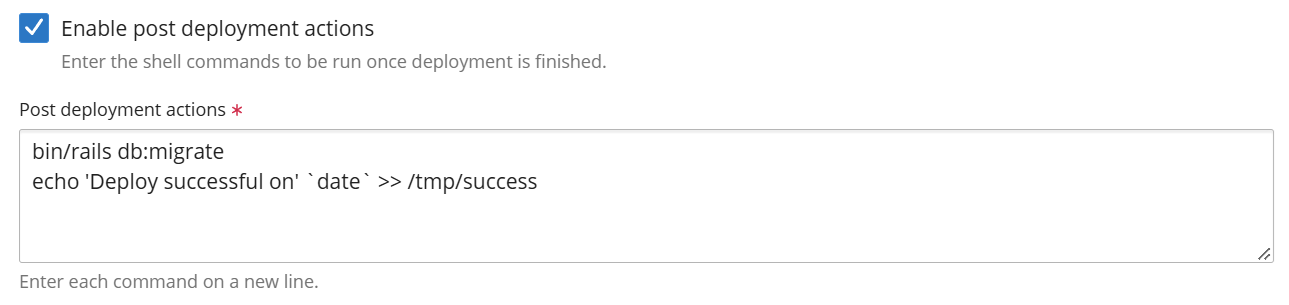
You can access a repository’s settings by clicking the icon on the bottom of its card.
Muista
(Plesk for Linux) If non-chrooted SSH access is not allowed for the domain’s system user, all entered commands will run in a chrooted environment. The home directory of the subscription’s system user will be treated as the file system root for that subscription. No executable files outside the chroot jail would be able to be run.
Changing the Active Branch
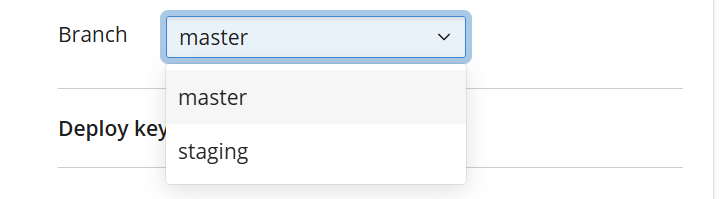
Content is only deployed from the currently selected branch of a Plesk repository. We call it the ”active branch”.
When deploying content from a repository with two or more branches, make sure that the correct branch is selected on the repository’s card. Pushing or pulling a branch other than the active branch to a Plesk repository will not result in the content being published, even if the ”Automatic” deployment mode is configured for the repository.
Muista
Switching between branches also results in the content being deployed if the ”automatic” deployment mode is configured for the repository.
Using Deploy Keys
When adding a remote repository as the origin for a Plesk repository using an SSH URL, you must configure authentication to be able to pull commits from that repository. To do so quickly and easily, you can use a deploy key, a kind of SSH key pair. This way, you do not need to generate and add an SSH key pair by hand.
When you enter an SSH URL as the remote repository’s URL, the option to use a deploy key appears automatically.
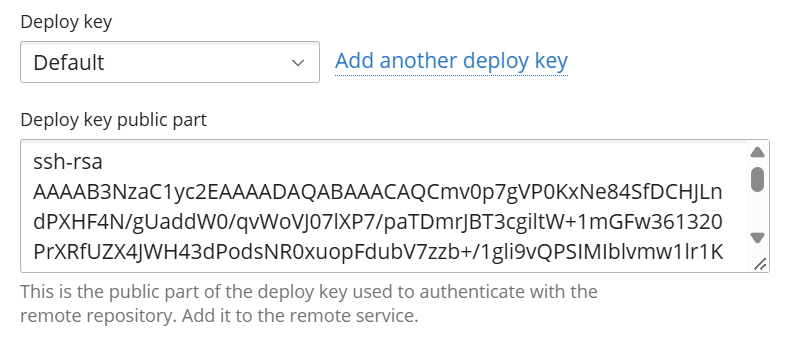
Here, you can select an existing deploy key, or create a new one if necessary.
Muista
Deploy keys are shared between all repositories under the same domain.
Deploy keys are not password-protected.
Click the window containing the public part of the deploy key to copy it to the clipboard. After that:
If the remote repository is hosted on a Git hosting service, such as GitHub, refer to that service’s documentation on how to add the public part of the deploy key.
If the remote repository is not hosted on a Git hosting service, add the public part of the deploy key as you would add any other public SSH key.
Pulling Changes Automatically Using Webhooks
When working with a Plesk repository that is pulling updates from a remote repository, by default, every time there is a new commit, it has to be pulled to the Plesk repository by clicking a button before the content can be deployed to the website.
If the remote repository is hosted on a Git hosting service that supports webhooks, you can create a webhook that will pull the commits with the changes to the Plesk repository automatically.
Thus, if a Plesk repository that is pulling updates from a remote repository has its webhook configured in the Git hosting service, and has the ”automatic” deployment mode configured in Plesk, a commit being pushed to the remote repository will result in it being pulled to the Plesk repository and deployed to the website with no user action being required.
You can find a repository’s webhook on its Settings page. To access the page, click the icon on the bottom of the repository’s card.
Click the webhook URL to copy it to the clipboard.

Then, create a webhook in the Git hosting service. Refer to the service’s documentation on how to create a webhook. Use the URL you copied earlier as the payload/endpoint URL. You need to configure the webhook such that it is triggered every time a new commit is pushed to the remote repository. On the Plesk side, whenever the webhook is triggered, commits will be pulled from the remote repository.
Muista
If Plesk is secured with a self-signed certificate, you may need to replace the https:// part in the webhook URL with http:// for the webhook to work correctly.
Granting Additional Users Access
When pushing content from a local repository to the Plesk repository, HTTP authentication is required. You can always authenticate with the username and password of the website’s system user. If you want a third party to be able to push content to the Plesk repository without having the access afforded by the system user’s credentials, you can add one or more additional users to a repository, and give the additional user(s) username and password to the third party. This way, they will be able to push content to the Plesk repository, but not access the server itself.
Before you can add additional users to a repository, you need to create at least one additional user. The additional user needs no permissions to be able to push content to the Plesk repository. Creating one with the ”Accountant” built-in role (the one with the least amount of permissions) is fine.
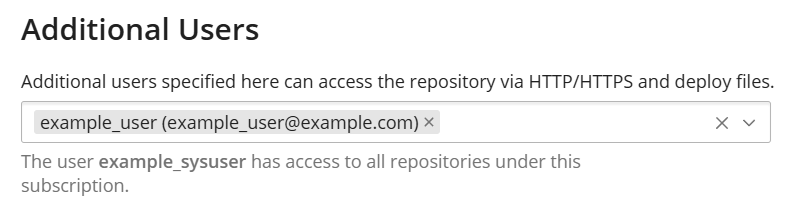
You can add one or more additional users to a repository during the repository’s creation. You can also do it later in the repository’s settings. You can access a repository’s settings by clicking the icon on the bottom of the repository’s card.