從 Microsoft Office Outlook 2019 存取
概要: 如何在 Microsoft Outlook 2019 中添加 Plesk 電子郵件帳戶。
如果您有更早的 Outlook 版本,請查看 Outlook 2016、Outlook 2010或 Outlook Express 6的說明。
要手動設定 Microsoft Office Outlook 2019,請執行下列步驟:
-
打開 Microsoft Office Outlook 2019。如果您在 Microsoft Outlook 2019 中沒有帳戶,請轉到第 3 步驟。如果您已設定了一個帳戶,還需要添加一個帳戶,請轉到下一步驟。
-
轉到 文件 > 添加帳戶。

-
指定您的電郵地址。
-
點按“高級選項” 旁的
圖示,選擇“讓我手動設定我的帳戶” 核取方塊,然後點按 連接。 -
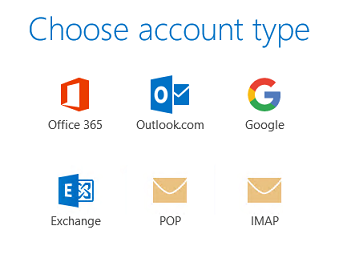
選擇您的帳戶類型:
- 若希望在伺服器上保留資訊副本,點按 IMAP 選項。若伺服器上啟用 SpamAssassin,使用 IMAP,您還可以設定 SpamAssassin 垃圾郵件篩檢程式檢查收件資訊。
- 若您不希望在伺服器上保留任何資訊,點按 POP。
-
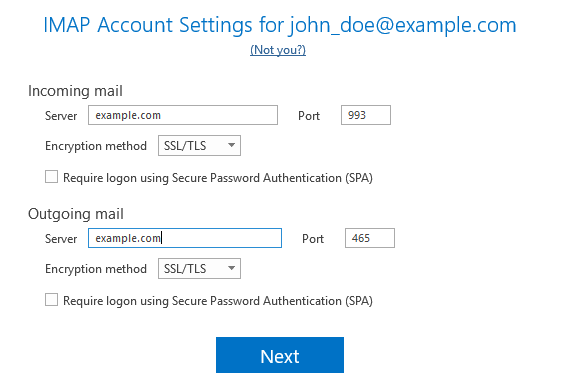
Microsoft Office Outlook 會自動檢測電郵地址設定。更改設定(若需要)並點按 下一步。
-
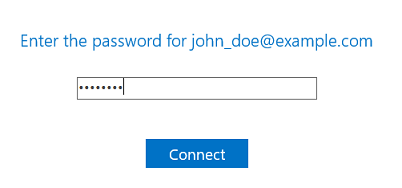
指定電郵地址密碼並按一下 連接 。
-
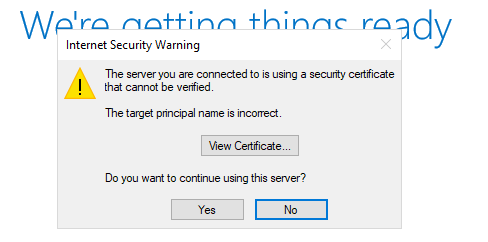
如果在保護 Plesk 郵件伺服器安全的 SSL/TLS 證書中的域名與在 Microsoft Outlook 連接設定中的域名不同,那麼您可能會看到以下資訊。
我們建議您在執行 Microsoft Outlook 設定之前修復此問題:
- 使用 Let’s Encrypt 的免費 SSL/TLS 證書或其它證書機構的證書保護域名的安全。
- 點按 查看證書 以查看 SSL/TLS 證書分配給了哪些域名。如果域名是正確的且屬於您的 Plesk 郵件伺服器,請返回到前一個步驟。更改接收和發送郵件伺服器以令其與 SSL/TLS 證書中的郵件伺服器相匹配。
-
請稍候直至 Microsoft Office Outlook 完成設定,待設定完畢點按 確定。

 圖示,選擇“讓我手動設定我的帳戶” 核取方塊,然後點按 連接。
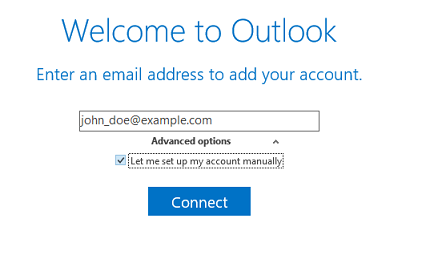
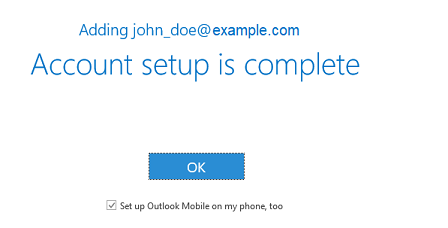
您的帳戶已設定好。Microsoft Office Outlook 此時將會給您發送一封測試郵件。