Quick Navigation Among Plesk Objects
In Plesk you can navigate between managing customers, reseller accounts, and websites. You can add domains, subdomains, and domain aliases directly in Domains, and select or create necessary customers and subscription while creating domains.
Navigating Customers and Resellers
After you have created a customer or reseller account and click it in the list in Customers or Resellers correspondingly, you can do the following:
-
View and modify account information, such as email, contact and login info, status, description, IP addresses, resources, and so on.
The corresponding links are on the right sidebar, for example, Edit Contact Info.
-
View all the Plesk objects owned by a customer or a reseller.
These are displayed on the corresponding tabs, for example, Domains.
-
Create or remove objects (domains, subscriptions, or customers) for the selected account.
The corresponding buttons are on each tab, for example, Add Domain on the Domains tab.
-
Change the status of a Plesk object, such as a subscription, a domain, or an account.
Use the corresponding link on the right sidebar or the button Change Status.
-
Proceed to the Customer Panel for managing these objects.
To do this, click the name of an object or click Manage in Customer Panel.

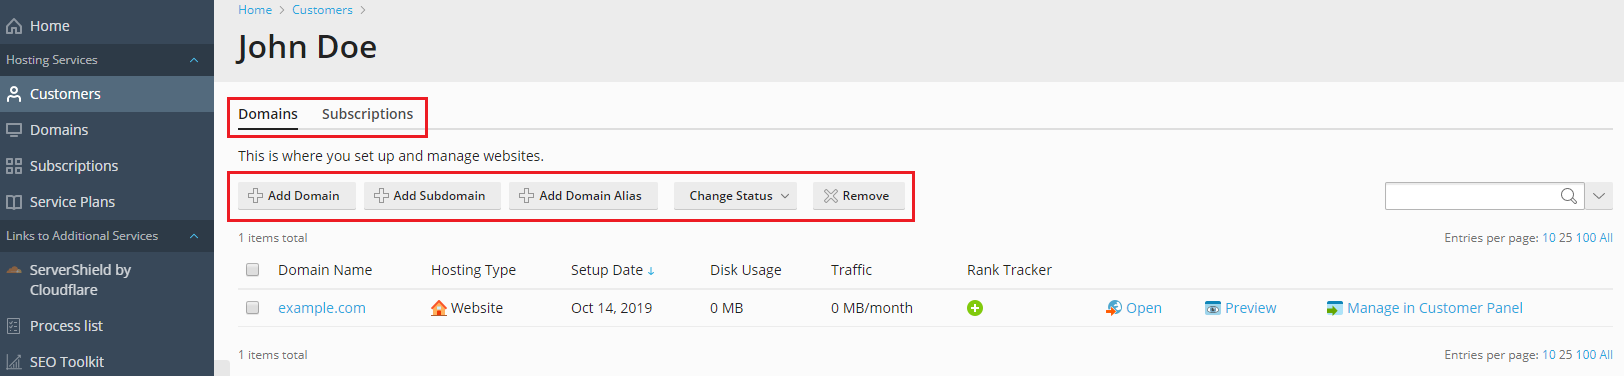
To quickly proceed to subscriptions and sites of a customer:
- Go to Customers and click the name of the customer.
- Go to the Domains tab or to the Subscriptions tab.
- Click the name of the domain or subscription that you are going to view or manage.
To quickly proceed to subscriptions, sites, and customers of a reseller:
- Go to Resellers and click the name of the reseller.
- Go to the Domains tab, the Subscriptions tab, or the Customers tab.
- Click the name of the domain, subscription, or customer that you are going to view or manage.
Adding Domains for Specific Subscriptions or Customers
Adding Domains and Subdomains
-
Go to Domains and click one of the buttons: Add Domain or Add Subdomain, and follow on-screen instructions.
Note: Depending on the Plesk edition, the information that you can specify on the Add Domain screen might differ. For example, selecting a subscription or a customer might not be available because it is not necessary for the intended users.
-
To specify a subscription, select the subscription in Location of the website’s files. The domain will belong to the selected subscription and the corresponding account.
To create a new subscription during the creation of a domain, leave Create a new subscription selected.
-
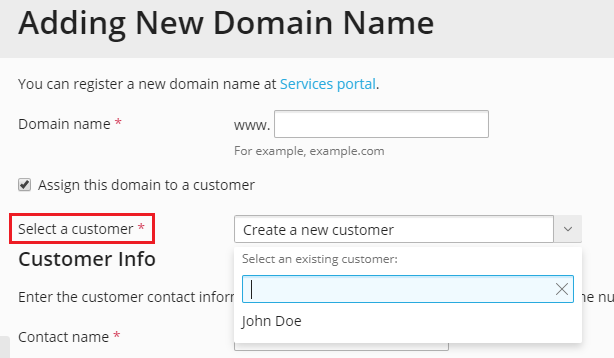
To create a domain for a particular customer, select Assign this domain to a customer. Select the customer to whom the domain will belong in Select a customer. A domain and a subscription with the specified name will be created for the selected customer (note that the subscription is created by default together with the domain).
To create a new customer account during the creation of a domain, select Assign this domain to a customer and leave Create a new customer selected. You will be prompted to specify the customer details.
To create a domain for your own usage, clear the checkbox Assign this domain to a customer. Select one of your own subscriptions if you want to create a domain under an existing subscriptions.
-
Enter other information that you are prompted to. For details, see Domains and DNS.

Adding Domain Aliases
Go to Domains and click Add Domain Alias. Enter other information that you are prompted to. For details, see Domains and DNS.