Installing Plesk on Alibaba Cloud
Provided Product Configurations
The following Plesk configurations are available on Alibaba Cloud Marketplace.
| Plesk | Components set |
|---|---|
| Plesk Onyx on Ubuntu 16 (WebHost) | Recommended set* (Fail2Ban, ModSecurity, Plesk Firewall, and **WordPress Toolkit are installed by default) |
| Plesk Onyx on CentOS 7 (WebHost) | Recommended set* (Fail2Ban, ModSecurity, Plesk Firewall, and **WordPress Toolkit are installed by default) |
| Plesk Onyx on CentOS 7 (BYOL) | Recommended set* (WordPress Toolkit, Security Advisor, Let’s Encrypt, Git, the resctrl utility, and Docker are not installed by default but can be installed later) |
| Plesk Onyx on Ubuntu 16 (BYOL) | Recommended set* (WordPress Toolkit, Security Advisor, Let’s Encrypt, Git, the resctrl utility, and Docker are not installed by default but can be installed later) |
| Plesk Onyx on Ubuntu 16.04 (Web Admin SE) | Recommended set* (Fail2Ban, ModSecurity, Plesk Firewall, and **WordPress Toolkit are installed by default) |
| Plesk Onyx on Windows 2012 R2 (WebHost) | Recommended set* (ModSecurity, Plesk Firewall) |
| Plesk Onyx on Windows 2012 R2 (BYOL) | Recommended set* (ModSecurity, Plesk Firewall) |
Note: *The Recommended components set includes all components necessary for web hosting (including the web server, a mail server, a database server, and so on), plus the most popular and widely used features. For more information about Plesk BYOL, see the topic Choosing Between Plesk WebHost and BYOL. For more information about Plesk Onyx on Ubuntu 16.04 (Web Admin SE), see the topic Plesk Web Admin SE.
Note: **WordPress Toolkit in Plesk Onyx on Ubuntu 16.04 (WebAdmin SE) provides only basic functionality. To use premium WordPress features, upgrade your Plesk license to Web Pro or Web Host Edition.
Installing Plesk on Alibaba Cloud
-
Log in or create an Alibaba Cloud account.
-
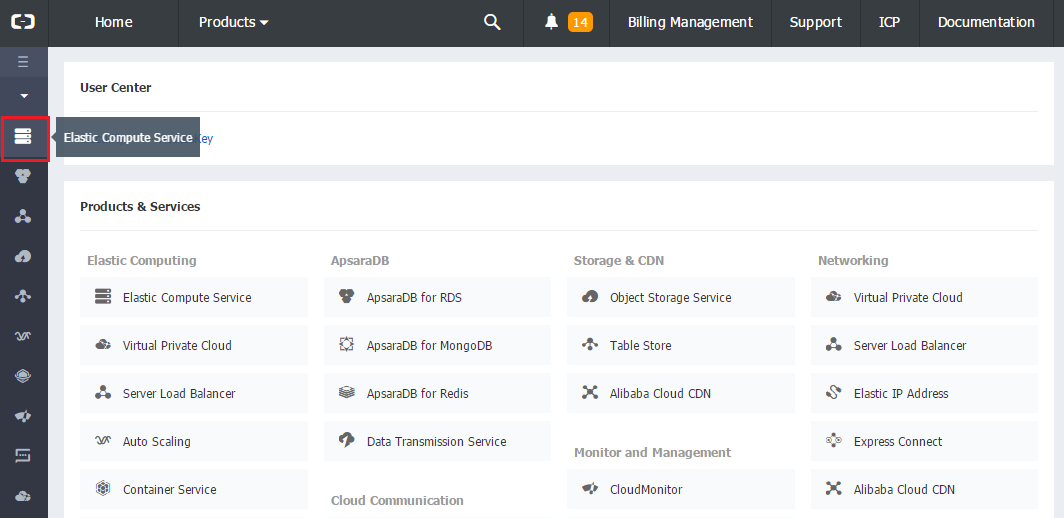
Go to the Alibaba Cloud console > Elastic Computer Service (in the left navigation bar).

-
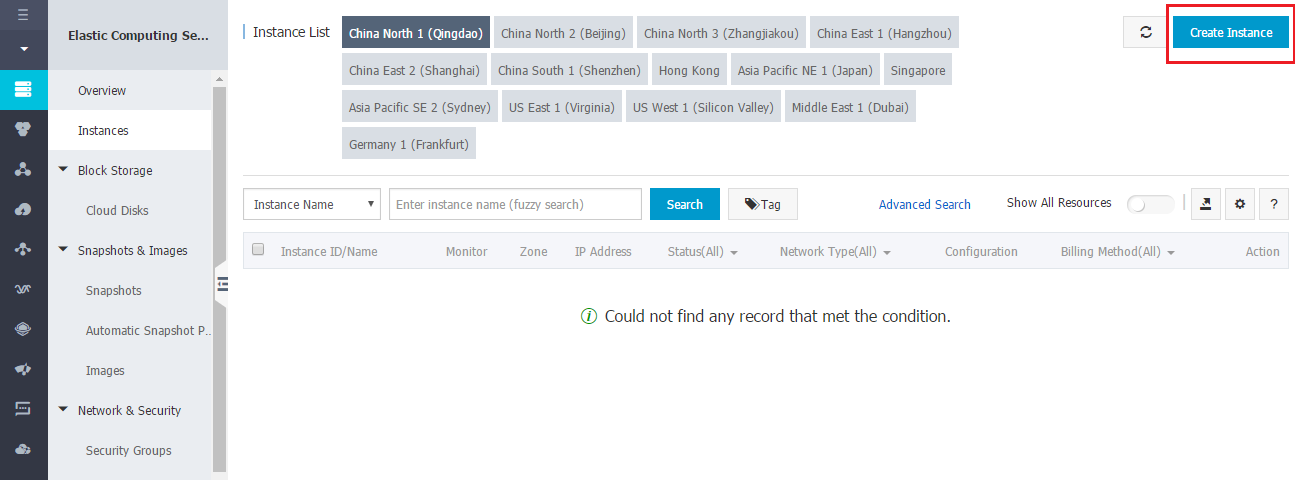
Click Instances, and then click the Create Instance button in the top right corner of the screen.
-
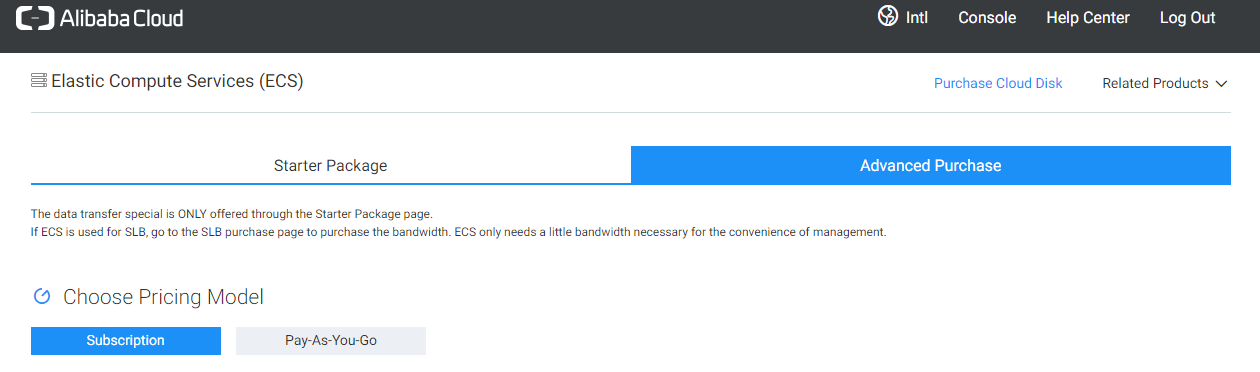
Select one of the two pricing models:
- Pay-As-You-Go costs more per hour, but if you choose this model, you are billed per hour and can cancel at any time. This pricing model allows you to try out Plesk on Alibaba cheaply, but is not well-suited for hosting.
- Subscription is cheaper in the long run, but requires prepayment and monthly commitment. If you decide that Plesk on Alibaba is right for you, we recommend using this model for web hosting.
-
Select the datacenter region and zone. If you plan to host small business websites, we recommend choosing the data center region and zone closest to their geographic location to decrease page load times for local visitors.
-
Select the Instance Type.
When choosing the ECS instance to deploy Plesk on, pay attention to the amount of RAM it comes with. The more websites you intend to host, and the more traffic the hosted websites generate, the more RAM you will need. Refer to the Plesk System Requirements to estimate the amount of RAM your setup will require.
If you are not sure which instance to choose, we recommend starting with the ecs.n1.tiny instance and upgrading it later, if necessary. Note that only the Subscription pricing model supports instance upgrade.
-
Set “Network Bandwidth Peak” to “0 M” to have the option to later bind an Elastic IP address to your instance. An Elastic IP address is a public IP address assigned to your instance that does not change every time the instance is restarted. Having a constant public IP address is required for web hosting.
-
Under “Choose the Operating System”, select the Marketplace Image tab.
-
Type
pleskin the “Search in all products” field and click the magnifying glass icon. -
Under “Choose Storage”, we recommend selecting SSD Cloud Disk for your website hosting and adding at least one Ultra Cloud Disk or Basic Cloud Disk for storing backups.
-
Under “Security Settings”, set the authentication method for your instance (password or key-based authentication).
-
Under “Purchase Plan”, specify the number of instances you want to purchase and, if necessary, the instance name.
-
Click Buy Now, and then click Activate.
-
When the instance has been successfully activated, you can see it in the Alibaba Cloud console (Elastic Computer Service > Instances > click the data center region you specified during purchase).
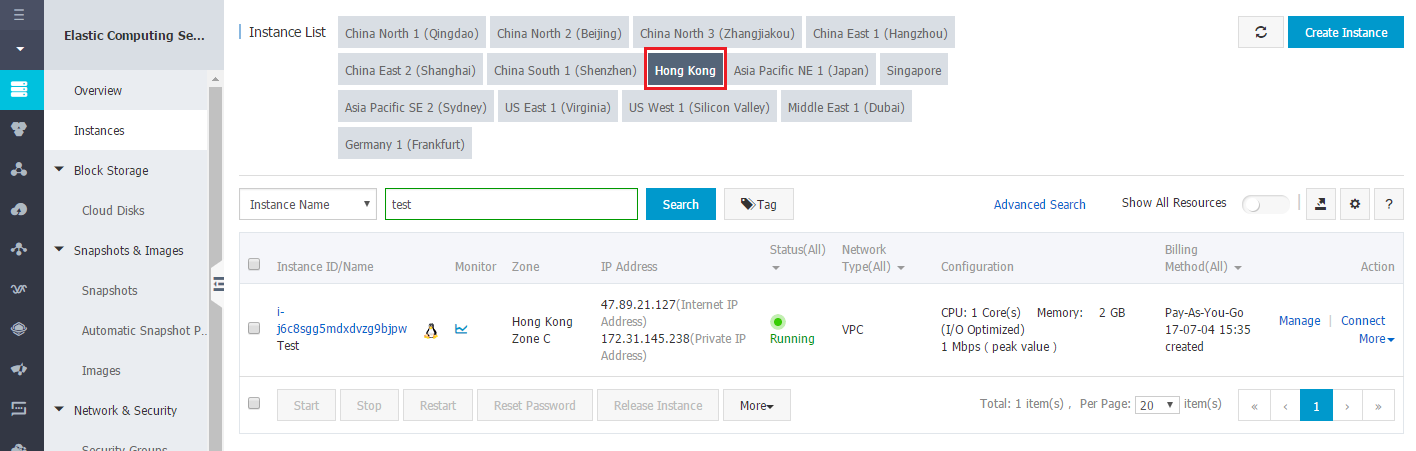
Your instance is now up and running. To begin using Plesk, you need to perform a short post-install configuration.
Plesk Post-install Configuration on an Alibaba Cloud Instance.
Opening Ports Used by Plesk
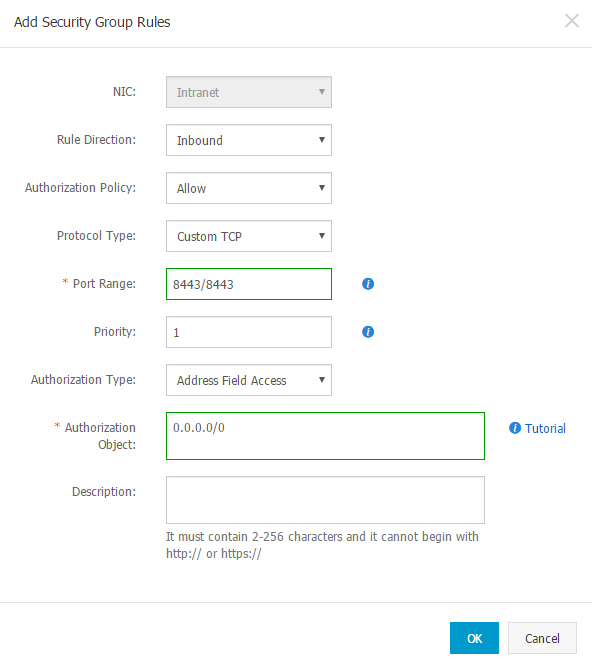
By default, whenever an instance is created, only certain ports are allowed for inbound connections, while ports used by Plesk are closed. To operate Plesk and its services effectively, you need to open the following ports by adding security group rules to the desired instance.
There are two ways to do this:
- Add a single security rule allowing all incoming connections. This option is preferred if you do not have much experience in using Plesk or/and Alibaba. However, if you go with this option, we strongly recommend using the Plesk firewall.
- Add multiple security rules allowing incoming connections only to ports required by Plesk. We recommend choosing this option if you run many instances in Alibaba Cloud. In this case, you will be able to control security rules applied to all instances from one place, the “Security Groups” screen.
Note: These instructions cannot be used to allow outbound connections on TCP port 25. To be able to send email, you need to apply for allowing outbound connections on TCP port 25. You can use security rules to allow inbound connections on TCP port 25 as described.
Accessing Plesk for the first time
To log in to Plesk for the first time, you need to generate a one-time login link. Go to the generated URL to log in to Plesk and set an administrator password. You will then be able to log in to Plesk using that password.
To access Plesk for the first time:
-
Access the instance command line:
-
Run the command:
sudo plesk login | grep -v localhost.localdomain -
A one-time login link will be generated. Use it to access Plesk as an administrator.
When you access Plesk for the first time, you are asked to provide the following information:
- Full hostname
By default, Alibaba Cloud generates and assigns a hostname to the instance once you have started it. However, some spam filters (including the default Plesk greylisting) treat mail sent from servers with such hostnames as spam. We recommend using your registered domain name as the server hostname.
- Default IP address
The private IP address of the server is detected automatically. To avoid connectivity issues, do not register your instance’s public (Elastic or Internet) IP address in Plesk. Only the private IP address must be registered.
We also recommend configuring the server to keep the DNS records of subdomains in separate DNS zones by running the following command:
/usr/local/psa/bin/server_pref -u -subdomain-dns-zone own
- Administrator’s password
For detailed instructions on Plesk’s post-install configuration, see Post-install Configuration on a Single Server.