Laravel Toolkit
概要: Laravel Toolkit は無料の Plesk 拡張です。これを使用して、Laravel アプリケーションのホスティングに関連する定型タスクを簡素化できます。
このトピックでは、Plesk で Laravel アプリケーションをアップロード、設定、実行する方法について説明します。このトピックでは、既にアプリケーションを用意しているか、アプリケーションの作成を計画していることを前提としており、Laravel アプリケーションの作成方法を説明するものではありません。
前提条件
Laravel アプリケーションをホストする前に、無料の Laravel Toolkit 拡張を Plesk サーバにインストールする必要があります。
- Plesk 管理者の場合は、拡張カタログから拡張をインストールします。
- それ以外の場合は、ホスティング事業者に連絡して拡張をインストールしてもらえるか確認してください。
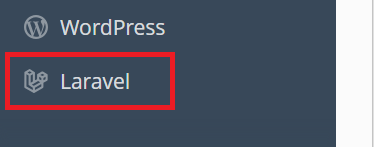
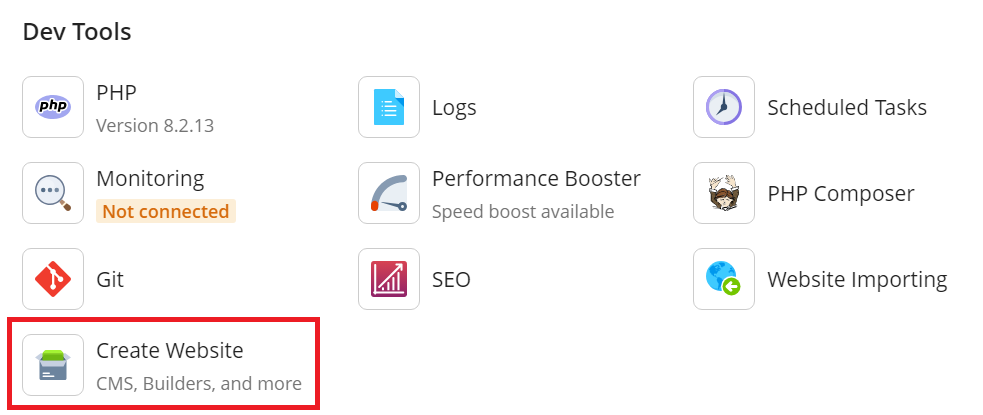
拡張のインストールが完了すると、利用を開始できます。 [Laravel] ボタンが、ナビゲーションペインや、すべてのドメインのドメインカードの [ウェブサイトを作成] ドロワーにも表示されます。
アプリケーションをアップロードする
アプリケーションを構成して実行する前に、Plesk サーバにアップロードして Laravel Toolkit に登録する必要があります。これには 3 つの方法があります。
- Laravel スケルトンを作成する。アプリケーションがコンピュータ上のフォルダまたは圧縮ファイルに格納されている場合、あるいはアプリケーションを最初から作成しようとしている場合は、Laravel Toolkit が必要なディレクトリ構造とローカル Git リポジトリを作成できます。
- リモート Git リポジトリからインストールする。アプリケーションがリモートリポジトリに格納されている場合は、Plesk サーバにこれを展開できます。
- 既存のアプリケーションをスキャンする。既にアプリケーションを Plesk にアップロードした場合は、このアプリケーションをスキャンすることで Laravel Toolkit にアプリケーションを登録できます。
注釈: Laravel スケルトンを作成するか、リモート Git リポジトリからインストールするためには、Plesk サーバに無料の Git 拡張 をインストールする必要があります。
Laravel スケルトンを作成する:
- Plesk にログインします。
- [ウェブサイトとドメイン]で、アプリケーションをホストするドメインを見つけて[ウェブサイトを作成] > [Laravel]の順にクリックします。
- [スケルトンをインストール]を選択して、[アプリケーションをインストール]をクリックします。
- スケルトンがインストールされたら、アプリケーションファイルを Plesk にアップロードする必要があります(たとえば、FTP または ファイルマネージャを使用)。デフォルトファイルは必要に応じて置き換えます。
リモート Git リポジトリからインストールする:
- Plesk にログインします。
- [ウェブサイトとドメイン]で、アプリケーションをホストするドメインを見つけて[ウェブサイトを作成] > [Laravel]の順にクリックします。
- [リポジトリからインストール]を選択します。
- アプリケーションのファイルが含まれるリモートリポジトリの URL を入力するか貼り付けます。
- このリモートリポジトリで認証が必要な場合は、このページに表示された公開鍵をリポジトリに追加します。
- [アプリケーションのインストール]をクリックします。
既存のアプリケーションをスキャンする:
- Plesk にログインします。
- [ウェブサイトとドメイン]で、アプリケーションをホストするドメインを見つけて[ホスティングと DNS]タブを開きます。
- [ホスティング] をクリックします。
- 「ドキュメントルート」の値を、アプリケーションの公開ディレクトリのパスに変更し(デフォルトでは
/httpdocs/public)、[保存]をクリックします。 - [ダッシュボード] タブに戻り、 [ウェブサイトを作成] > [Laravel] をクリックし、 [キャンセル] をクリックしてから、 [スキャン] をクリックします。
アプリケーションのファイルをアップロードまたは展開し、アプリケーションが Laravel Toolkit に登録されたら、このアプリケーションをホスティングするドメインのカードに[Laravel]ボタンが表示されます。

次のステップに進めます。
Artisan、Composer、Node.js コマンドを実行する
Laravel アプリケーションを管理するには、Artisan、Composer、Node.js コマンドの実行が必要になる可能性があります。Laravel Toolkit により、Plesk インターフェースからこれらのコマンドを簡単に実行できるため、シェルアクセスは必要ありません。
アプリケーションを正常に機能させるために、Artisan、Composer、Node.js コマンドを実行する必要があるかどうかわからない場合は、このアプリケーションの提供元である人または組織にお問い合わせください。
注釈: Node.js コマンドを実行するためには、無料の Node.js 拡張を Plesk サーバにインストールする必要があります。
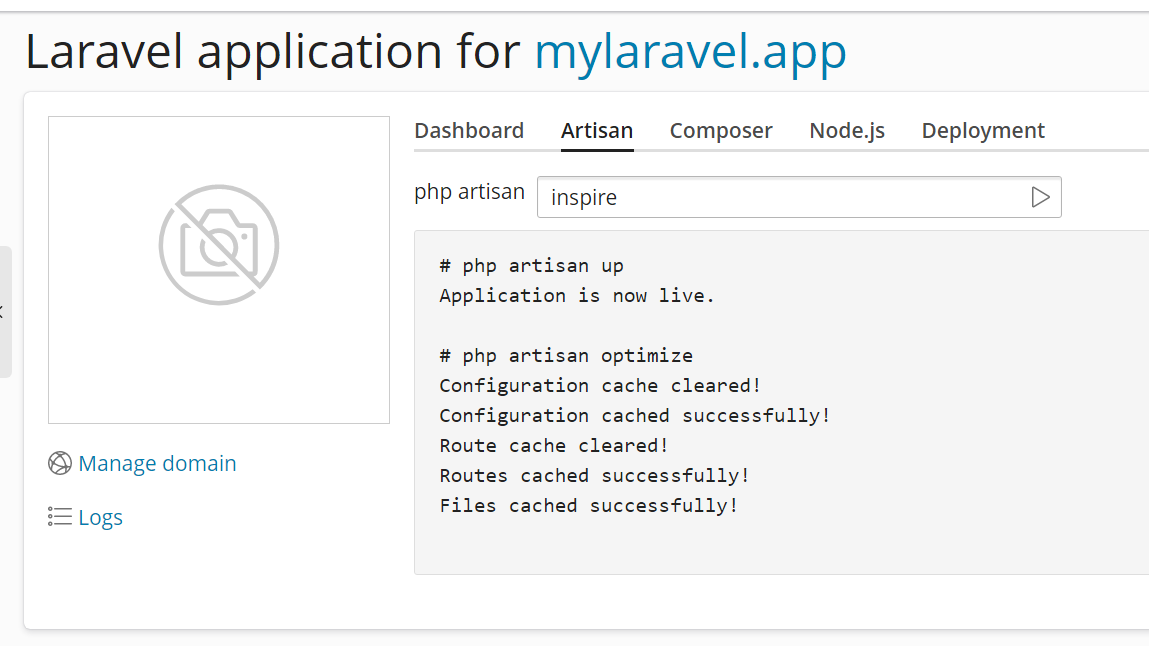
Artisan、Composer、または Node.js コマンドを実行する:
-
[ウェブサイトとドメイン]で、アプリケーションをホストしているドメインを見つけて[Laravel]をクリックします。
-
該当するタブに移動し、実行するコマンドを入力するかリストから選択して、Enter キーを押すか
 ボタンをクリックします。
注釈: Node.js コマンドを実行する際は、コマンドで必要な効果を得られるように、特定の Node.js バージョンやパッケージマネージャを指定する必要がある場合があります。どれを選択すべきかわからない場合は、このアプリケーションの提供元である人または組織にお問い合わせください。
 ボタンをクリックします。
アプリケーションのログファイルを表示する
Laravel アプリケーションは、実行中にログを個別のログファイルに記録します。このファイルの内容は Laravel Toolkit インターフェースから確認できるため、アプリケーションのモニタリングや発生した問題のトラブルシューティングが簡単になります。

アプリケーションのログを表示する:
- Plesk にログインします。
- [ウェブサイトとドメイン]で、アプリケーションをホストしているドメインを見つけて[Laravel]をクリックします。
- [ログ]をクリックします。
ドメインログブラウザが開き、Laravel ログのログエントリのみが表示されます。
アプリケーションのスケジュール済みタスクを表示する
Laravel では、cron などの外部スケジューラを使用する代わりに、アプリケーションのコード内でタスクをスケジュールできます。Laravel Toolkit により、現在設定されているスケジュール済みタスクを Laravel Toolkit インターフェースから直接表示したり、Laravel のスケジュール済みタスクを有効化または無効化したりできます。
注釈: Laravel Toolkit インターフェースから Laravel のスケジュール済みタスクを 追加、削除、編集することはできません。 アプリケーションのコード内でタスクをスケジュールする方法をご確認ください
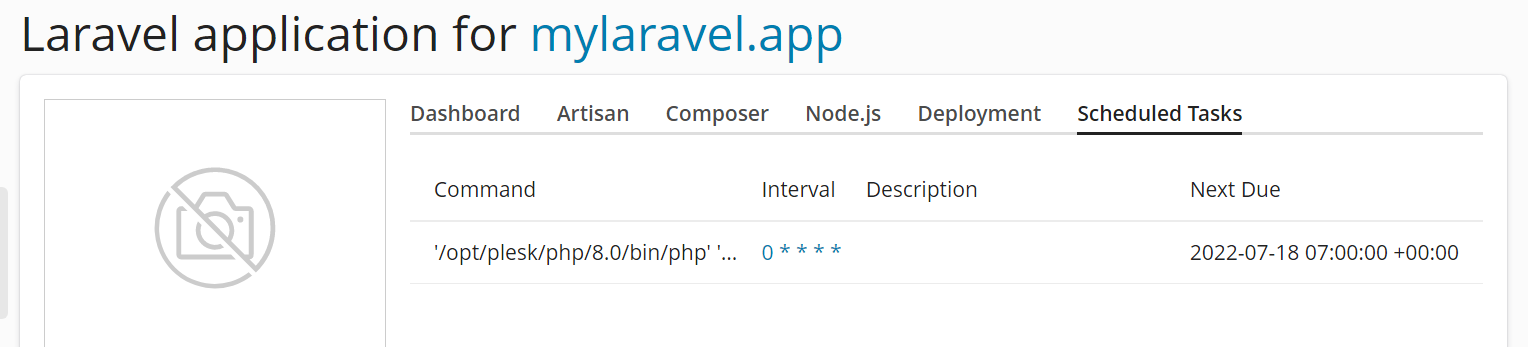
アプリケーションのスケジュール済みタスクを表示する:
- Plesk にログインします。
- [ウェブサイトとドメイン]で、アプリケーションをホストしているドメインを見つけて[Laravel]をクリックします。
- [スケジュール済みタスク]タブに移動します(このタブは、スケジュール済みタスクが 1 つ以上設定されている場合にのみ表示されます)。
注釈: アプリケーションのスケジュール済みタスクを有効化または無効化するためには、まず特定の処理を実行する必要があります。この処理は、Plesk for Linux と Plesk for Windows のどちらを使用しているかによって異なります。スケジュール済みタスクを実行したい Laravel アプリケーションをホストしているドメインごとに、この処理を行う必要があります。
スケジュール済みタスクの管理を有効にする:
- Plesk にログインします。
- アプリケーションをホストしているドメインが属する契約に対して、「スケジューラ管理」パーミッションを有効にします([パーミッション]タブにあります)。
- (Plesk for Linux)[ウェブサイトとドメイン]に移動し、アプリケーションをホストするドメインを探し、[ホスティングと DNS]タブに移動して[ホスティング]をクリックします。
- (Plesk for Linux)[SSH アクセス]の下で、[禁止]以外のいずれかのオプションを選択して、[保存]をクリックします。
これで、アプリケーションのスケジュール済みタスクを有効または無効にできます。
アプリケーションのスケジュール済みタスクを有効にする:
- Plesk にログインします。
- [ウェブサイトとドメイン]で、アプリケーションをホストしているドメインを見つけて[Laravel]をクリックします。
- [スケジュール済みタスク]トグルボタンをクリックして、[有効]と表示させます。
これで、Laravel アプリケーションのスケジュール済みタスクが有効になります。
環境変数を編集する
アプリケーションが適切に機能するためには、カスタム環境変数が 1 つ以上必要である可能性があります。あるいは、設定されている環境変数に応じて、アプリケーションの挙動が変わる可能性があります。アプリケーションを適切に機能させるために必要な環境変数があるかどうかわからない場合は、このアプリケーションの提供元である人または組織にお問い合わせください。
環境変数を編集する:
- Plesk にログインします。
- [ウェブサイトとドメイン]で、アプリケーションをホストしているドメインを見つけて[Laravel]をクリックします。
- [環境変数(.env)]の横の[編集]ボタンをクリックします。
- 必要に応じて環境変数を編集して、[更新]をクリックします。
更新された環境変数が有効になります。
アプリケーションをメンテナンスモードにする
アプリケーションでの作業中や更新作業中にウェブサイトの訪問者に各種エラーが表示されないようにするために、アプリケーションをメンテナンスモードに設定できます。アプリケーションをメンテナンスモードにすると、ウェブサイトの訪問者には「503 SERVICE UNAVAILABLE」エラーのページが表示されます。
アプリケーションをメンテナンスモードにする:
- Plesk にログインします。
- [ウェブサイトとドメイン]で、アプリケーションをホストしているドメインを見つけて[Laravel]をクリックします。
- [メンテナンスモード]トグルボタンをクリックして、[有効]が表示されるようにします。
Laravel アプリケーションはメンテナンスモードになります。
注釈: アプリケーションでの作業や更新が終了したら、忘れずにメンテナンスモードを終了させてください。
アプリケーションを更新する
Laravel アプリケーションのファイルが保存されている Git リポジトリがローカルとリモートのどちらであっても、アプリケーションのコードに加えた変更が Plesk サーバに伝達されていることを確認する必要があります。変更を手動で適用するか自動的に適用するかを選択できます。
アプリケーションを更新するタイミングを厳密に管理する必要がある場合、手動での更新をお勧めします。これにより、リポジトリでアプリケーションのコードにいかなる変更を加えても、準備が整うまでは Plesk サーバに変更が反映されなくなります。このアプローチの欠点は、アプリケーションを更新する必要があるたびに管理者が手作業で実施する必要があることです。
アプリケーションを手動で更新する:
- Plesk にログインします。
- [ウェブサイトとドメイン]で、アプリケーションをホストしているドメインを見つけて[Laravel]をクリックします。
- [デプロイメント]タブに移動して、[デプロイメントモード]の下で[手動]ラジオボタンをオンにします。
- [デプロイメントシナリオ]の下で、デプロイメント作業中に実行したくない手順のチェックボックスをオフにしてから、[デプロイ]をクリックします。
Laravel Toolkit ですべてのデプロイメント手順を実行すると、アプリケーションと依存関係が更新されます。
アプリケーションのコードに加えた変更を Plesk サーバに自動で反映させたい場合、その方法は、アプリケーションのコードを保存している Git リポジトリがローカルかリモートかに応じて異なります。
アプリケーションを自動的に更新する(ローカルリポジトリ):
- Plesk にログインします。
- [ウェブサイトとドメイン]で、アプリケーションをホストしているドメインを見つけて[Laravel]をクリックします。
- [デプロイメント]タブに移動して、[デプロイメントモード]の下で[自動]ラジオボタンをオンにします。
- [デプロイメントシナリオ]の下で、デプロイメント作業中に実行したくない手順のチェックボックスをオフにします。
これで、アプリケーションのコードが保存されているローカルリポジトリの master ブランチにコミットがプッシュされるたびに、アプリケーションと依存関係が更新されるようになります。
アプリケーションを自動的に更新する(リモートリポジトリ):
- Plesk にログインします。
- [ウェブサイトとドメイン]で、アプリケーションをホストしているドメインを見つけて[Laravel]をクリックします。
- ここで表示されるウェブフック URL をコピーして、リモートリポジトリに追加します。具体的な手順については、リポジトリプロバイダのマニュアルを参照してください。
- [デプロイメント]タブに移動して、[デプロイメントモード]の下で[自動]ラジオボタンをオンにします。
- [デプロイメントシナリオ]の下で、デプロイメント作業中に実行したくない手順のチェックボックスをオフにします。
これで、アプリケーションのコードが保存されているリモートリポジトリでウェブフックを起動するイベントが発生するたびに、アプリケーションと依存関係が更新されるようになります。
デプロイメントスクリプトを構成する
アプリケーションを正常に機能させるためには、デプロイメント中にサーバで特定のコマンドを実行する必要がある可能性があります。コマンドを手動で実行することを避けるには、アプリケーションが更新されるたびに実行されるデプロイメントスクリプトを設定できます。
アプリケーションを正常に機能させるために、デプロイメント中に何らかのコマンドを実行する必要があるかどうかわからない場合は、このアプリケーションの提供元である人または組織にお問い合わせください。
注釈: Plesk for Linux では、Laravel Toolkit インターフェースからデプロイメントスクリプトを編集する前に、SSH アクセスを有効にする必要があります。これは一度だけ行う作業です。
(Plesk for Linux) デプロイメントスクリプトの編集機能を有効にする:
- Plesk にログインします。
- [ウェブサイトとドメイン]に移動し、アプリケーションをホストするドメインを探し、[ホスティングと DNS]タブに移動して[ホスティング]をクリックします。
- [SSH アクセス]の下で、[禁止]以外のいずれかのオプションを選択して、[保存]をクリックします。
これで、Laravel Toolkit インターフェースでデプロイメントスクリプトを編集できるようになります。
デプロイメントスクリプトを編集する:
- Plesk にログインします。
- [ウェブサイトとドメイン]で、アプリケーションをホストしているドメインを見つけて[Laravel]をクリックします。
- [デプロイメント]タブに移動して、[スクリプトを編集]をクリックします。
- デプロイメントスクリプトを入力するか貼り付けてから、[更新]をクリックします。
デプロイメントスクリプトが有効になり、アプリケーションを更新するたびに実行されるようになります。
キューを管理する
Laravel のキューは、アップロードされたファイルの解析など、時間のかかるタスクをバックグラウンドで非同期に処理することを可能にします。アプリケーションがキューをサポートしている場合、Plesk でキューを有効にして、キューワーカープロセスを構成することができます。
キューを使用するには、契約でキューを有効にし、さらにキューワーカーが使用するデータベースを作成する必要があります。これは一度限りの手続きです。
Laravel のキューはさまざまなキューバックエンドを使用できますが、このガイドではバックエンドとして MySQL/MariaDB データベースを使用する場合のみを取り上げます。Plesk でキューを有効にする最も簡単な方法であり、ほとんどのユーザーにとって十分であるためです。その他のバックエンドを使用すると、アクセス時間の改善などの利点を得られるものの、実装と管理には専門知識が必要であり、追加コストが発生する可能性もあります。
キューを有効にする:
-
Plesk にログインして、アプリケーションをホストしているドメインを探します。
-
アプリケーションに対してスケジュール済みタスクを有効にします。これは、キューを機能させるために必要な作業です。
-
アプリケーションの Git プロジェクトリポジトリで、
composer.jsonファイルの "require" セクション に以下の行を追加します。"plesk/ext-laravel-integration": "^7.0"
注釈:
composer.jsonファイルの各セクションでは、最終行を除くすべての行の末尾をカンマにする必要があります。ローカルの Git リポジトリを使用する場合、この変更はファイルマネージャで行わないでください。代わりに、リポジトリに変更をコミットしてください。これは、次にアプリケーションをデプロイしたときに変更点が上書きされるのを避けるためです。
-
[Laravel]をクリックし、[デプロイメント]タブに移動して、[デプロイ]をクリックします。これにより、
composer.lockファイルの内容に変更が加えられます。これらの変更をリポジトリにコミットして、次にアプリケーションをデプロイするときに変更が上書きされるのを防ぎます。 -
変更をコミットした後で、もう一度[デプロイ]をクリックします。
-
(オプション)ドメインカードに戻り、[データベース]から[データベースを追加]をクリックします。
注釈: Laravel アプリケーションが既に MySQL/MariaDB データベースを使用している場合、そのデータベースを使用してキューを有効にできます。その場合、このステップと次のステップはスキップしてください。
-
ドメインカードに戻り、[Laravel]をクリックして、[環境変数(.env)]の横にある[編集]ボタンをクリックします。
-
.envファイルに次の行を追加します。プレースホルダは、使用するデータベースについての情報に置き換えてください(今作成したものか、Laravel アプリケーションで既に使用中のもの):DB_CONNECTION=mysql DB_HOST=<database server IP address or hostname> QUEUE_CONNECTION=database DB_DATABASE=<database name> DB_USERNAME=<database user name> DB_PASSWORD=<database user password>
次に、[アップデート]をクリックします。
-
[Artisan]タブに移動して、<https://docs.plesk.com/en-US/obsidian/administrator-guide/website-management/laravel-toolkit.80010/#running-artisan-composer-and-node-js-commands>`次のコマンドをこの順序で実行します __。
queue:tablemigrate -
[ダッシュボード]タブに移動し、Laravel アプリケーションをメンテナンスモードから戻してから、[キュー]トグルボタンをクリックして「有効」と表示されるようにします。
これで、Laravel アプリケーションのキューが有効になります。
キューワーカープロセスがサーバリソースをより効率的に使用できるようにするために、Plesk にはさまざまな設定が用意されています。これらは主に、キューワーカープロセスが終了して、使用していたメモリを解放する際の条件に関するものです。
キューワーカープロセスを構成する:
-
Plesk にログインして、アプリケーションをホストしているドメインを探します。
-
[Laravel]をクリックして、[キュー]タブに移動します。
-
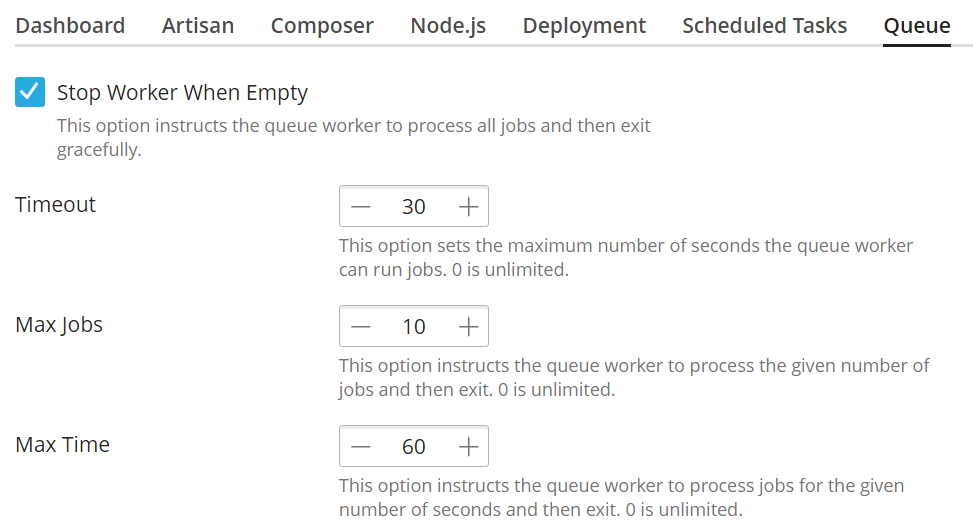
(オプション)[空の場合はワーカーを停止する]チェックボックスをオンにすると、キューにジョブがないときにワーカープロセスが停止するように設定されます。この場合、ワーカープロセスは 60 秒ごとに起動し、現在キューにあるすべてのジョブを処理した後、終了します。
[空の場合はワーカーを停止する]チェックボックスをオンにしない場合、ワーカープロセスはキューにジョブがなくても機能を続けます。
-
(オプション)カスタムの「Timeout」値を設定して、ジョブの実行時間が設定した値を超えた場合にワーカープロセスがエラー終了するように構成します。「Timeout」値は、Laravel アプリケーションによって作成される一般的なジョブが終了するのに十分な時間にしてください。
カスタムの「Timeout」値を設定しなければ、キュー内で個別のジョブが(ジョブのスタックなどを原因として)長時間実行されている場合でも、ワーカープロセスは終了しません。
ご用心: 値を低く設定しすぎると、処理時間が足りずにジョブが失敗することがあります(たとえば、大きなファイルをアップロードする場合など)。カスタムの「Timeout」値を設定した後でジョブが失敗するようになった場合は、値を大きくするか、デフォルト値(0:処理時間の制限なし)に戻すことを検討してください。
-
(オプション)カスタムの「最大ジョブ数」の値を設定して、特定の数のジョブを処理したら終了するようにワーカープロセスを構成します。
カスタムの「最大ジョブ数」の値を設定しないと、ワーカープロセスは大量のジョブを処理した後でも終了しなくなります。
-
(オプション)カスタムの「最大時間」の値を設定して、実行時間が特定の時間(秒単位)に達したら終了するようにワーカープロセスを構成します(ワーカープロセスはジョブの処理中は終了しません)。
カスタムの「最大時間」の値を設定しないと、ワーカープロセスは処理時間が長時間になっても実行を続けます。
キューワーカープロセスの構成が完了し、サーバのリソースをより効率的に使用するようになりました。
ジョブはさまざまな理由により失敗する可能性があります。Plesk は失敗したジョブをトラッキングしており、ユーザーが再開または破棄することができます。
失敗したジョブを表示、再開、却下する:
- Plesk にログインして、アプリケーションをホストしているドメインを探します。
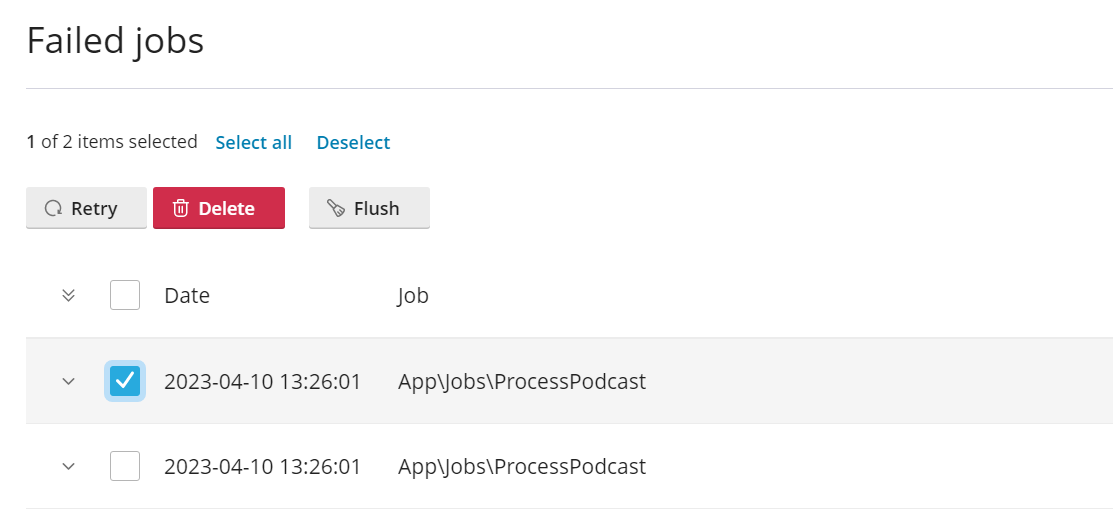
- [Laravel]をクリックして[キュー]タブに移動してから、[失敗したジョブを表示]をクリックして失敗したジョブのリストを表示します。
- (オプション)失敗したジョブを 1 つ以上選択し、[再試行]をクリックして再開します。
- (オプション)失敗したジョブを 1 つ以上選択し、[削除]をクリックしてリストからそのジョブを削除します。
- (オプション)[フラッシュ]をクリックして、失敗したすべてのジョブをリストから削除します。
失敗したジョブが再開または却下されます。