Security.txt 標準の遵守
security.txt は、サービス所有者にセキュリティの脆弱性を報告するための標準として広く普及しています。 security.txt の主な目的は、Plesk ドメインで脆弱性を発見したときに、クライアントとセキュリティリサーチャーの両方が簡単に連絡できるようにすることです。
バージョン 18.0.62 以降、Plesk Obsidian はこの標準に完全に対応しています。
- Plesk サーバでホストされているすべてのドメインに対して
security.txtファイルが生成されます。 - Plesk は、
security.txtファイルが一度作成され、機能が有効になると、その後も継続的に管理します。 - Plesk はドメインのカスタム
security.txtファイルを考慮し、このドメインにはサーバファイルのセキュリティポリシーを適用しません。 - Plesk はファイルの有効期限を自動的に更新します。
Plesk サーバで security.txt に対応するには:
-
拡張がインストールされたら、 [開く] をクリックします。
-
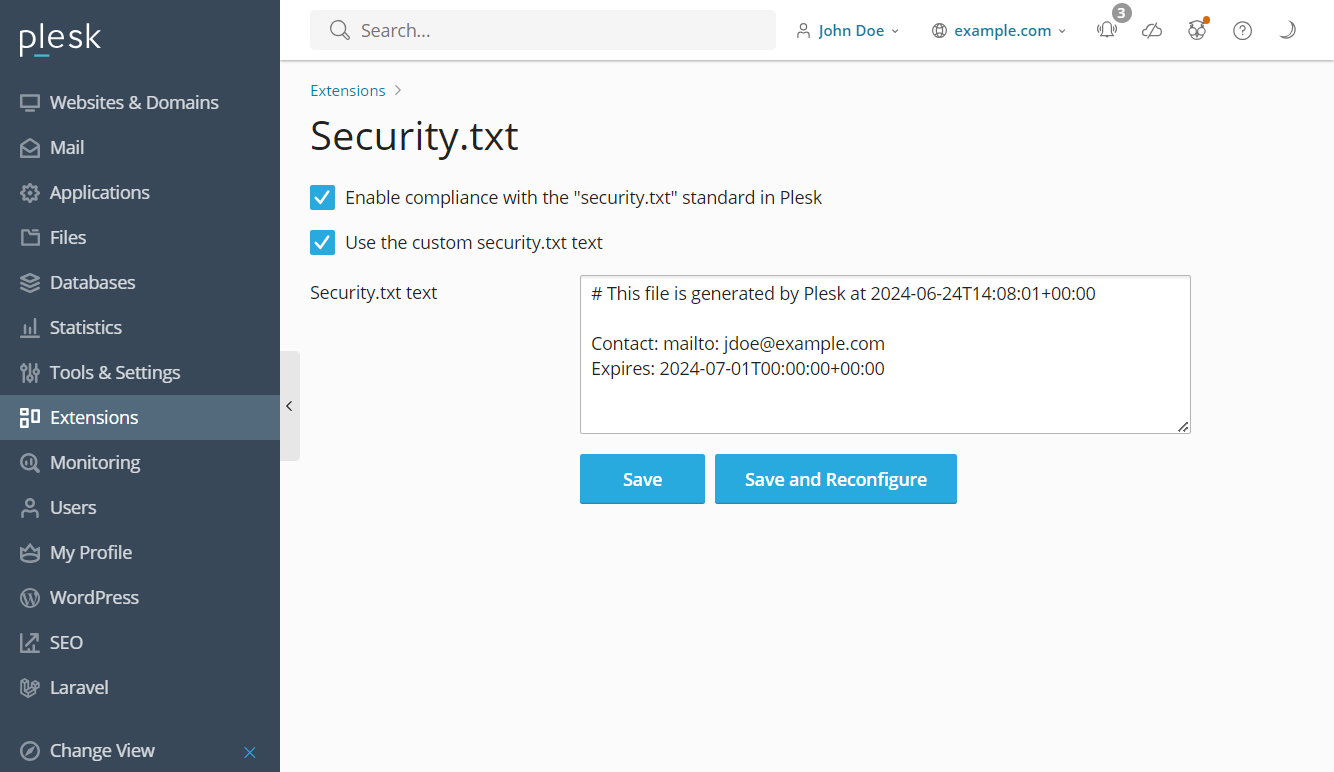
Select the "Enable compliance with the "security.txt" standard in Plesk" checkbox.

-
(オプション) Plesk によって生成されたデフォルトの
security.txtファイルを変更するには、[Use the custom security.txt text] (カスタムの security.txt テキストを使用する) チェックボックスをオンにして、表示される [Security.txt text] (security.txt テキスト) フィールドに必要な変更内容を指定します。コマンドラインからファイルを変更することもできます。 -
次のいずれかをクリックして変更を保存します。
-
[Save] (保存) をクリックすると、構成が保存され、後で変更を手動で適用できます。これにより、たとえば、変更に応じてドメインを再構成する時間の猶予をクライアントに与え、起こりうる問題を回避することができます。
plesk repair webCLI コマンド を実行することで、サーバを手動で再構成できます。 - [Save and Reconfigure] (保存して再構成) をクリックすると、変更が適用され、今すぐ Plesk サーバが再構成されます。
Plesk サーバが security.txt に対応するようになります。
コマンドラインユーティリティを使用する
plesk ext security-txt-plesk コマンドラインユーティリティを使用して、security.txt の構成を更新できます。このユーティリティは、以下のコマンドを受け付けます。
-
--help- 利用可能なすべてのsecurity-txt-pleskコマンドを出力します。 -
--status- Pleskサーバがsecurity.txtポリシーを使用しているかどうかを示します。デフォルトのsecurity.txtポリシーを有効にしている場合は、value: onが返されます。カスタムのsecurity.txt``ポリシーを有効にしている場合、またはカスタムファイルパスを使用している場合は、 ``value: customが返されます。 -
--enable- Plesk サーバ上のすべてのドメインでデフォルトのsecurity.txtポリシーを使用するように設定します。これにより、カスタムファイルパスと拡張メニューの [Use the custom security.txt text] オプションが無効になります。 -
--disable- Plesk サーバ上のすべてのドメインがすべてのsecurity.txtポリシーを無視するように設定します。 -
-
-path-security.txtファイルの新しいファイルパスを設定します。security.txtファイルの新しいパスを設定するには、まず新しいファイルの場所にsecurity.txtファイルが存在する必要があります。 -
注釈:
このコマンドを実行するには、まず [Native security.txt compliance] 拡張メニューで [Use the custom security.txt text] オプションを有効にする必要があります。次に、
--reconfigure-allコマンドを含める必要があります。たとえば、security.txtファイルにカスタムsecurityディレクトリを使用するには、新しいファイルとディレクトリを作成してから、次のコマンドを使用します:plesk ext security-txt-plesk -path /security/security.txt --reconfigure-all
-
-
--reconfigure-all- Plesk サーバ上のすべてのドメインが更新され、新しいsecurity.txt構成が使用されるようになります。