Installing Plesk on IONOS Cloud
In this topic, you will learn how to install Plesk on an IONOS Cloud virtual machine (VM) using Plesk images.
Prepare the IONOS Cloud Instance for installing Plesk
Ensure that you already created a data center on IONOS before you begin.
-
Log in to the IONOS Cloud Platform and open your Virtual Data Center.
-
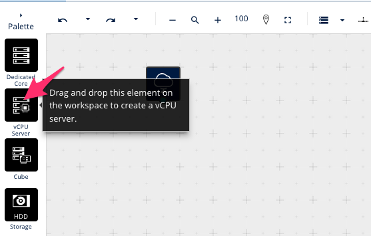
Select vCPU server and drag and drop it into your workspace to create the VM.

-
Choose to either install Plesk with a QCOW image you uploaded or use the Plesk installer.
Install Plesk with a pre-installed QCOW image
Примечание: If you want to use the Plesk installer, read the Install Plesk with the Plesk Installer section.
-
Upload an official Plesk image to the IONOS Cloud Platform. If you need help uploading the file, read the IONOS Cloud Platform Private Images documentation.
-
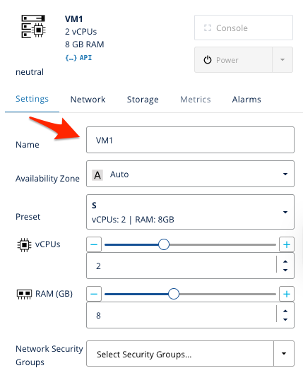
Select your new VM and the Inspector pane will appear. Enter a name for your VM in the Name text box.
-
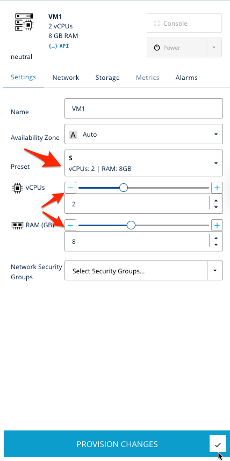
Select a preset configuration, or configure your VM manually.
Make certain that your VM meets the following requirements:
Type RAM Disk Space Linux 1 GB and 1 GB swap 20 GB Windows 2 GB 32 GB -
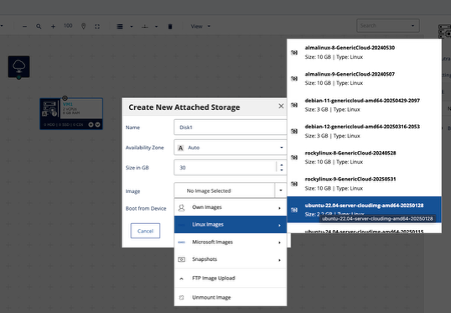
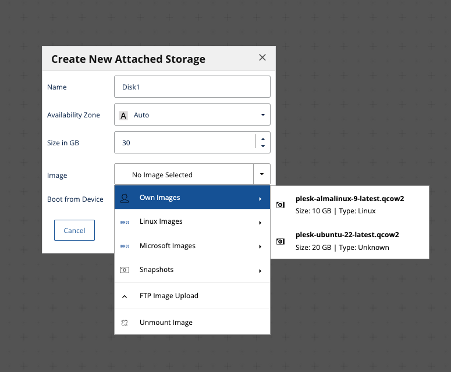
Select the Storage tab and then click either HDD or SDD to configure the storage for your VM. The Create New Attached Storage window will appear.
-
Enter a Name for your storage in the Name text box, and then set a size in the Size in GB text box.
-
In the Image menu, select Own Images, then select one of your uploaded Plesk images.
-
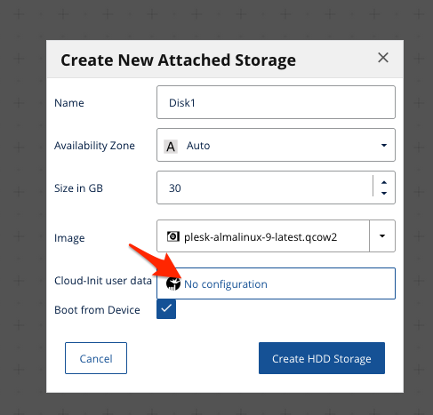
Click the Cloud-init user data text box to enter your public SSH key. This allows you to log into your VM via SSH.
-
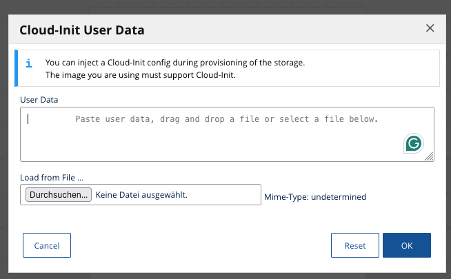
Enter your user data and then click OK. It might resemble the following example:
#cloud-config
ssh_pwauth: True
users:
- name: root
ssh_authorized_keys:
- ssh-rsa YOUR_PUBLIC_SSH-KEY
-
Click Create HDD Storage or Create SDD Storage to finish storage creation.
-
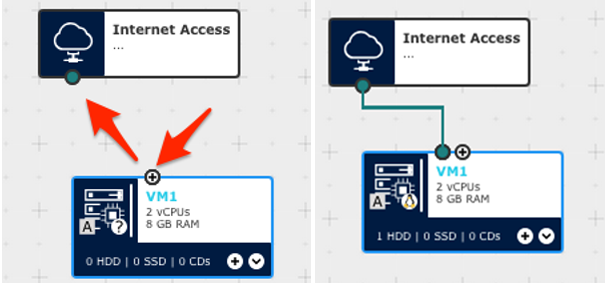
Connect your VM to the Internet. To do this, draw a line from the VM to Internet Access.
-
Click Provision Changes to complete the setup of your VM.
-
Connect to your VM via SSH.
-
Generate the Plesk login URL with the following command:
plesk login -
Paste the generated URL into your web browser. This will cause Plesk to initialize. Enter your contact information, admin password, and license to use your installation.
Install Plesk with the Plesk Installer
Примечание: If you want to use a Plesk QCOW image, read the Install Plesk with a pre-installed QCOW image section.
-
Select your new VM and the Inspector pane will appear. Enter a name for your VM in the Name text box.
-
Select a preset configuration, or configure your VM manually.
Make certain that your VM meets the following requirements:
Type RAM Disk Space Linux 1 GB and 1 GB swap 20 GB Windows 2 GB 32 GB -
Select the Storage tab and then click either HDD or SDD to configure the storage for your VM. The Create New Attached Storage window will appear.
-
Enter a Name for your storage in the Name text box, and then set a size in the Size in GB text box.
-
In the Image menu, select Linux Images or Microsoft Images, then select an operating system.
-
Set a root or Administrator password and select an SSH key.
-
Click Create HDD Storage or Create SDD Storage to finish storage creation.
-
Connect your VM to the Internet. To do this, draw a line from the VM to Internet Access.
-
Click Provision Changes to complete the setup of your VM.
-
Log in to your VM via SSH.
-
Install Plesk on your server.