Laravel Toolkit
概要: Laravel Toolkit 是一个免费的Plesk扩展,您可以用来简化与托管Laravel应用程序相关的日常任务。
在本主题中,您将学习如何在Plesk中上传、配置和运行 Laravel 应用程序。注意,本主题假设您已经准备好应用程序,或者正在计划创建应用程序。这并不是关于如何创建Laravel 应用程序的指南。
前提条件
在您可以托管Laravel 应用程序之前,必须在Plesk服务器上安装免费的`Laravel Toolkit 扩展<https://www.plesk.com/extensions/laravel/>`__:
- 如果您是Plesk管理员,请 从扩展目录安装扩展。
- 否则,请联系您的主机提供商,并要求他们为您安装该扩展。
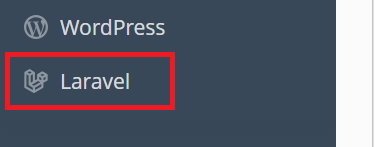
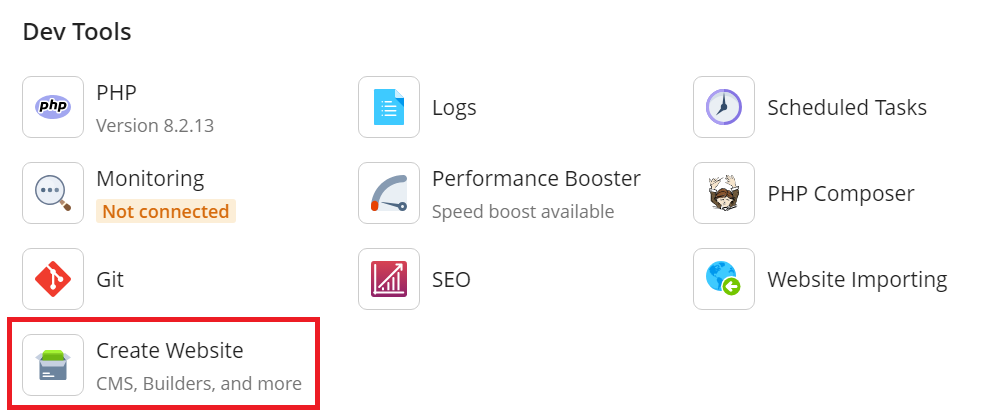
Once the extension is installed, you are ready to begin. You will see the Laravel button in the Navigation Pane, and also in the “Create Website” drawer on the domain cards of all your domains.
更新您的应用程序
在配置和运行应用程序之前,您需要将其上传到Plesk服务器,并在Laravel Toolkit中将其注册。有三种方法可实现:
- 创建 Laravel 框架。如果您的应用程序存储在计算机上的文件夹或压缩文件中,或者您希望从头创建应用程序,Laravel Toolkit 可以创建必要的目录结构,还可以创建本地Git repository。
- 从远程 Git repository 安装。如果您的应用程序存储在远程repository中,那么您可以将其部署到Plesk服务器上。
- 扫描现有的应用程序。如果您已经将您的应用程序上传到Plesk,您可以通过扫描方式在 Laravel Toolkit 中注册您的应用程序。
注解: 要能够创建Laravel 框架或从远程 Git repository 进行安装,必须在Plesk服务器上安装免费的`Git 扩展 <https://www.plesk.com/extensions/git/>`__。
创建 Laravel 框架:
- 登录到 Plesk。
- 转到 网站与域名 找到将托管您的应用程序的域名,然后单击 创建网站 > Laravel。
- 选择“安装框架”,然后单击**安装应用程序**。
- 一旦安装了框架,您需要将应用程序文件上传到Plesk(例如,使用 FTP 或 文件管理器),必要时替换默认文件。
从远处 Git repository 安装:
- 登录到 Plesk。
- 转到 网站与域名 找到将托管您的应用程序的域名,然后单击 创建网站 > Laravel。
- 选择 “从远程 repository 安装”。
- 键入或粘贴包含应用程序文件的远程 repository 的URL。
- 如果远程repository需要验证,请将您在此页面上看到的公钥添加到repository中。
- 点击 安装应用程序。
扫描现有应用程序:
- 登录到 Plesk。
- 转到 网站与域名,找到将托管您的应用程序的域名,然后打开”主机与 DNS” 标签。
- Click Hosting.
- 更改“文档根目录”值以匹配应用程序的公共目录(默认情况下,
/httpdocs/public)的路径,然后单击**保存**。 - Go back to the “Dashboard” tab, click Create Website > Laravel, click Cancel, and then click Scan.
Once you have uploaded or deployed your application’s files and your application has been registered in Laravel Toolkit, the Laravel button will appear on the card of the domain hosting your application.

现在可以继续下一步。
运行 Artisan、Composer 和 Node.js 命令
要管理Laravel应用程序,您可能需要运行Artisan、Composer 和/或 Node.js 命令。通过Laravel Toolkit 可以方便地从Plesk界面运行这些命令,而不需要访问shell。
如果您不确定是否需要运行任何Artisan、Composer 和/或 Node.js 命令才能使应用程序正常运行,请咨询向您提供该应用程序的人员或机构。
注解: 若要能够运行 Node.js 命令,必须在 Plesk服务器上安装免费的 Node.js 扩展。
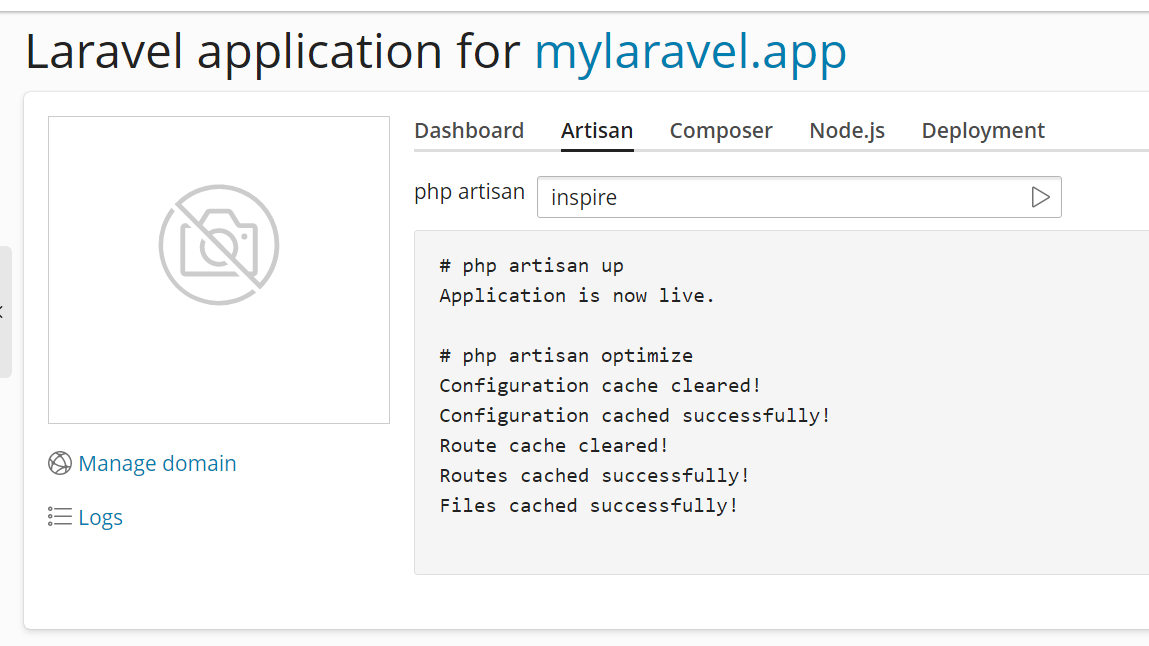
运行 Artisan、Composer 或 Node.js 命令:
-
转到 网站与域名 找到托管您的应用程序的域名,然后单击 Laravel。
-
转到相应的选项卡,键入您要运行的命令或从列表中选择一个,然后按Enter键或单击|image-ui-lib-start| 按钮。
注解: 在运行Node.js命令时,您可能需要指定一个特定的Node.js版本和/或程序包管理器,以使该命令达到预期的效果。如果您不确定该选择什么,请咨询向您提供该应用程序的个人或机构。
查看应用程序的日志文件
当它运行时,Laravel应用程序会将其日志写入一个单独的日志文件。您可以直接从Laravel Toolkit 界面看到该文件的内容,从而不管可能会出现什么问题时都能实现更容易地监控应用程序和故障排除。
查看应用程序的日志文件:
- 登录到 Plesk。
- 转到 网站与域名 找到托管您的应用程序的域名,然后单击 Laravel。
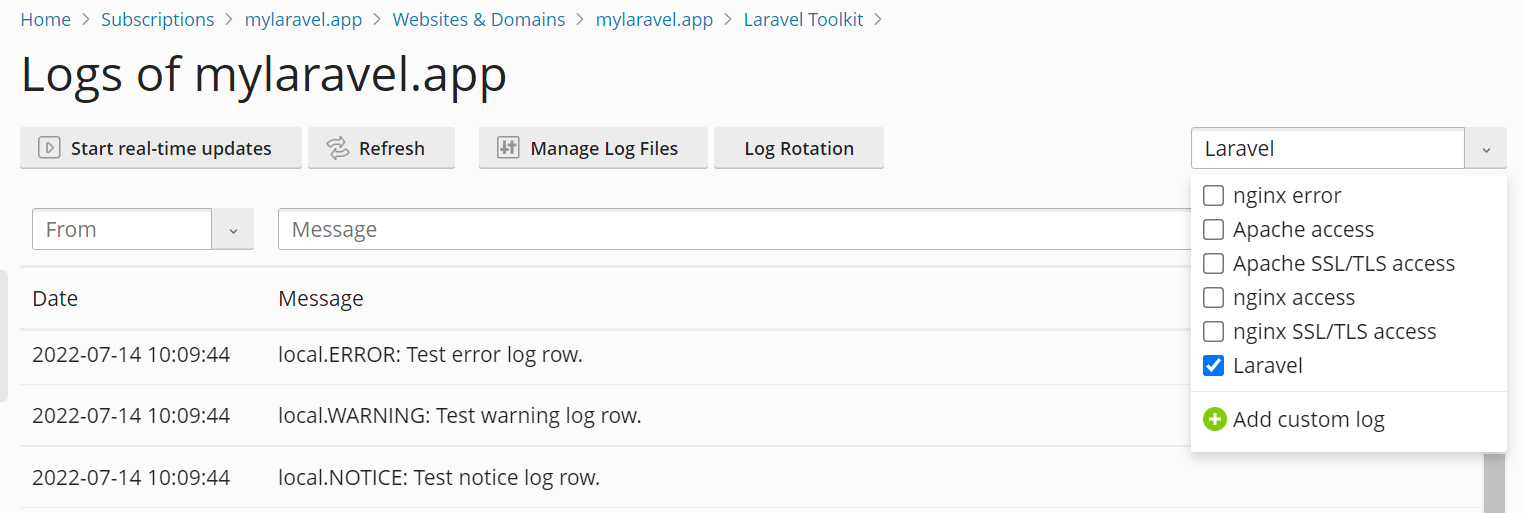
- 点击 日志。
这将打开 域名日志浏览器只显示来自Laravel日志的日志条目。
查看应用程序的计划任务
使用Laravel,您可以在应用程序的代码中计划任务,而不是使用外部计划程序,如cron。使用Laravel Toolkit,您可以直接从Laravel Toolkit界面看到所有当前配置的计划任务,还可以启用或禁用Laravel计划任务。
注解: 您无法从Laravel Toolkit 界面中添加、移除或编辑Laravel计划任务。了解如何在应用程序的代码内计划任务
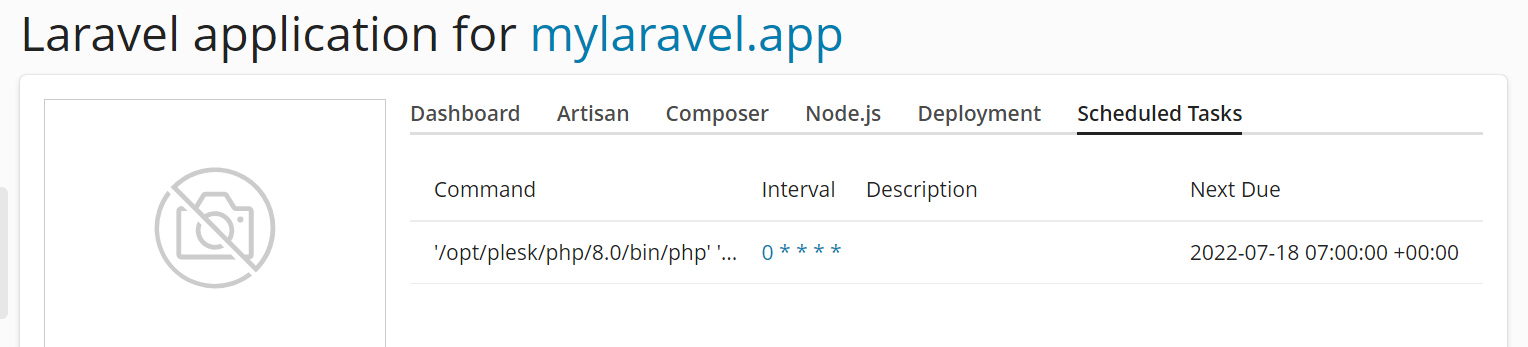
查看应用程序的计划任务:
- 登录到 Plesk。
- 转到 网站与域名 找到托管您的应用程序的域名,然后单击 Laravel。
- 转至“计划任务”选项卡(仅在配置了一个或多个计划任务时,该选项卡才可见)。
注解: 为了能够启用或禁用应用程序的计划任务,您需要首先执行一个特定的操作,具体操作取决于您运行的是 Plesk for Linux 或 Plesk for Windows。您需要对每个托管要运行其计划任务的Laravel应用程序的域名执行此操作。
Enabling scheduled tasks management:
- 登录到 Plesk。
- Enable the “Scheduler management” permission (found on the “Permissions” tab) for the subscription to which the domain hosting your application belongs.
- (Plesk for Linux) 转到 网站与域名,找到托管您的应用程序的域名,转到 “主机与 DNS” 标签,然后点击 主机。
- (Plesk for Linux) Under “SSH Access”, select any option other than “Forbidden”, and then click Save.
您现在可以启用或禁用应用程序的计划任务。
启用应用程序的计划任务:
- 登录到 Plesk。
- 转到 网站与域名 找到托管您的应用程序的域名,然后单击 Laravel。
- 点击“计划任务”切换按钮,以显示“启用”。
现在已为Laravel应用程序启用了计划任务。
编辑环境变量
您的应用程序可能需要一个或多个自定义环境变量才能正常运行,或者可能会根据已设置的环境变量更改其行为。如果您不确定应用程序是否需要任何环境变量才能正常运行,请咨询向您提供该应用程序的人员或机构。
编辑环境变量:
- 登录到 Plesk。
- 转到 网站与域名 找到托管您的应用程序的域名,然后单击 Laravel。
- 点击 “环境变量 (.env)” 旁的 编辑 按钮。
- 根据需要编辑环境变量,然后单击**更新**。
更新后的环境变量现在已经生效了。
将您的应用程序置于维护模式
为了防止网站访问者在您正在工作或更新您的应用程序时看到错误,您可以将其置于维护模式。当您的应用程序处于维护模式时,网站访问者将看到一个页面显示“503服务不可用”的错误。
将您的应用程序置于维护模式:
- 登录到 Plesk。
- 转到 网站与域名 找到托管您的应用程序的域名,然后单击 Laravel。
- 点击**维护模式** 切换按钮,以显示“启用”。
您的 Laravel 应用程序现在处于维护模式。
注解: 在完成工作或更新后,不要忘记将应用程序退出维护模式。
更新您的应用程序
不管您的Laravel应用程序文件是在本地或远程Git repository中存储,都需要确保将对应用程序代码所做的更改传播到Plesk服务器。您可以选择手动或自动部署更改。
如果您需要精确控制更新应用程序的时间,我们建议手动更新。这样,在您准备好进行更改之前,对repository中的应用程序代码所做的更改都不会传播到Plesk服务器。这种方法的缺点是,每次需要更新应用程序时,您都必须执行手动操作。
手动更新您的应用程序:
- 登录到 Plesk。
- 转到 网站与域名 找到托管您的应用程序的域名,然后单击 Laravel。
- 转到“部署”选项卡,在“部署模式”下,选择“手动”单选按钮。
- 在“部署方案”下,清空与不希望在部署期间运行的步骤对应的复选框,然后单击**部署**。
一旦Laravel Toolkit运行完了所有的部署步骤,您的应用程序及其依赖项将会被更新。
如果您希望将对应用程序的代码所做的更改自动传播到Plesk服务器,具体方法取决于应用程序的代码是存储在本地还是远程Git repository中。
自动更新应用程序(本地repository):
- 登录到 Plesk。
- 转到 网站与域名 找到托管您的应用程序的域名,然后单击 Laravel。
- 进入“部署”选项卡,并在“部署模式”下选择“自动”单选按钮。
- 在“部署方案”下,清空与不希望在部署期间运行的步骤对应的复选框。
现在,每次commit 操作被push到存储应用程序代码的本地 repository的 master branch时,您的应用程序及其依赖项都将被更新。
自动更新应用程序(远程repository):
- 登录到 Plesk。
- 转到 网站与域名 找到托管您的应用程序的域名,然后单击 Laravel。
- 复制您在此处看到的 webhook URL,然后将其添加到远程repository中。有关具体说明,请参见repository提供商的文档。
- 进入“部署”选项卡,并在“部署模式”下选择“自动”单选按钮。
- 在“部署方案”下,清空与不希望在部署期间运行的步骤对应的复选框。
现在,每次触发webhook的事件发生在存储应用程序代码的远程repository 中时,您的应用程序及其依赖项都将被更新。
配置部署脚本
您的应用程序可能需要在部署期间在服务器上运行某些命令才能正常运行。为了避免手动运行这些命令,您可以配置每次更新应用程序时都运行的部署脚本。
如果您不确定应用程序在部署期间是否需要运行任何命令才能正常运行,请咨询向您提供该应用程序的人员或机构。
注解: 在Plesk for Linux中,您需要先启用SSH访问,然后才能从Laravel Toolkit界面编辑部署脚本。您只需执行一次此操作。
(Plesk for Linux) Enabling the ability to edit the deployment script:
- 登录到 Plesk。
- 转到 网站与域名,找到托管您的应用程序的域名,转到 “主机与 DNS” 标签,然后点击 主机。
- 在“SSH 访问”下,选择除“禁止”以外的任何选项,然后单击**保存**。
现在可以从 Laravel Toolkit 界面编辑部署脚本。
编辑部署脚本:
- 登录到 Plesk。
- 转到 网站与域名 找到托管您的应用程序的域名,然后单击 Laravel。
- 转到“部署”选项卡,然后单击**编辑脚本**。
- 键入或粘贴部署脚本,然后单击**更新**。
部署脚本现在已生效,并且将在每次更新应用程序时运行。
Managing Queues
Queues in Laravel make it possible to process time-consuming tasks, such as parsing an uploaded file, asynchronously in the background. If your application supports queues, you can enable them in Plesk to configure the queue worker process.
To use queues, you need to enable them for your subscription, and also to create a database for the queue worker to use. This is a one time procedure.
Laravel queues can use a variety of queue backends. However, in this guide we will only cover using a MySQL/MariaDB database as backend. This is the simplest way to enable queues in Plesk, and it should be sufficient for most users. Other backends may provide advantages, such as improved access times, but they require expertise to implement and maintain, and may also incur additional costs.
Enabling queues:
-
Log in to Plesk, and then locate the domain hosting your application.
-
Enable scheduled tasks for your application. This is necessary for queues to function.
-
In your application’s Git project repository, add the following line to the “require” section of the
composer.jsonfile:"plesk/ext-laravel-integration": "^7.0"
注解: In each section of the
composer.jsonfile, every line except the last one must end with a comma.If you use a local Git repository, do not make this change via File Manager. Instead, commit changes to the repository. This is to avoid the changes being overwritten the next time you deploy your application.
-
Click Laravel, go to the “Deployment” tab, and then click Deploy. This will result in changes being made to the contents of the
composer.lockfile. Commit those changes to the repository to avoid the changes being overwritten the next time you deploy your application. -
After committing the changes, click Deploy once again.
-
(Optional) Return to the domain card, click Databases, and then click Add Database.
注解: If your Laravel application is already using a MySQL/MariaDB database, you can use that database to enable queues. In that case, skip this step, and also the following step.
-
(Optional) Create a MySQL or MariaDB database, and a database user.
-
Return to the domain card, click Laravel, and then click the Edit button next to “Environment variables (.env)”.
-
Add the following lines to the
.envfile, replacing the placeholders with the information about the database you want to use (either the one just created, or the one already being used by your Laravel application):DB_CONNECTION=mysql DB_HOST=<database server IP address or hostname> QUEUE_CONNECTION=database DB_DATABASE=<database name> DB_USERNAME=<database user name> DB_PASSWORD=<database user password>
and then click “Update”.
-
Go to the “Artisan” tab, and then run the following commands, in this order:
queue:tablemigrate -
Go to the “Dashboard” tab, take your Laravel application out of maintenance mode, and then click the Queue toggle button so that it shows “Enabled”.
Queues are now enabled for your Laravel application.
To make the queue worker process use server resources more efficiently, there is a number of settings you can configure in Plesk. They mostly deal with conditions under which the queue worker process may exit, freeing the memory it has been using.
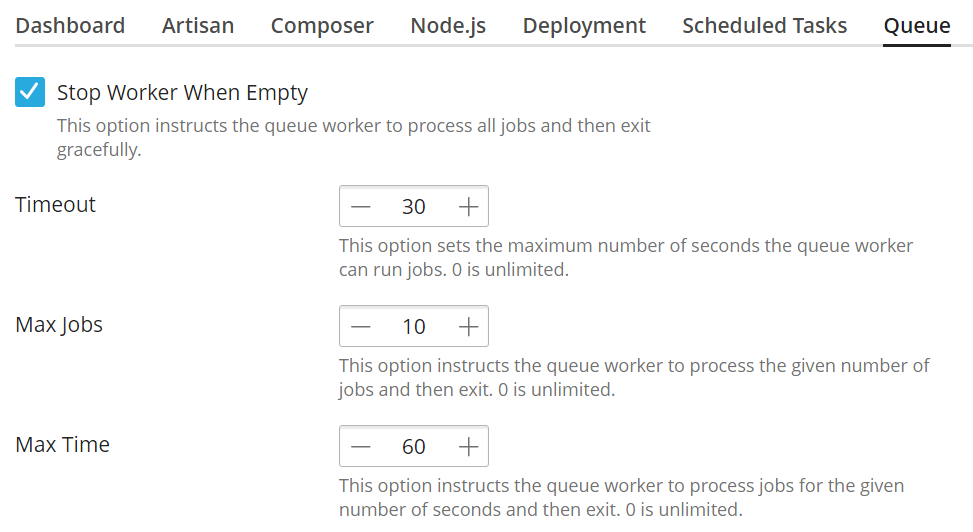
Configuring the queue worker process:
-
Log in to Plesk, and then locate the domain hosting your application.
-
Click Laravel, and then go to the “Queue” tab.
-
(Optional) Select the “Stop Worker When Empty” checkbox to configure the worker process to stop when there are no jobs in the queue. If you do, the worker process will start every 60 seconds, process all jobs currently in the queue, and then exit.
If you do not select the “Stop Worker When Empty” checkbox, the worker process will remain running even when there are no jobs in the queue.
-
(Optional) Set a custom “Timeout” value to configure the worker process to exit with an error if job has been running for a length of time exceeding the configured value. Make sure that the “Timeout” value allows enough time for a typical job created by your Laravel application to finish.
If you do not set a custom “Timeout” value, the worker process will not exit even if an individual job has been in the queue being processed for a long time (for example, because the job has become stuck).
警告: Setting too low a value may result in jobs failing because of insufficient time to process (for example, when uploading a large file). If you start experiencing failed jobs after setting a custom “Timeout” value, consider increasing it or returning the parameter to its default value (“0”, indicating no limit on job processing time).
-
(Optional) Set a custom “Max Jobs” value to configure the worker process to exit once it has processed a certain number of jobs.
If you do not set a custom “Max Jobs” value, the worker process will not stop, even if it has processed a large number of jobs.
-
(Optional) Set a custom “Max Time” value to configure the worker process to exit once it has been running for the specified number of seconds (the worker process will not exit while in the middle of processing a job).
If you do not set a custom “Max Time” value, the worker process will keep running even if it has been running for a long time.
The queue worker process has been configured and should now use server resources more efficiently.
Jobs may fail due to many reasons. Plesk keeps track of failed jobs, which you can restart or dismiss.

Viewing, restarting, and dismissing failed jobs:
- Log in to Plesk, and then locate the domain hosting your application.
- Click Laravel, go to the “Queue” tab, and then click Show failed jobs to see the list of failed jobs.
- (Optional) Select one or more failed jobs, and then click Retry to restart them.
- (Optional) Select one or more failed jobs, and then click Delete to remove them from the list.
- (Optional) Click Flush to remove all failed jobs from the list.
Failed jobs have now been restarted and/or dismissed.