添加與移除域名
If your hosting plan supports multiple domains, you can add new domains to the server easily. Before adding a domain like example.com, make sure it’s registered. If your hosting provider offers domain registration, you can do it from the Customer Panel. Otherwise, register the domain with an external registrar first.
In Plesk, you can configure two types of sites:
-
Second-level domain websites (like example.com), which can include:
Unique domain name and optional aliases.
Subdomains (for example, mail.example.com).
FTP accounts with directory-level access.
Content creation with Sitejet Builder.
Easy app deployment (CMS, blogs, shopping carts, and more).
SSL/TLS for secure data exchange.
Mail services and mailing lists.
Statistics on traffic.
-
Subdomains (third-level domains), which typically represent sections of an existing site. They support:
Separate document root.
FTP access.
Content creation with Sitejet Builder.
Easy app deployment.
SSL/TLS for secure data exchange.
Statistics on traffic.
添加更多域名
託管一個新的二級域名網站:
-
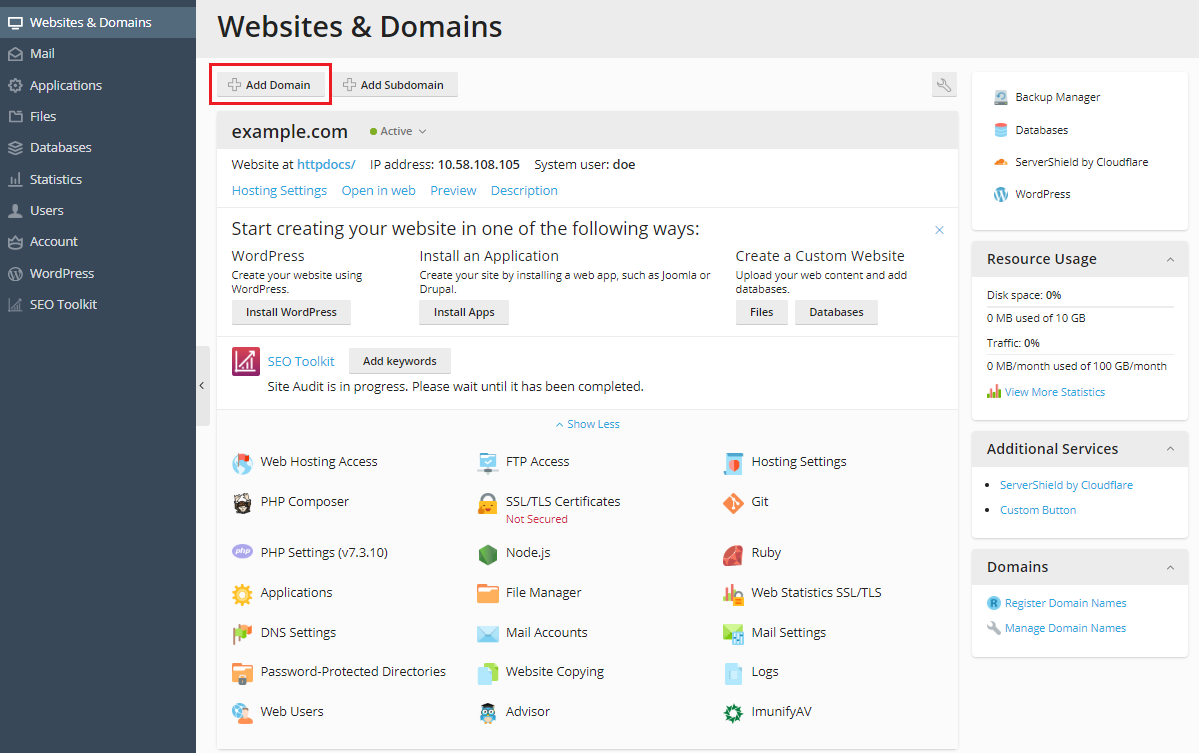
Go to Websites & Domains and click Add Domain

備註
The options available on the Add Domain screen may vary depending on your Plesk edition.
-
Choose one of the options for creating a website:
Blank website - Start with a simple placeholder page for your HTML or PHP site.
Upload files - Upload your own website files from your local computer.
Sitejet Builder - Create a website with our drag & drop website builder. Find out more at Sitejet Builder.
Deploy using Git - Pull your website files directly from a Git repository. Find out more at Git Support.
Wordpress - Set up a site running the latest WordPress version. Find out more at WP Toolkit.
Mail hosting - Create a new domain for mail hosting only.
-
Under the 「Select your domain name」 section, choose:
Registered domain name if you already have a domain. Enter the domain.
Temporary domain name if you do not have a registered domain name. Plesk generates a temporary domain name that you can use before you register and purchase a proper domain name.
-
Under the 「Webspace settings」 section, choose one of the following:
Create a new webspace and fill in the required details.
Select an existing webspace. In this case, choose the hosting type and its respective settings. Find out more at Hosting Types.
-
按一下 “添加網站” 。
現在在螢幕底部顯示新的域名。
如果您的帳號可更改主機設定,那麼您可點按新網站的域名查看或更改主機設定,可參照小節 更改主機設定 。
Based on the option you selected for creating your site, you can now start building it (for example with Sitejet Builder or by uploading your web content to the subscription of the new website, as described in the section Website Content).
備註
If Plesk cannot resolve your domain when you create it, you will see a warning message in your domain’s **DNS Settings** interface (Websites & Domains > Hosting & DNS > DNS). Connect the DNS settings related and your domain name with the domain name at the registrar’s side. To achieve this, enter the Plesk name server IP address into the respective NS record of the registrar. The instruction on how to obtain the IP is as follows: go to Websites & Domains > domain name > Hosting & DNS > DNS, find the NS record, and then find the A record corresponding to the NS record value.
例如,如果 NS 記錄是
example.com. NS ns.example.com*,找到帶有
ns.example.com的 A 記錄,如ns.example.com. A 192.0.2.12結果值,
192.0.2.12,就是您需要的 Plesk 域名伺服器 IP。
選擇一個域名視圖模式
The 「Websites & Domains」 screen looks differently (the layout, visible controls, and the overall UX) depending on the domain view mode you choose.
To choose the view mode, go to Websites & Domains, click Set view, and then choose:
In an expanded row view is an expandable list best suited if you have several domains and you want to have access to all available controls.
On a separate page view is good if you have a large number of domains (more than 100). However, not all necessary controls will be visible.
Adding a Domain Favicon
A domain favicon is a small image Plesk shows next to a domain name. You can see favicons on the following screens:
(For Power User view) Websites & Domains
(For Service Provider view) Domains and Subscriptions
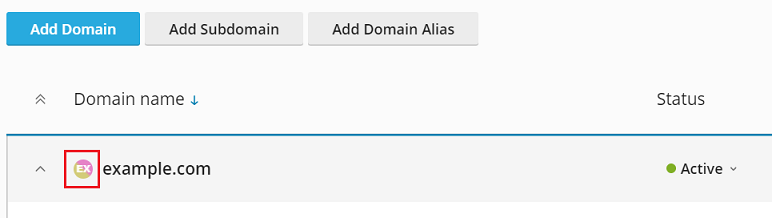
Once you create a domain, Plesk generates and shows a default favicon based on the first two characters of the domain name.
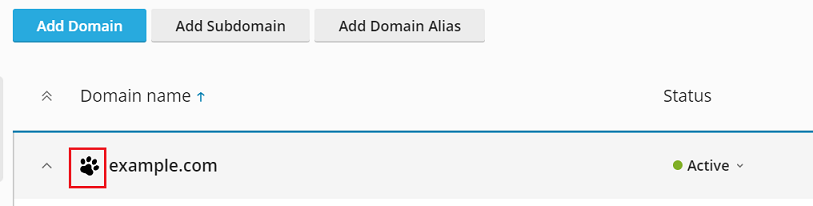
However, you can add your custom favicon, for example, the same one you use as your website favicon shown on the browser tab. Custom domain favicons help you to do the following:
Find the desired website more easily.
Tell one domain from another.
To add a Dynamic List domain favicon:
Choose a PNG, SVG, or ICO image you will use as the favicon.
-
Give the favicon image any of the following names:
favicon.svgfavicon-32x32.pngfavicon.pngfavicon-16x16.pngapple-touch-icon.pngfavicon.ico
-
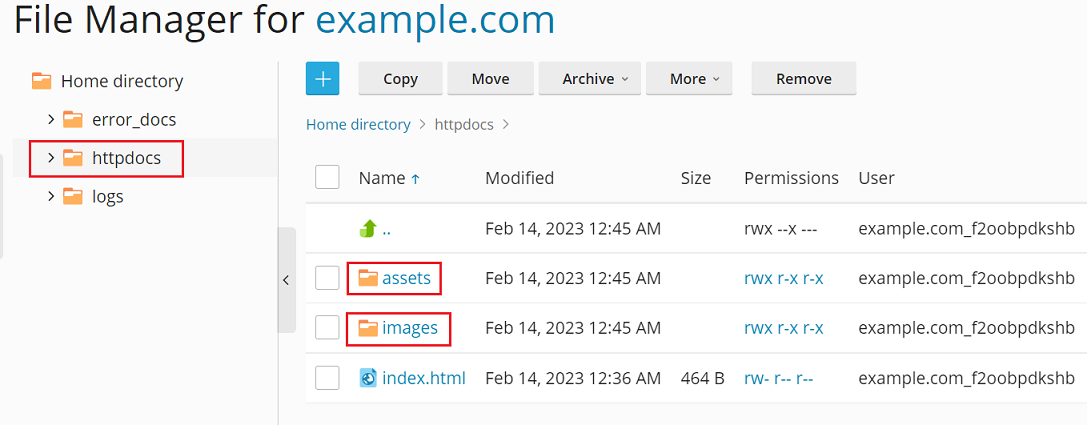
Using File Manager, upload the image to one of the following website directories:
The document root directory, which is, by default,
httpdocs(unless you set a custom document root)/imagesin the document root directory/assets/imagesin the document root directory
備註
It is essential that you upload a favicon to one of the directories mentioned above. To show a custom favicon, Plesk non-recursively searches for exact file name matches in the directories. If you upload the
favicon.svgfile to the/images/favicondirectory, Plesk will not find the image because/images/faviconis a subdirectory of the required directory.
You have uploaded your custom favicon image. To have Plesk show your favicon, wait a while or refresh the Plesk page.
備註
If your website runs on WordPress, you can create both the website and domain favicon at the same time using the Favicon by RealFaviconGenerator plugin. Plesk detects a website favicon created by the plugin wizard and automatically sets the favicon for the domain in Dynamic List view.
For Plesk to find a favicon, you need to correctly name a favicon image and put it into the designated directories as described in the procedure above.
However, you can set custom location and custom name for a favicon using the panel.ini file.
To set a custom location for the Dynamic List domain favicon:
-
Open the 「panel.ini」 file for editing, which is located here:
(Plesk for Linux)
/usr/local/psa/admin/conf/panel.ini(Plesk for Windows)
%plesk_dir%admin\conf\panel.ini
您還可以使用`Panel.ini Editor <https://www.plesk.com/extensions/panel-ini-editor/>`__ 擴展在Plesk介面中編輯該檔。
-
Add lines of the following pattern and save the file:
[domainManagement]
favicons.customPaths[] = path/to/custom_favicon_name.ico
If you set a custom location for a favicon, favicons generated by the Favicon by RealFaviconGenerator plugin will stop working. To bring them back, you need to add the default custom path for Favicon by RealFaviconGenerator:
[domainManagement]
favicons.customPaths[] = path/to/custom_favicon_name.ico ; your custom path added earlier
favicons.customPaths[] = /wp-content/uploads/fbrfg/favicon.ico ; default custom path for Favicon by RealFaviconGenerator
If you do not want to see any domain favicons (neither custom not default ones) in Dynamic List view, you can disable favicons.
To disable Dynamic List domain favicons:
-
Open the 「panel.ini」 file for editing, which is located here:
(Plesk for Linux)
/usr/local/psa/admin/conf/panel.ini(Plesk for Windows)
%plesk_dir%admin\conf\panel.ini
您還可以使用`Panel.ini Editor <https://www.plesk.com/extensions/panel-ini-editor/>`__ 擴展在Plesk介面中編輯該檔。
-
Add the following lines and save the file:
[domainManagement]
favicons.enabled = false
移動域名
您可以移動以下項:
現有或新訂閱的附加域名(訂閱第一個域名後創建的域名)。移動到新訂閱的附加域名將成為新訂閱的主域名。
現有或新訂閱的附加域名(訂閱第一個域名後創建的域名)。移動到新訂閱的附加域名將成為新訂閱的主域名。
移動包括您的域名和訂閱,以及那些屬於您客戶和代理商的域名和訂閱。
將附加域名移動到現有訂閱有助於執行以下操作:
在客戶和代理商之間重新分配域名。
從 Plesk 早期版本和其它主機面板遷移後,正確地分配域名。
將過渡網站與生產網站分開然後將網站從開發狀態移為生產狀態。
將錯誤創建的域名移動到正確的訂閱。
更有效的使用訂閱的資源。
向新訂閱移動附加域名可用於以下情況:
您要拆分一個帶有多個域名的訂閱以銷售其中一個域名。
某個訂閱接近于允許的資源限制。
您需要隔離安全受到威脅的域名。
通過將主域名移動到現有訂閱,您可以將多個訂閱合併為一個訂閱,這有助於實現以下操作:
更有效地使用資源。
管理一個訂閱而不是多個。
在遷移期間重新排列在訂閱之間分散的域名。
域名會連同其內容、設定檔、日誌檔、PHP 設定、APS 應用程式外加子域名和域名別名(如果有)一起移動到其它訂閱。
備註
您想要將域名移動到的目標訂閱必須有足夠的資源(網站、子域名、域名別名或郵件名稱)。
若要將域名移動到現有的或新的訂閱,請如下操作:
-
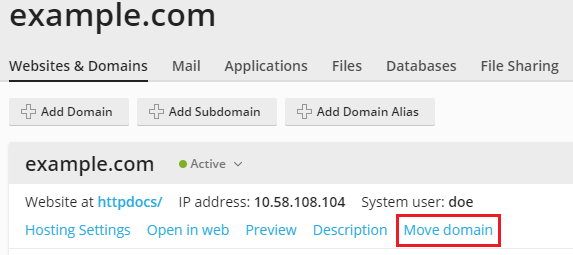
轉到 網站與域名,找到您要移動的域名並點按 移動域名。
-
選擇移動域名的位置:
To move it to an existing subscription, select an available subscription.
To move it to a new subscription, select Create a new subscription, specify the system username and the password (in the corresponding fields).
按一下 保存 。
移動完成後,您的域名將被分配給選定的訂閱。
已知問題和局限性
移動域名有許多問題和局限性。所有移動操作(附加域名和主域名)都可能有大部分的問題和局限性。而其它一些局限性會在僅移動附加域名或僅移動主域名時產生。
所有的移動操作
無法將域名移動到沒有主機的訂閱。
-
只有下列用戶才能將附加域名移動到新訂閱,將主域名移動到現有訂閱:
Plesk 管理員。
具有“在伺服器管理面板中創建訂閱以及在客戶面板中創建域名”許可權的代理商。
如果目標訂閱存在有相同文檔根目錄的域名,則無法移動域名。若要移動該域名,請更改其 「文檔根目錄」 值(在主機設定中)。
無法將有郵件服務的域名移動到沒有郵件服務的訂閱。
如果具有自訂的其它 Apache 或 nginx 指令的域名被移動到了另一個訂閱,則這些指令會被保留,您可能需要對其進行檢查。
-
如果您移動有以下兩項的域名:
已安裝的 web 應用程式(WordPress、Joomla! 或其它)
和設為應用程式管理員的 Plesk 其他的用戶,
其他的使用者將失去對應用程式的存取權限。應用程式管理員的登入名和密碼將被更改(您可以在應用程式設定中查看)。
如果您將帶有郵件用戶的域名移動到屬於其它所有者的訂閱,電郵地址將會與該郵件用戶分離。
如果您將域名移動到有不同 PHP 設定的訂閱,將會鎖定目標訂閱。
移動附加域名
-
以下項不可移動:
沒有父級域名的子域名。
沒有父級域名的域名別名。
移動安裝有 web 應用程式(WordPress、Joomla! 或其它)的域名不會自動移動應用程式的資料庫。這不會影響網站,但是您可能想要手動將資料庫移動到現在分配了域名的訂閱。
移動主域名
-
以下項不可移動:
其訂閱有附加域名的主域名(創建訂閱時創建的域名)。
有 web 用戶的主域名。
移動安裝了 Web 應用程式(WordPress、Joomla! 等)的主域名會自動移動應用程式的資料庫和資料庫使用者。
移動啟用計畫備份任務的主域名將關閉備份任務。
移動主域名將關閉為域名設定的匿名 FTP 存取。
移動有其他用戶的主域名會將用戶從源訂閱中分離出來,並將其移動到目標訂閱。
移動有計劃任務的主域名會將任務移動到目標訂閱。
移動一個有其他 FTP 用戶的主域名會將使用者移動到目標訂閱,並保留他們的主路徑。
刪除網站
當您從 Plesk 中刪除域名時,所有與相應網站相關的資料都會從伺服器中刪除。
備註
您的訂閱的主域名 - 就是為您帳戶創建的第一個域名(默認域名),無法被刪除;但是可被重命名。
要刪除域名,請執行下列步驟:
請轉到 網站與域名 ,並找到所要刪除的域名或子域名。
按一下 刪除網站 或 刪除子域名 。
請確認刪除並按一下 是的,移除 。
備註
從客戶面板中移除域名不會取消這些域名的註冊。如果您已經註冊了這些域名,以後仍可把這些域名用於您的網站。