WP Toolkit
summary: WP Toolkit is a single management interface you can use to create, configure, and manage WordPress® in Plesk.
In this topic, you will learn how to install WordPress on websites in Plesk and how to register existing WordPress websites in WP Toolkit. You will also learn how to automatically pre-install WordPress on newly created websites, how to create and manage sets of WordPress plugins and themes, how to install plugins and themes on or remove them from WordPress websites, how to back up and restore WordPress websites, and also how to configure a variety of WordPress settings, such as the default database table prefix.
- WP Toolkit can install, configure, and manage WordPress version 4.9 or later.
- To manage the content of a WordPress website, read our Website Content documentation.
Prerequisites
Before you can start using WP Toolkit, the WP Toolkit extension must be installed on the Plesk server:
- If you are the Plesk administrator, install the extension from the Extensions Catalog.
- Otherwise, contact your hosting provider and ask them to install the extension for you.
Once the extension is installed, you are ready to begin. You will see the WordPress option in the Navigation Pane.

The “WordPress” option will also appear in domains’ Create Website drawers.
Note: The WP Toolkit extension is free with the Web Pro and the Web Host Plesk editions and is available for a fee for the Web Admin edition.
Installing WordPress
To install a new WordPress installation, go to WordPress and click Install.
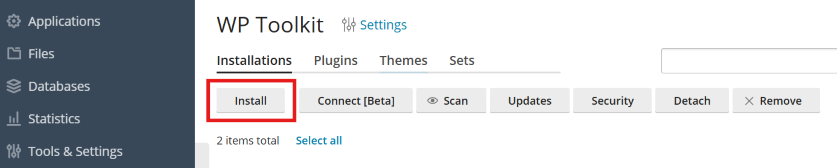
Here you can:
-
Install the latest version of WordPress with the default settings by clicking Install.
-
Change the default settings (including the desired WordPress version, the database name, the autoupdate settings, and more) and then click Install.

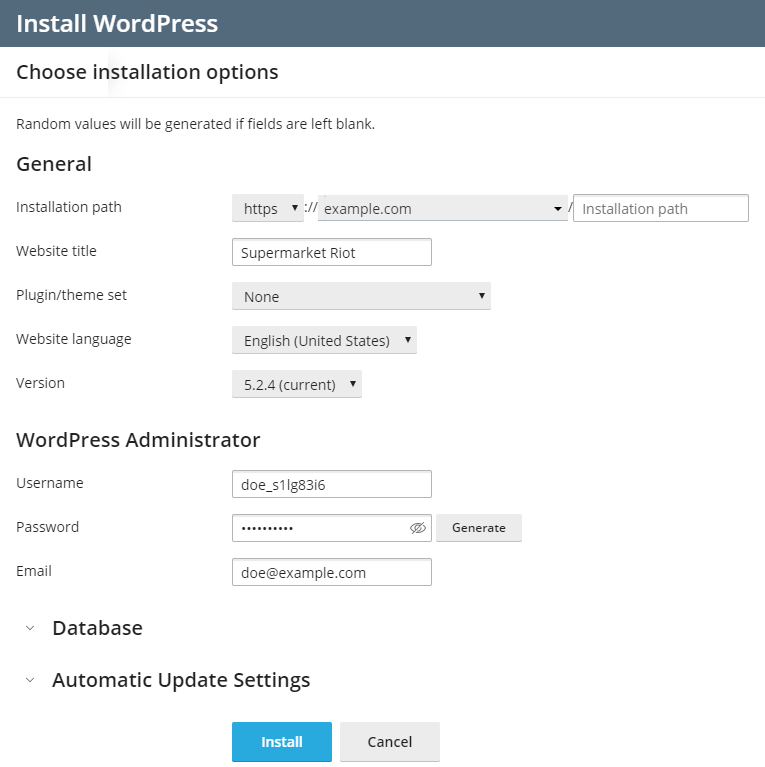
Note: To install WordPress, WP Toolkit retrieves data from
wordpress.org. By default, if WP
Toolkit cannot establish connection in 15 seconds, wordpress.org
is considered to be unavailable. If you experience connectivity
issues (for example, due to the poor quality of the Internet
connection), consider increasing the timeout value. To do so, go to
WordPress, click “Settings”, specify the desired value in
the “HTTP timeout for retrieving data from wordpress.org (sec)” field,
and then click OK.
WordPress is now installed. You can find the new installation in the list of existing WordPress installations in WordPress.

Adding Existing WordPress Installations to WP Toolkit
All WordPress installations added using WP Toolkit appear in WP Toolkit automatically. Those installed manually need to be attached to WP Toolkit. If you have upgraded from an earlier version of Plesk and you used WordPress, we recommend that you attach all existing WordPress installations to WP Toolkit.
To attach WordPress installations to WP Toolkit:
- Go to WordPress.
- Click Scan.
The WordPress installation is now attached. You can find it in the list of existing WordPress installations in WordPress.
Importing WordPress Installations
You can use the “Web Site Migration” feature to migrate WordPress websites owned by you but hosted elsewhere to Plesk. When you migrate a WordPress website, Plesk copies all its files and the database to your server. Once a website has been migrated, you can manage its WordPress configuration using WP Toolkit and its content with Plesk.
Selecting One Language for All WordPress Installations on the Server
When WordPress is installed via WP Toolkit, WP Toolkit selects the default WordPress language that matches the Plesk interface language of the user for whom WordPress is installed. For example, if you have a user whose Plesk interface language is Italian and you install WordPress for this user, Italian will be selected as the default WordPress language.
However, you may want to have one language for all WordPress installations on the server regardless of Plesk interface languages selected by users. To do so, go to WordPress > Settings, select the default WordPress installation language, and then click Save. The selected language will be the default one for all new WordPress installations on the server. Users remain free to choose a different language when they install WordPress if they want.
To return to the default way of selecting the WordPress language, go to WordPress > Settings, select “Same as user language” next to “Default WordPress installation language”, and then click Save.
Specifying One Database Table Prefix for All WordPress Installations on the Server
WP Toolkit generates random prefixes of the database tables for each new WordPress installation on your Plesk server. You may want to change this behavior and specify one default prefix that all new WordPress installations will use.
To specify the default prefix of the database tables:
-
Go to WordPress > Settings.
-
Next to “Default database table name prefix”, specify the desired prefix and then click Save.
Note: If you want to specify the
wp_prefix, change it a bit (for example,wporwp__). Thewp_prefix is considered insecure and conflicts with WP Toolkit security measures. If you specify this prefix, new WordPress installations will receive the “Danger” security status. Any form different from the exactwp_does not trigger the security warning.
To return to random prefixes, clear the “Default database table name prefix” field and then click Save.
Preinstalling WordPress on Users’ Domains
Watch the video tutorial
With Plesk WP Toolkit, you can have WordPress preinstalled on newly created domains. You can have predefined lists of plugins and themes installed on those domains. In addition, you can give your customers and resellers the ability to enable Smart Updates.
For every hosting plan, you can choose among the following options:
- Do not preinstall WordPress.
- Preinstall WordPress only.
- Preinstall WordPress with a predefined set of plugins and themes.
- Preinstall WordPress with or without a predefined set of plugins and themes and give ability to enable Smart Updates.
If you choose any of the last three options, WordPress will be automatically installed on the first domain of every subscription based on the hosting plan (main domain).
To preinstall WordPress on newly created domains:
- Go to Service Plans.
- On the “Hosting Plans” tab, either click Add a Plan to create a new plan, or click the name of an existing plan to edit it.
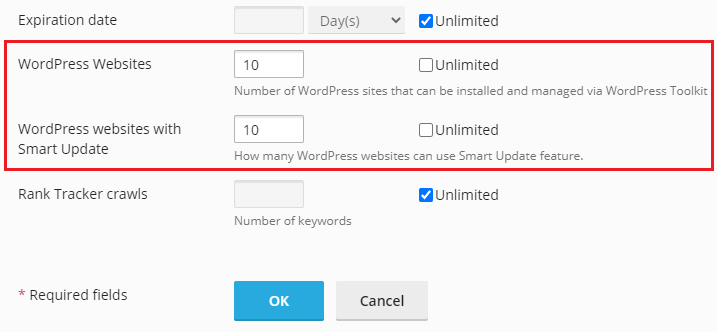
- If you have installed the Smart Updates license, customers and resellers can also enable Smart Update. You can specify the exact number of customers’ and resellers’ installations that can use Smart Update. To do so, clear the “Unlimited” checkbox next to “WordPress websites with Smart Update” and specify the desired limit. Regardless of the specified number, customers and resellers cannot use Smart Update on more WordPress installations than your Smart Updates license allows.
- Go to the “Additional Services” tab.
- Choose whether to preinstall WordPress only or WordPress with a
predefined set of plugins and themes:
- To install WordPress only, select “Install WordPress” under “WP Toolkit”.
- To install WordPress with a predefined set of plugins and themes, select “Install WordPress with the … set” under “WP Toolkit”.
- Click OK (or Update & Sync if editing an existing plan).
Now every time you create a new subscription based on this hosting plan, WordPress will be installed automatically on that subscription’s main domain. Existing subscriptions based on this hosting plan will not be affected.
Managing Sets
A set is a predefined list of WordPress plugins and themes. WP Toolkit comes with a number of preconfigured sets, and you can always create more. By default, every set you create becomes available to customers and resellers. You can use sets in the following ways:
-
You can preinstall sets on customers’ and resellers’ websites. To do so, configure a hosting plan to preinstall WordPress and choose to add a single set. When you do this, all plugins and themes included in the set will be installed together with WordPress.
-
You as well as your customers and resellers can select a set to install it together with WordPress when performing a custom installation. Customers and resellers can see which plugins and themes are included in a set.
Note: If you do not want customers and resellers to install sets on their WordPress installations, go to WordPress, click “Settings”, and clear the “Allow customers to use sets when they install WordPress” checkbox.
-
You can install sets on already existing websites that belong to you or your customers and resellers.
To create a set:
-
Go to WordPress, go to the “Sets” tab, and then click Create Set.
-
Give your set a name and click Create.
-
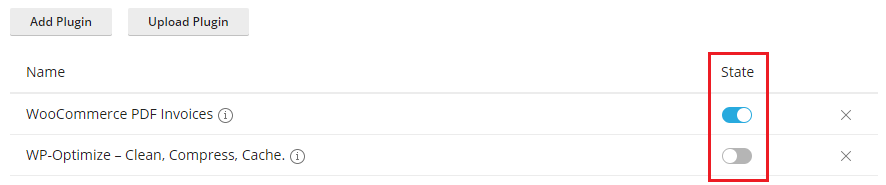
Click “Add Plugins”, and then click Add Plugin. Search for the desired plugin, select it from the list, and then click Add.
Note: You can choose which plugins to activate and which not to once the set is installed on a WordPress website. To do so, under the “State” column, turn off plugins you do not want to activate.
When you have added all desired plugins, close the pane.
-
Repeat the previous step for themes.
Note: You can choose which theme to activate once the set is installed on a WordPress website. To do so, under the “State” column, turn on the theme you want to activate.
Now you can select the set as a preinstallation option in the hosting plan or during custom installation of WordPress.
To add plugins and themes to a set:
-
Go to WordPress, and then go to the “Sets” tab.
-
Click “Add Plugins” for the set you want to modify, and then click Add Plugin. Search for the desired plugin, select it from the list, and then click Add.
Note: You can choose which plugins to activate and which not to once the set is installed on a WordPress website. To do so, under the “Active” column, turn off plugins you do not want to activate.
When you have added all desired plugins, close the pane.
-
Repeat the previous step for themes.
Note: You can choose which theme to activate once the set is installed on a WordPress website. To do so, under the “Active” column, turn on the theme you want to activate.
Adding plugins and themes to a set does not affect existing subscriptions to which this set has been applied.
To install a set on existing WordPress installations:
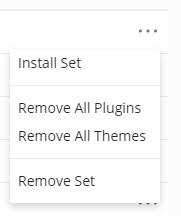
- Go to WordPress, go to the “Sets” tab, and then click the icon
corresponding to the set that you want to install.
- Click Install Set, select websites on which you want to install the set, and then click Install.
 icon
corresponding to the set that you want to install.
icon
corresponding to the set that you want to install.The set will be installed on the selected WordPress installations. The plugins and theme in the set will be activated if you chose them to be when you created the set.
To remove the selected plugins and themes from a set:
- Go to WordPress, and then go to the “Sets” tab.
- Click the number displayed under the “Plugins” or “Themes” columns
(for example,
2 total) to show the list of plugins or themes currently included in the set. - Click the icon next to the names of the plugins or
themes you want to remove.
 icon next to the names of the plugins or
themes you want to remove.
icon next to the names of the plugins or
themes you want to remove.To remove all plugins and themes from a set:
- Go to WordPress, and then go to the “Sets” tab.
- Click the icon corresponding to the set you want to modify, click
either Remove All Plugins or Remove All Themes, and then
click Yes.
Removing plugins and themes from a set does not affect existing subscriptions to which this set has been applied.
To rename a set:
- Go to WordPress, and then go to the “Sets” tab.
- Click the name of the set you want to rename, type a new name, and
then click the icon.
 icon.
icon.To remove a set:
-
Go to WordPress, and then go to the “Sets” tab.
-
Click the
icon corresponding to the set you want to remove, click
Remove Set, and then click Yes.
Removing a set does not affect existing subscriptions to which this set has been applied. For all hosting plans that used the removed set, WordPress preinstall settings are reset (on the “Additional Services” tab, “WP Toolkit” is set to “None”).
Limiting the Number of Users’ WordPress Installations
The Plesk administrator can set a limit on the number of WordPress installations customers and resellers can install and manage. The limit relates to the following ways of increasing the number of WordPress installations:
- Installing WordPress websites via WP Toolkit.
- Adding existing WordPress installations using the “Scan” feature.
- Cloning WordPress installations.
Note: Technical installations that WP Toolkit creates itself (for example, clones made by Smart Updates) do not count towards the limit.
To set a limit on the number of WordPress installations:
-
You can set a limit in a particular subscription or in a service plan:
- Go to Subscriptions, and either click Add Subscription to create a new subscription or click the name of an existing subscription and then click Customize in the right sidebar.
- Go to Service Plans. On the “Hosting Plans” tab, either click Add a Plan to create a new plan or click the name of an existing plan to edit it.
-
By default, no limits are set. Next to “WordPress Websites”, clear the “Unlimited” checkbox. You can also limit the number of WordPress websites that can use the “Smart Updates” feature. If so, clear the checkbox next to “WordPress websites with Smart Update” as well.
-
Specify the number of WordPress websites customers can manage and/or the number of WordPress websites that can use the “Smart Updates” feature.
-
Click OK (or Update & Sync if editing an existing plan).
You have set up a limit on the number of users’ WordPress installations.
Note: If you set up a limit lower than the number of websites a customer has, it will not automatically delete redundant installations. The number of the user’s existing installations remains unchanged unless the user removes or detaches some. Then it will not be possible to bring these installations back or to increase the number of installations in any other way beyond the limit.
Limiting the Number of Users’ WP Toolkit Backups
The Plesk administrator can set a limit on the number of WP Toolkit backups customers and resellers can create.
This limit prevents customers and resellers from using up allowed disk space quota. The limit is applied to each website belonging to a subscription. To make WP Toolkit backups unavailable to users, set the limit to zero.
To set a limit on the number of WP Toolkit backups:
-
You can set a limit in a particular subscription or in a service plan:
- Go to Subscriptions, and either click Add Subscription to create a new subscription or click the name of an existing subscription and then click Customize in the right sidebar.
- Go to Service Plans. On the “Hosting Plans” tab, either click Add a Plan to create a new plan or click the name of an existing plan to edit it.
-
By default, no limits are set. Next to “WordPress Backups”, clear the “Unlimited” checkbox and then specify the number of backups customers and resellers can create.
-
Click OK (or Update & Sync if editing an existing plan).

You have set up a limit on the number of users’ WP Toolkit backups.
Note: If you set up a limit lower than the number of backups a user has, it will not automatically delete redundant backups. The number of the user’s existing backups remains unchanged unless the user removes some. Then it will not be possible to create backups beyond the limit.
Managing WordPress Installations
Go to WordPress to see all WordPress installations hosted on the server.
WP Toolkit groups information about each installation in blocks we call cards.
A card shows a screenshot of your website and features a number of controls that give you easy access to frequently used tools. The screenshot changes in real time to reflect the changes you make to your website. For example, if you turn on maintenance mode or change the WordPress theme, the screenshot of the website will change immediately.
Note: Changes you make directly in WordPress are synchronized with
WP Toolkit once every 24 hours. To sync manually, click the
 icon.
icon.
When you move the mouse cursor over the screenshot of the website, you’ll see the following:
- Open Website button. To open the website in a new browser tab, click the button.
- Date and time the screenshot was updated last time. To update the screenshot right away,
in the upper-right corner of the screenshot, click the icon.
Here you can also do the following:
-
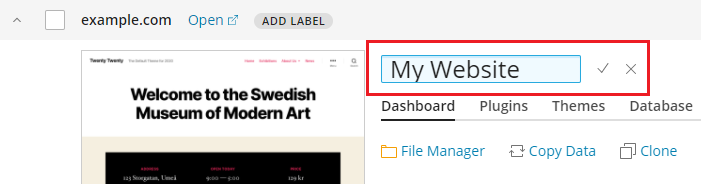
Change your website name. To do so, click the
icon, give your website a name, and then click . -
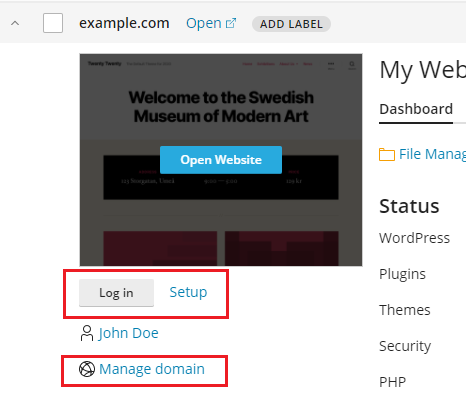
Log in to WordPress as an administrator. To do so, click Log in below the website screenshot.
-
Change general WordPress settings. To do so, click “Setup” next to Log in.
-
Go to the domain’s screen in Websites & Domains. To do so, click Manage domain below the website screenshot.
Status
WordPress websites are frequently targeted by hackers. Outdated WordPress core, plugins, and themes also pose a security risk.
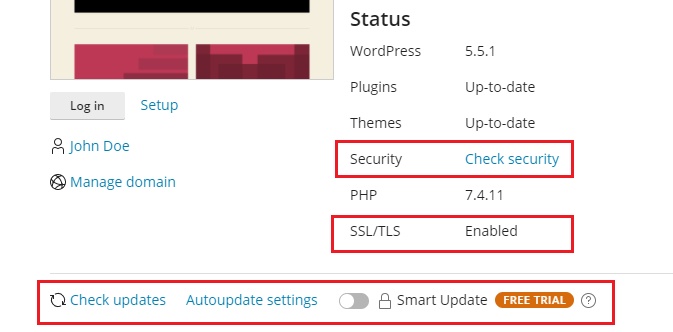
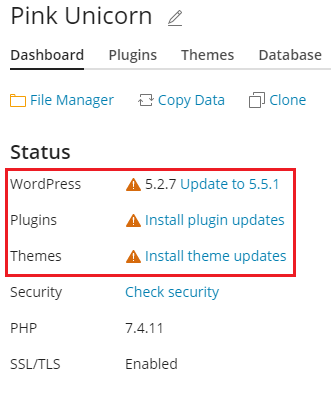
In the “Status” section, you can do the following:
- See if the WordPress core as well as installed plugins and themes are up to date and update them if necessary.
- See if SSL/TLS support is enabled and, if not, enable it.
- See how safe is your website and enhance its security.
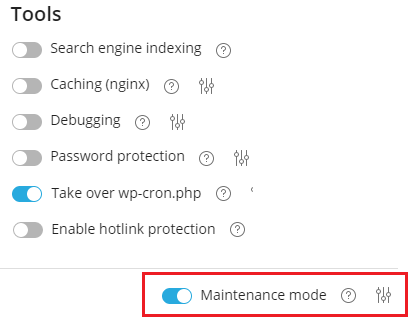
The controls in the “Tools” section give you easy access to the following settings and tools:
- “Search engine indexing” shows your website in search results of search engines.
- “Caching (nginx)” speeds up the website load time and reduces server load.
- “Debugging” helps you debug a website that is not ready for viewing and being tested or developed.
- “Password Protection” specifies the password you will use to log in to WordPress from Plesk.
-
“Take over wp-cron.php” helps you set up a regular run of
wp-cron.php. - Enable hotlink protection helps you prevent other websites from displaying, linking or embedding your images. This is called hotlinking and it can quickly drain your bandwidth and make your website unavailable.
Above the “Status” and “Tools” sections, you find the following WP Toolkit features:
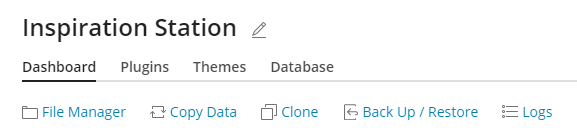
- “File Manager” to manage the website’s files in File Manager.
- “Copy Data” to copy the content of your website to another.
- “Clone” to make a full copy of your website.
- “Back Up / Restore” to create a backup of your website and restore it if necessary.
- “Logs” to view WP Toolkit logs of the installation you need to troubleshoot.
At the bottom of the website card, you can do the following:
-
Enable Smart Update, a premium feature, which helps you keep your production websites up to date without the risk of breaking them.
-
Turn on “Maintenance mode”, which hides your website’s content from visitors.

On the remaining three tabs you can manage the installation’s plugins, themes, and change the database username and password.
Website Labels
Website labels are preconfigured identifiers that you can give to your websites (for example, “staging”, “production”, “testing”, and so on).
Depending on your project, it might be necessary to host multiple copies of a website for various purposes. Labels will help you distinguish one website from another.
By default, a website has no label. To label it, click ADD LABEL (on the website card next to the website name) and select the desired label. Labels are optional and you can change or remove a label at any time.

Managing Cards View
You can choose the way WP Toolkit shows cards. The default
view is best suited for a small number of installations. If you have
a large number of installations, collapse cards ![]() .
.
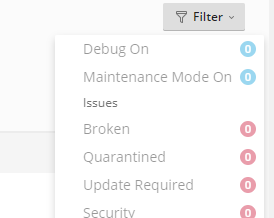
You can also Filter installations to manage them easier.
Removing and Detaching Installations
You can detach WordPress installations that you do not want to see and manage in WP Toolkit. Detaching does not remove the installation, merely hides it from WP Toolkit. A detached installation will be attached to WP Toolkit again after you scan for WordPress installations. You can detach WordPress installations individually or multiple installations at a time.
To detach WordPress installations:
- Go to WordPress and then do the following:
- (To detach an individual installation) On the card of the installation you want to detach,
click the icon.
- (To detach multiple installations) Select installations you want to detach and click Detach.
- (To detach an individual installation) On the card of the installation you want to detach,
click the
- Click Detach.
Unlike detaching, removal completely deletes a WordPress installation. You can remove any installation, no matter how it was installed: using WP Toolkit, through the Applications page, or manually. You can remove WordPress installations individually or multiple installations at a time.
To remove WordPress installations:
- Go to WordPress and then do the following:
- (To remove an individual installation) On the card of the installation you want to remove,
click the icon.
- (To remove multiple installations) Select installations you want to remove and click Remove.
- (To remove an individual installation) On the card of the installation you want to remove,
click the
- Click Remove.
Search Engine Indexing and Debugging
By default, a newly created WP Toolkit website is shown in search results of search engines. If your website is not yet ready for public viewing, turn off “Search engine indexing”.
If you are installing WordPress for testing or development, you can
enable “Debugging” to automatically find and fix errors in the website
code. To do so, click the ![]() icon next to “Debugging”, select the WordPress
debugging tools you want to activate, and then click OK.
icon next to “Debugging”, select the WordPress
debugging tools you want to activate, and then click OK.
Updating WordPress Installations
To keep your website secure, you need to regularly update the WordPress core, as well as any installed plugins and themes. You can do this either automatically or manually:
- Manual updates give you control over when updates are installed. For example, you can wait and see if installing a particular update caused issues for other WordPress users. However, you need to remember to update regularly to avoid falling behind.
- Autoupdates give you peace of mind by keeping your WordPress installation up to date. However, updates can sometimes break your installation, and with autoupdates, you may not learn about it right away.
For security reasons, we recommend that you configure autoupdates.
To update a WordPress installation manually:
-
Go to WordPress. If your WordPress installation needs updating, you will see the corresponding messages in the “Status” section (for example, “Install plugin updates”).
-
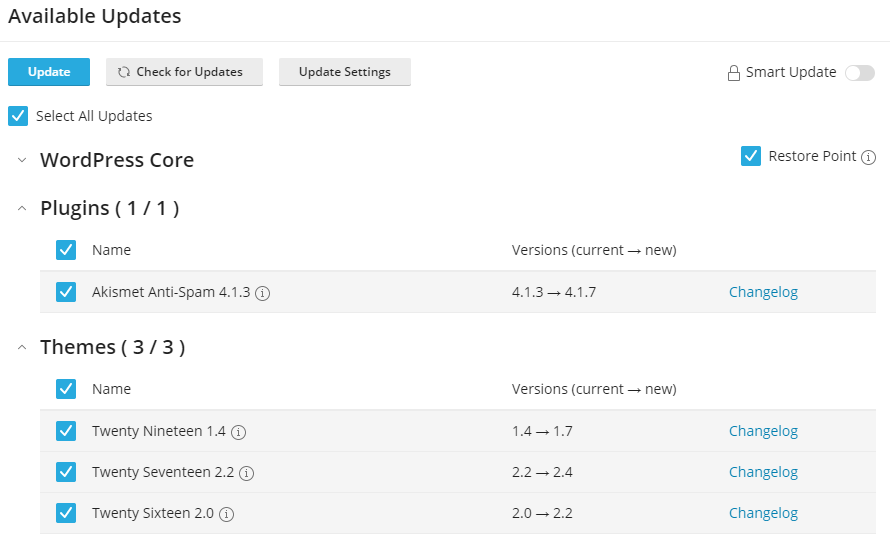
Click any message about available updates, wait for WP Toolkit to load the list of available updates, and then select the updates you want to install.
Note: If an update of a WordPress core is available, you will see the “Restore Point” checkbox. Keep this checkbox selected to create a restore point you can use to roll back the update if something goes wrong.
-
Click Update.
The selected updates will be applied.
Although WP Toolkit regularly checks for updates itself, you can also check for updates at any time. To do so, click “Check updates”.
To configure autoupdates for a WordPress installation:
-
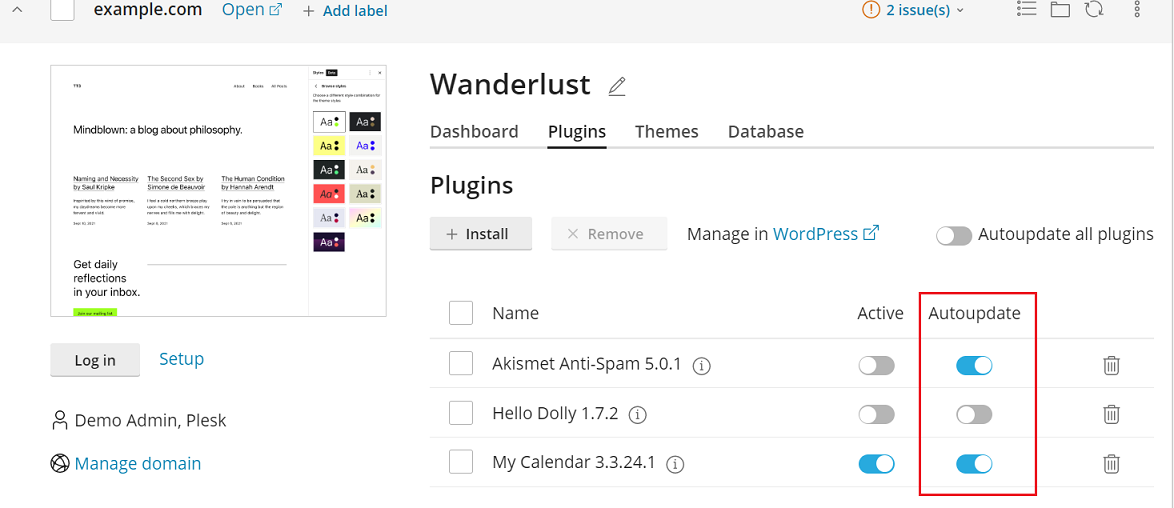
Go to WordPress and choose the WordPress installation that you want to update automatically and then, on the installation card, click “Autoupdate settings”.
-
Choose the desired autoupdate settings.
You can configure autoupdates separately for WordPress core, plugins, and themes (for example, you can choose to enable autoupdates for plugins and themes, but not for WordPress core).
You can also configure autoupdates for all plugins and themes or individually for each plugin and theme.
To fine-tune autoupdates, follow these recommendations:
-
Selecting “No” next to “Update WordPress automatically” turns off autoupdates of WordPress core. This is insecure.
-
If your website is publicly available (production) and you are concerned that applying updates automatically may break it, keep “Yes, but only minor (security) updates” selected.
-
If your website is a non-public (staging) version of a WordPress website, select “Yes, all (minor and major) updates”. This will keep your staging website up-to-date and ensure that, should an update break something, it happens to the staging website and not to the production one.
-
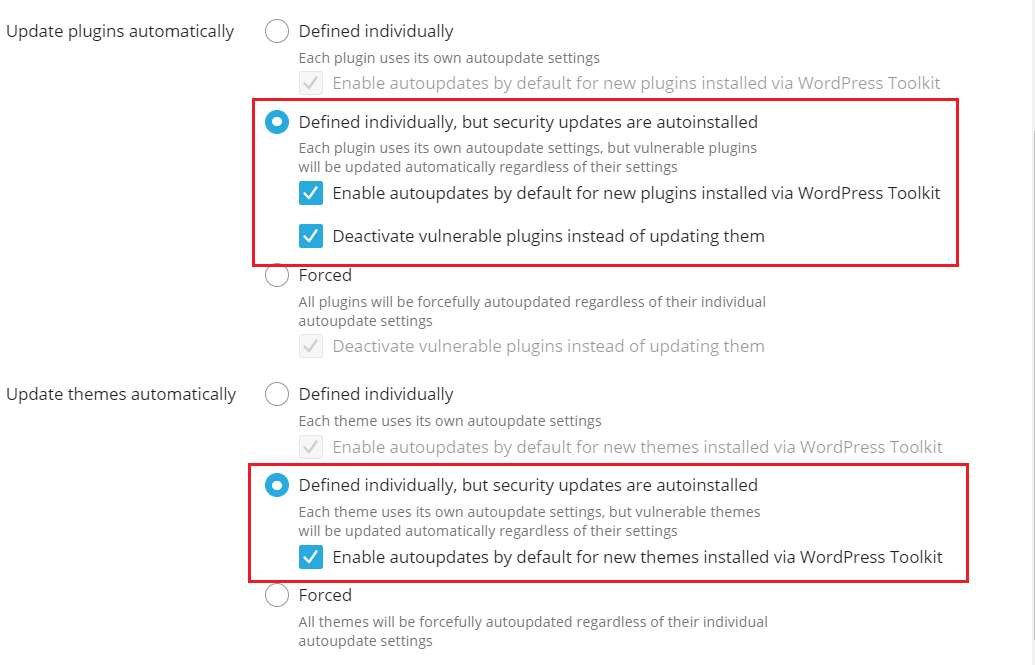
In most cases, we recommend that you select “Defined individually, but security updates are autoinstalled” for both plugins and themes. Then you will need to configure autoupdates individually for each plugin and theme on the “Plugins” and “Themes” tabs of the website card.
However, WP Toolkit will automatically install security updates for vulnerable plugins and themes even if autoupdates for them are turned off.
If you are afraid that security updates of plugins can break your website, select the “Deactivate vulnerable plugins instead of updating them” checkbox. Then you can manually update vulnerable plugins and activate them again (when you are sure they are safe for your website).
To save effort in turning on autoupdates for each new plugin and theme on the “Plugins” and “Themes” tab, select “Enable autoupdates by default for new plugins installed via WP Toolkit” and “Enable autoupdates by default for new themes installed via WP Toolkit”.
-
To have more control over autoupdates, select “Defined individually” for plugins and themes. This scenario is very similar to the previous one but WP Toolkit will not update a vulnerable plugin or theme if autoupdates for it are turned off. We recommend that you monitor WP Toolkit email notifications of vulnerable plugins and themes and manually update or deactivate them.
-
To make sure all plugins and themes are always up to date, select “Forced” for both plugins and themes. In this case, WP Toolkit will automatically update all plugins and themes regardless of their individual autoupdate settings. Selecting the “Forced” option overrides individual autoupdate settings of plugins and themes shown on the “Plugins” and “Themes” tabs.
-
-
Click OK.

Note: If you are concerned that WordPress autoupdates may break your website, use Smart Updates. With Smart Updates, WordPress installations are always updated safely without breaking your website. When you enable Smart Updates, they will check all autoupdates and allow only those that cause no issues for your website.
Backing up and Restoring WordPress Installations
To help prevent data loss, you can back up and restore websites. To do so, you can use either the WP Toolkit feature or the general Plesk backup mechanism, called Backup Manager.
Creating backups in WP Toolkit may be more convenient than in Backup Manager because of the following reasons:
- WP Toolkit backs up an individual website, while Backup Manager backs up the whole subscription with all the subscription’s websites and their data.
- If you need to back up an individual website, a WP Toolkit backup requires less time and disk space.
- Creating backups in WP Toolkit does not require any setup.
To back up a WordPress website:
-
Go to WordPress and then click Back up / Restore on the card of the WordPress installation you want to back up.
-
Click Back up.

Once the backup is finished, it will be displayed in the list of WP Toolkit backups.

To restore a WordPress website:
-
Go to WordPress and then click Back up / Restore on the card of the WordPress installation whose backup you want to restore.
-
Click the
icon corresponding to the backup you want to restore.Note: Restoring a backup removes all changes you made to the website after the backup date. For this reason, WP Toolkit suggests that you back up the current state of your website and use this backup to restore.
-
Click Restore.
You have restored your backup.
To be on the safe side, you may want to download WP Toolkit backup files to store them elsewhere.
To download WP Toolkit backup files:
-
Go to WordPress and then click Back up / Restore on the card of the WordPress installation whose backup files you want to download.
-
Click the
icon corresponding to the backup whose file you want to download.You will be redirected to the directory in File Manager (
/wordpress-backupsin the website’s home directory) where WP Toolkit backups are stored. -
Click the
icon corresponding to the backup file you want to download and then click Download.
You have downloaded a backup file.
You can delete WP Toolkit backups you no longer need.
To delete a WP Toolkit backup:
- Go to WordPress and then click Back up/Restore on the card of the WordPress installation whose backup file you want to delete.
- Click the icon corresponding to the backup you want to delete and then click Delete.
You have deleted a backup.
Smart Updates
Smart Updates is a premium feature included in WP Toolkit Deluxe or bought as a standalone extension. It helps you keep your production websites up to date without the risk of breaking your website. Smart Updates analyses the potential consequences of installing updates and advises you whether doing so is safe.
To keep your websites secure, you need to regularly update WordPress: themes, plugins, and core. However, these updates can potentially break you websites. Manual updates require your attention and cannot guarantee that your websites will continue working.
Smart Updates makes sure a WordPress installation is always updated safely without breaking your website. It does the following:
- Clones the installation and then analyses the clone for issues.
- Updates the clone and analyses it again.
- Detects issues (PHP issues, HTTP response code errors, changed page titles, and others): not only those the update can cause but also those that existed before the update.
- With manual updates, Smart Updates reports whether or not it is safe to update. You can view and download the detailed report about the issues found and then decide whether to update the production website or not.
- With autoupdates, Smart Updates automatically updates the production website unless there is at least one issue caused by the update. Otherwise the update is not performed and you receive an email with the results of the analysis.
Using Smart Updates
Smart Updates is a paid feature, which you buy on a per installation basis. You can use Smart Updates with both manual and autoupdates.
To enable Smart Update:
- Buy Smart Updates and install the received additional license key. You enable Smart Update separately for each installation.
- Go to WordPress and turn on “Smart Update” on the installation card.
You have enabled Smart Update. Now you can use it with manual or autoupdates.
Note: Smart Update is not an alternative to backups. We recommend that you regularly back up your WordPress installations especially if you use autoupdates.
To use Smart Update manually:
-
Make sure you have enough disk space for a full copy of the installation that you want to update.
-
On the installation card, click Updates.
-
On the Available Updates card, click Check for Updates.
-
Select the updates you want to install, and then click Run Smart Update Tests.
-
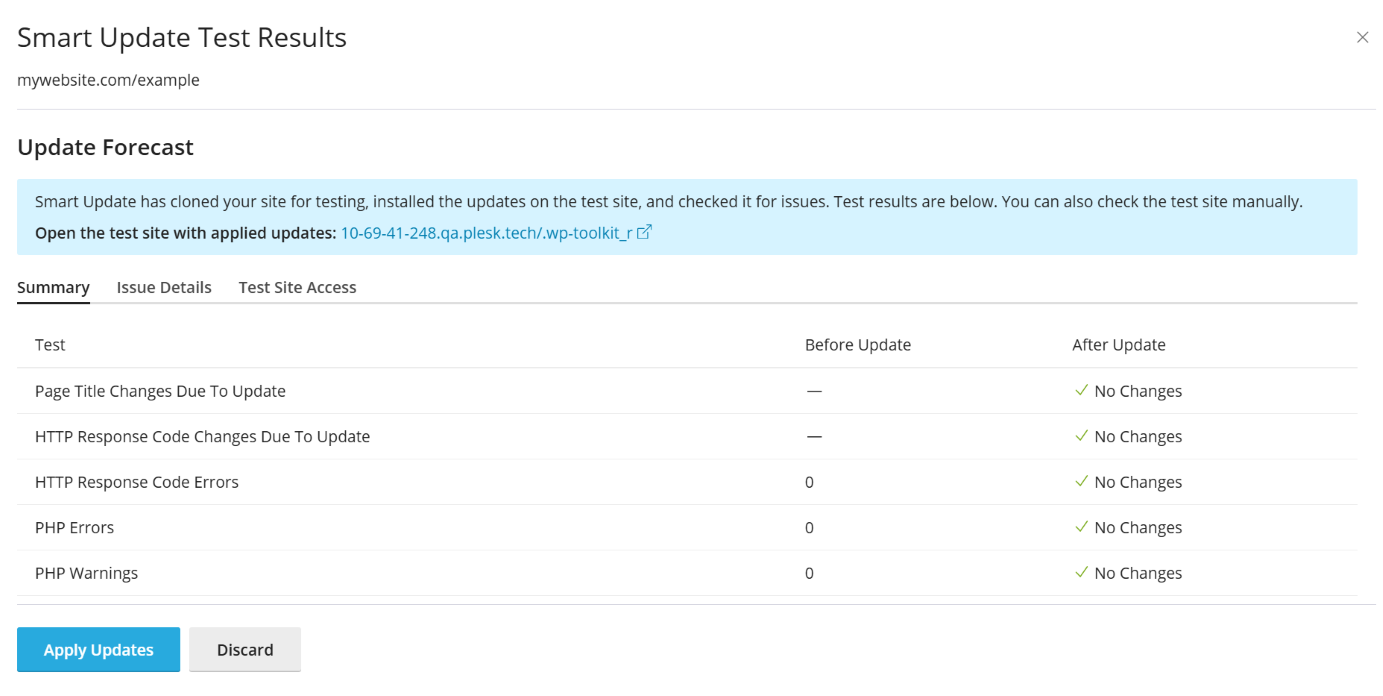
Wait while Smart Update clones and analyses your website (this may take some time depending on the size of the website). The analysis is performed in the background, so closing the window will not interrupt the update.
-
View the analysis report on your website. You can see issues found for the whole website. To download a report about them, click Download Summary.
-
If Smart Update did not detect any issues regarding the update and the screenshots appear to confirm it, click Apply Updates and then confirm your choice. Smart Update will update the production installation and delete the clone.
If you do not want to update the production installation, click Discard.
To use Smart Update automatically:
- Make sure you have enough disk space for a full copy of the installation that you want to update.
- When an update is available, Smart Update will clone the installation, update the clone and analyze the clone after update.
- If the update causes no issues, Smart Update automatically updates the production installation. If Smart Update detects at least one issue the update may cause, the update is not applied and you will receive an email with the link. Follow the link to open a report on the issues.
Managing Plugins
A WordPress plugin is a type of third-party software that adds new functionality to WordPress. With WP Toolkit, you can install and manage plugins on one or more WordPress installations.
Installing Plugins
In WP Toolkit, you can install plugins on one or more WordPress installations.
You can search for and install plugins found in the wordpress.org plugins repository. You can also upload custom plugins, which is useful if:
-
You cannot find a suitable plugin in the wordpress.org repository.
-
You need to install your own plugin.
Note: Any plugins you upload become available for installation by customers.
To install plugins on a particular WordPress installation:
-
Go to WordPress, go to the “Plugins” tab of an installation card, and then click Install.
-
Search for plugins, and then click Install next to the plugin you want to install. Installed plugins are activated immediately.
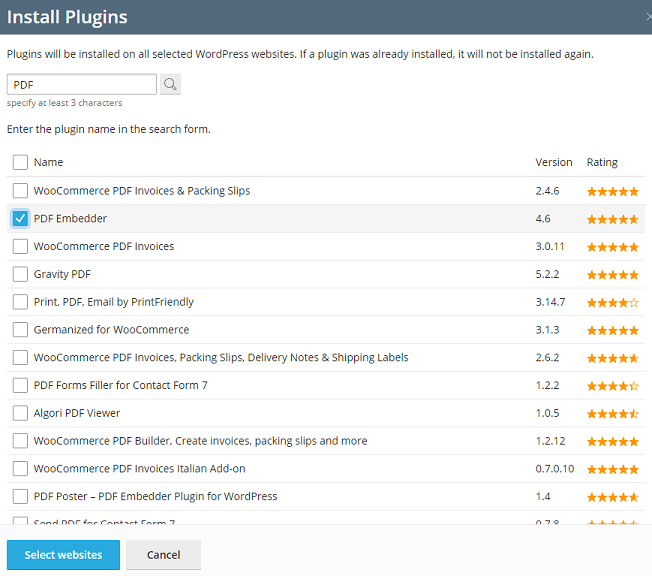
To install plugins on multiple WordPress installations:
-
Go to WordPress > the “Plugins” tab, and then click Install.
-
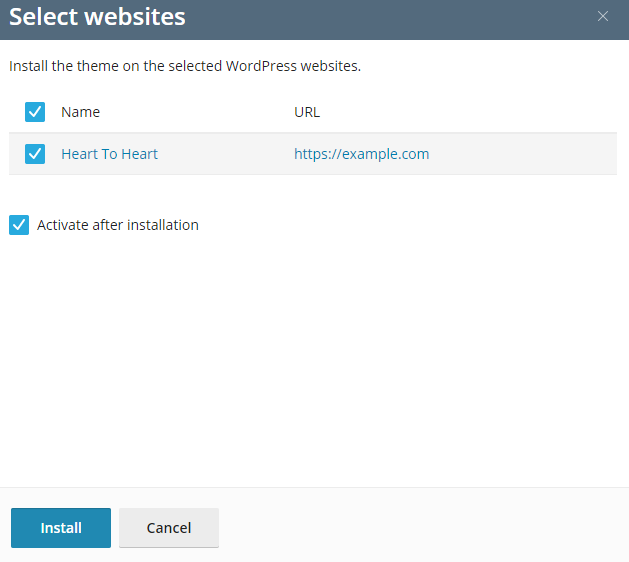
Search for plugins, select the plugins you want to install, and then click Select websites.
Note: Selecting one or more plugins and then performing a new search without installing the selected plugins resets the selection.
-
By default, newly installed plugins are activated immediately. You can prevent this by clearing the “Activate after installation” checkbox.
-
Select websites on which you want to install plugins and then click Install.

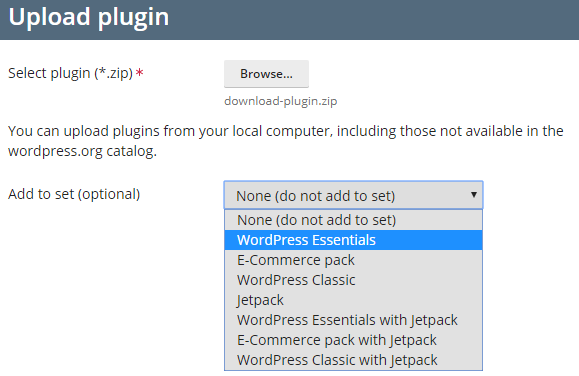
To upload a plugin:
-
Go to WordPress > the “Plugins” tab, and then click Upload plugin.
-
Click Browse… and browse to the location of the ZIP file containing the plugin you want to upload.
-
You can add the uploaded plugin to a set. To do so, select the set from the drop-down list. If you do not want to add the uploaded plugin to a set, keep the “None” option. You can read more about sets in Managing Sets.
-
Click OK.
At this point, the uploaded plugin has become available for installation by customers. You can also install the uploaded plugin on your own WordPress installations.
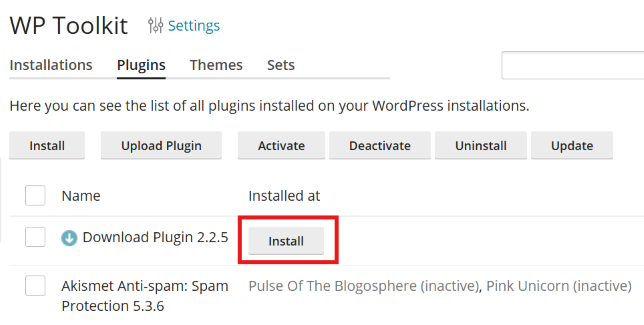
To install an uploaded plugin:
-
Go to WordPress > the “Plugins” tab.
-
Click Install next to a plugin you have uploaded.
-
Select the WordPress installations on which you want to install the uploaded plugin.
-
By default, a newly uploaded plugin is not activated. You can activate it by selecting the “Activate after installation” checkbox.
-
Click Install.
Activating and Deactivating Plugins
You can activate or deactivate plugins installed on a particular installation or on all installation hosted on the server.
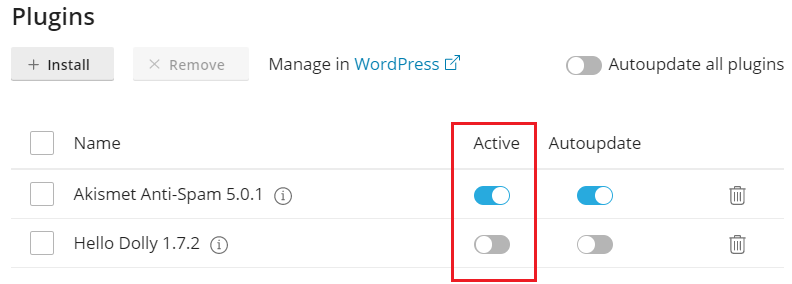
To activate or deactivate plugins for a particular installation:
-
Go to WordPress, and then go to the “Plugins” tab of an installation card.
-
Under “Active”, turn on or turn off a plugin to activate or deactivate it, respectively.
To activate or deactivate plugins for all installations hosted on the server:
- Go to WordPress > the “Plugins” tab.
- Select the plugin you want to activate or deactivate.
- Click Activate or Deactivate.
Updating Plugins
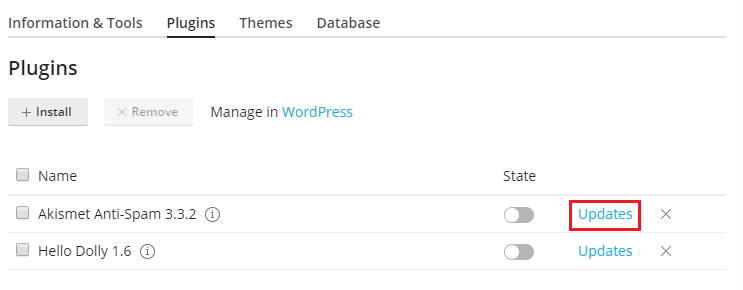
If a plugin needs updating, you will see “Updates” next to the plugin on the “Plugins” tab of an installation card. You can update not only free plugins but also paid ones if they can be updated in the usual way in the WordPress admin dashboard.
Note: WP Toolkit can update paid plugins that require a license if the license is present. WP Toolkit cannot update paid plugins that use non-standard update methods.
You can do the following:
- Update plugins for one particular installation. Read how to do so in the “To update a WordPress installation manually” procedure.
- Update plugins installed on multiple installations.
- Configure autoupdates for plugins. Read how to do so in the “To configure autoupdates for a WordPress installation” procedure.
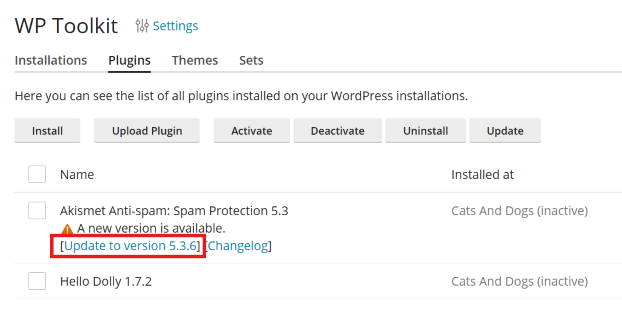
To update plugins on multiple installations:
-
Go to WordPress > the “Plugins” tab.
-
Click “Update to version …” next to the plugin you want to update. To learn more about the update, click “Changelog”. This will take you to the plugin’s page on wordpress.org.
-
Click Yes.
Removing Plugins
You can remove plugins from a particular installation or from all installations hosted on the server.
To remove plugins from a particular installation:
- Go to WordPress, and then go to the “Plugins” tab of an installation card.
- To remove one plugin, click the icon corresponding to the plugin you want to remove.
To remove several plugins, select them and click Remove.
- Click Yes.
To remove plugins from all installations hosted on the server:
- Go to WordPress > the “Plugins” tab.
- Select the plugins you want to remove, click Uninstall, and then click Yes.
WordPress Plugin Blocklist
Note: The WordPress plugin blocklist is available in WP Toolkit version 5.6 or higher.
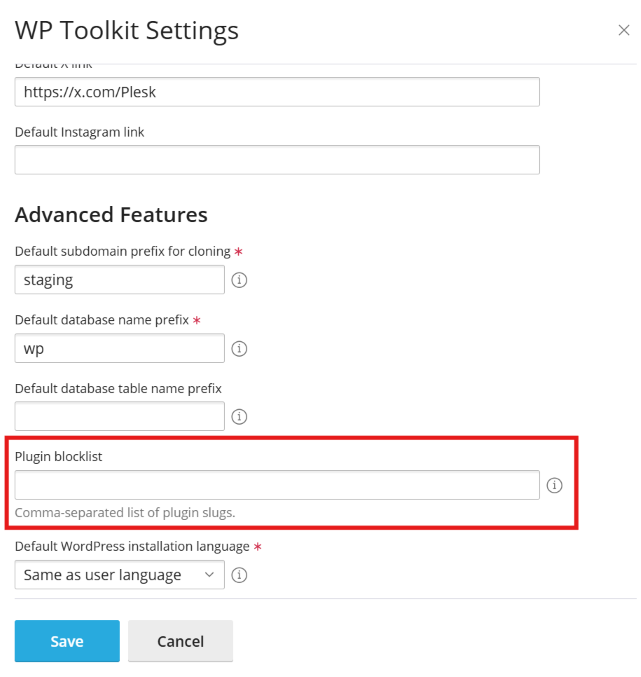
Some WordPress plugins can affect the server’s performance, interfere with other plugins, or cause security issues. The reason is that plugins are developed by various developers with various knowledge and skill. In the plugin blocklist, you can forbid particular plugins from being installed on the server and automatically disable them if they are already installed. Here’s how the plugin blocklist looks:
Example. A plugin affect the server’s performance.
Imagine that a WordPress plugin requires too much resources of the server for operation. To provide stable and smooth operation of the Plesk server, you need to prevent your clients from installing the plugin. Here’s how to do it:
-
Go to WordPress.
-
Click Settings.
-
In the WP Toolkit Settings pop-up window, in the Plugin blocklist field, type in the plugin name with each word separated by a dash:
Note: To add another plugin to the list, put a comma after the previous plugin’s name, and then specify the new plugin’s name with no space after the comma.
-
Click Save.
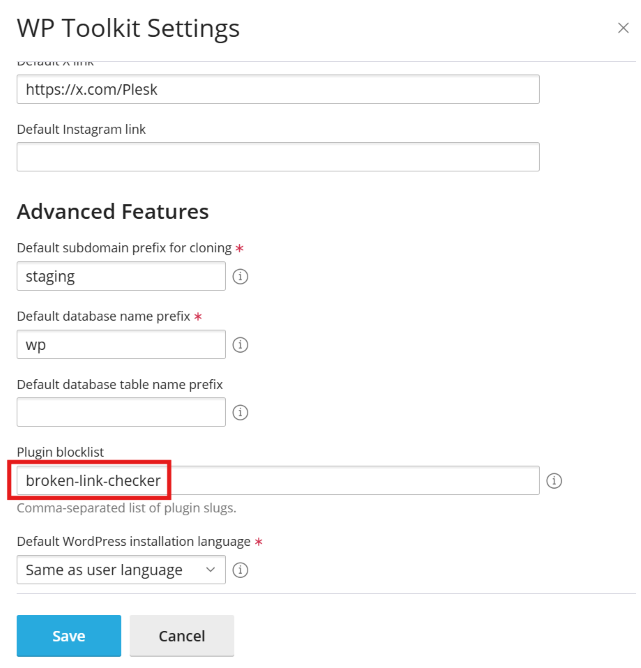
As a result, clients won’t be able to install, upload, or activate the specified plugin using WP Toolkit. If the plugin is already installed, WP Toolkit will automatically disable it.
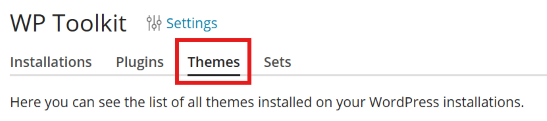
Managing Themes
A WordPress theme determines the overall design of your website including colors, fonts, and layout. By selecting a different theme, you change the look and feel of your website without changing the content. With WP Toolkit, you can install and manage themes.
Installing Themes
In WP Toolkit, you can install themes on one or more WordPress installations.
You can search for and install themes found in the wordpress.org themes repository. You can also upload custom themes, which is useful if:
-
You cannot find a suitable theme in the wordpress.org repository.
-
You need to install your own theme.
Note: Any themes you upload become available for installation by customers.
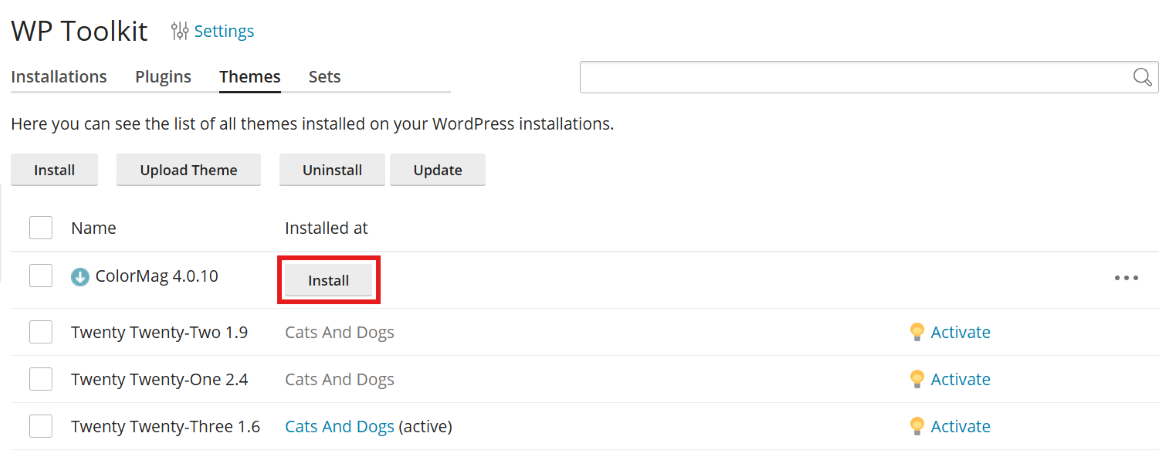
To install themes on a particular WordPress installation:
-
Go to WordPress, go to the “Themes” tab of an installation card, and then click Install.
-
Search for themes, and then click Install next to the theme you want to install. By default, a newly installed theme is not activated.
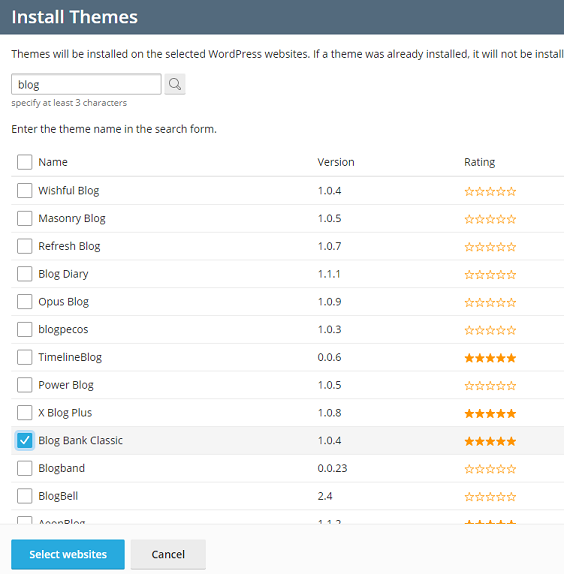
To install themes on multiple WordPress installations:
-
Go to WordPress > the “Themes” tab, and then click Install.
-
Search for themes, select the themes you want to install, and then click Select websites.
Note: Selecting one or more themes and then performing a new search without installing the selected themes resets the selection.
-
Select websites on which you want to install themes and then click Install.
To upload a theme:
- Go to WordPress > the “Themes” tab, and then click Upload theme.
- Click Browse… and browse to the location of the ZIP file containing the theme you want to upload.
- You can add the uploaded theme to a set. To do so, select the set from the drop-down list. If you do not want to add the uploaded theme to a set, keep the “None” option. You can read more about sets in Managing Sets.
- Click OK.
At this point, the uploaded theme has become available for installation by customers. You can also install the uploaded theme on your own WordPress installations.
To install an uploaded theme:
-
Go to WordPress > the “Themes” tab.
-
Click Install next to a theme you have uploaded.
-
Select the WordPress installations on which you want to install the uploaded theme.
-
By default, a newly uploaded theme is activated. You can deactivate it by clearing the “Activate after installation” checkbox.
-
Click Install.
Activating a Theme
You can activate a theme installed on a particular installation or on all installations hosted on the server. A WordPress installation can have only one active theme at a time.
To activate a theme for a particular installation:
- Go to WordPress, and then go to the “Themes” tab of an installation card.
- Under “Active”, turn on a theme to activate it. The theme that was previously active will be automatically deactivated.
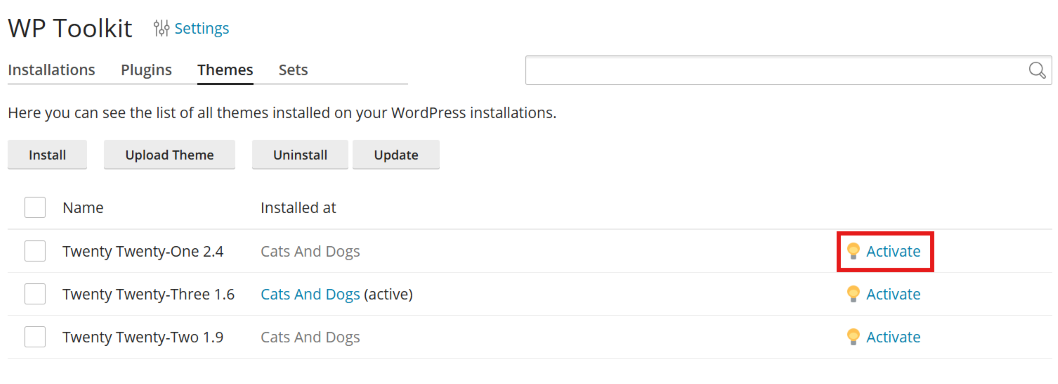
To activate a theme for all installations hosted on the server:
-
Go to WordPress > the “Themes” tab.
-
Click Activate next to a theme you want to activate.
Updating Themes
If a theme needs updating, you will see “Updates” next to the theme on the “Themes” tab of an installation card. You can update not only free themes but also paid ones if they can be updated in the usual way in the WordPress admin dashboard.
Note: WP Toolkit can update paid themes that require a license if the license is present. WP Toolkit cannot update paid themes that use non-standard update methods.
You can do the following:
- Update themes for one particular installation. Read how to do so in the “To update a WordPress installation manually” procedure.
- Update themes installed on multiple installations.
- Configure autoupdates for themes. Read how to do so in the “To configure autoupdates for a WordPress installation” procedure.
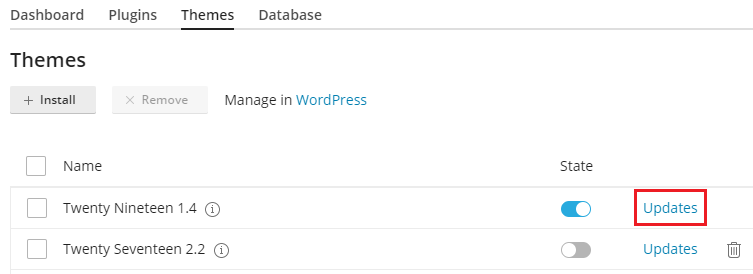
To update themes on multiple installations:
- Go to WordPress > the “Themes” tab.
- Click “Update to version …” next to the theme you want to update. To learn more about the update, click “Changelog”. This will take you to the theme’s page on wordpress.org.
- Click Yes.
Removing Themes
You can remove themes from a particular installation or from all installations hosted on the server.
Note: You cannot remove an active theme. Before removing a currently active theme, activate another theme first.
To remove themes from a particular installation:
- Go to WordPress, and then go to the “Themes” tab of an installation card.
- Click the icon next to theme you want to remove. To remove
several themes, select them and click Remove.
- Click Yes.
To remove themes from all installations hosted on the server:
- Go to WordPress > the “Themes” tab.
- Select the themes you want to remove, click Uninstall, and then click Yes.
Securing WordPress
WP Toolkit can enhance the security of WordPress installations (for
example, by turning off XML-RPC pingbacks, checking the security of
the wp-content folder, and so on).
We call individual improvements you can make to the installation’s security “measures”. We consider certain measures to be critical. For that reason, WP Toolkit applies them automatically to all newly created installations.
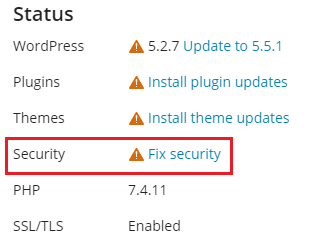
On the installation’s card next to “Security”, you can see the following security messages:
-
- “Fix security” means that not all critical security measures were applied.
- We strongly recommend that you apply them all.
-
- “Check security” means that all critical security measures were applied,
- while some recommended measures were not.
- “View settings” means that all security measures (critical and recommended) were applied.
Note: Some security measures, once applied, can be reverted. Some cannot. We recommend that you back up a WordPress installation before securing it.
You can secure WordPress installations individually or multiple installations at a time.
To secure an individual WordPress installation:
- Go to WordPress, choose the installation you want to secure, and then, on the installation card, click the message next to “Security” (for example, “Fix security”).
- Wait for WP Toolkit to display the security measures you can apply.
- Select the security measures you want to apply, and then click Secure.
All selected measures will be applied.
To secure multiple WordPress installations:
- Go to WordPress and then click Security.
- You will see the list of your WordPress installations. For every
installation, you can see how many critical (indicated by the
icon) and recommended (the icon) security
measures can be applied to it. To see the list of measures that can
be applied, click the corresponding icon. If all security measures
are applied, you will see the icon instead.
- (Optional) To see more information about all security measures and to
manage them for an individual WordPress installation, click
next to the desired installation. To return to managing security of
multiple installations, click next to “Security Status Of Selected
Websites”.
- Select installations to which you want to apply security measures and then click Secure.
- By default, only critical security measures are selected to be
applied. You can also select:
- Security measures of your choice. To do so, click the “Custom selection” radio button.
- All security measures at once. To do so, click the “All (critical and recommended)” radio button.
- Click Secure.
The selected measures will be applied.
Reverting Security Measures
In rare cases, applying security measures can break your website. In this case, you can revert security measures you have applied. Not all security measures can be reverted. Those that can be are marked as “(can be reverted)”. You can revert security measures for an individual WordPress installation or for multiple WordPress installations at a time.
To revert applied security measures for an individual installation:
-
Go to WordPress, choose the installation for which you want to revert an applied measure, and then, on the installation card, click the message next to “Security” (for example, “Check security”).
-
Wait for WP Toolkit to display the list of security measures.
-
Select the security measures you want to revert and then click Revert.

The applied security measures will be reverted.
To revert applied security measures for multiple installations:
- Go to WordPress and then click Security.
- You will see the list of WordPress installations hosted on the server and whether critical and recommended security measures were applied to them or not.
- (Optional) To see more information about all security measures and to
manage them for an individual WordPress installation, click next to the desired installation.
To return to managing security of multiple installations,
click next to “Security Status Of Selected Websites”.
- Select installations for which you want to revert security measures and then click Revert.
- Select security measures you want to revert and then click Revert.
The applied security measures will be reverted.
Cloning a WordPress Website
Cloning a WordPress website involves creation of a full website copy with all website files, the database, and settings.
You may want to clone your WordPress website in one of the following situations:
- You maintain a non-public (staging) version of a WordPress website on a separate domain or subdomain, and you want to publish it to a production domain to make it publicly available.
- You have a publicly available (production) WordPress website and you want to create a non-public (staging) copy of it, to which you can make changes without affecting the production website.
- You want to create a “master” copy of a WordPress website with preconfigured settings, plugins, and theme, and then clone it to start a new development project for a client.
- You want to create multiple copies of a WordPress website and make different changes to each one (for example, to show them to a client so that he or she can choose the one he or she likes best).
Note: By default, on cloned WordPress installations, the “Search engine indexing” option is turned off. To turn this option on for cloned WordPress installations, go to WordPress, click “Settings”, and then clear the “Turn off Search Engine Indexing for cloned websites” checkbox.
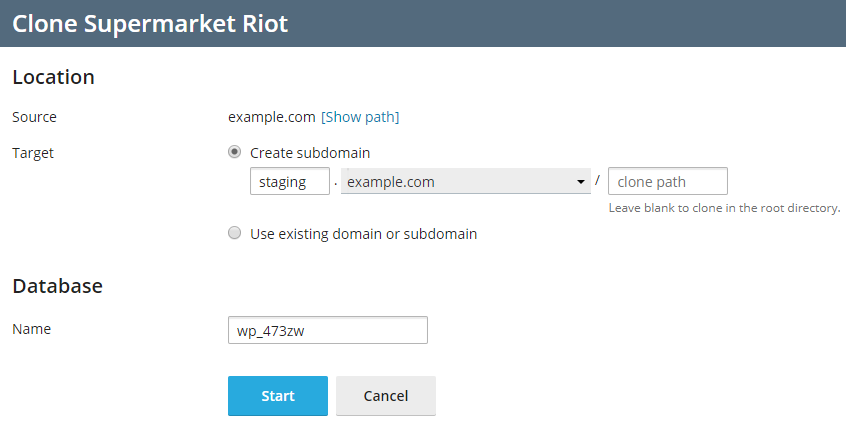
Clone a WordPress website:
-
Go to WordPress and then click “Clone” on the card of the WordPress installation you want to clone.
-
Choose the target where to clone the website:
- Keep “Create subdomain” selected to have WP Toolkit create a new subdomain with the default “staging” prefix. You can use it or type in a desired subdomain prefix.
Note: You can change the default subdomain prefix. To do so, go to WordPress, click “Settings”, specify the desired prefix in the “Default subdomain prefix for cloning” text field, and then click OK.
- Select “Use existing domain or subdomain” and then select the desired domain or subdomain from the list.
Caution: Make sure that the domain or subdomain selected as the target is not being used by an existing website. During cloning, website data existing on the target may be overwritten and irrevocably lost.
-
(Optional) Change the name of the database automatically created during cloning.
-
When you are satisfied with the selected target and the database name, click Start.

When the cloning is finished, the new clone will be displayed in the list of WordPress installations.
Copying Data from One WordPress Website to Another
You can copy the content of your WordPress website including files and database to another WordPress website.
Let us say you maintain a non-public (staging) version of a WordPress website on a separate domain or subdomain and a publicly available (production) version of this website on a production domain. You may want to copy data from one website to another in the following situations:
- You want to copy the changes you have made to the staging version to the production version.
- You want to copy the data from the production website to the staging website to see how the changes (for example, a new plugin) work with the production data. After checking that everything works fine, you may copy your changes to your production website.
- You have made some changes (for example, installed a new plugin) to the staging website, and these changes resulted in new tables being added to the database. You want to copy only these tables to the production website without affecting other data.
- You have upgraded the staging website to a newly released version of WordPress and fixed the post-upgrade issues (if any). You now want to push these changes to the production website.
- You can choose to copy the WordPress files, the WordPress database, or both the files and the database. When copying the database, you can choose to copy all tables, or tables that are present on the source but absent from the target, or you can specify individual database tables to be copied.
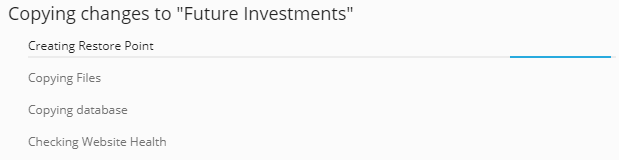
When performing the copying, keep in mind the following:
- The selected data are copied from the source website to the target website. Any files and/or database tables present both on the source and the target that are not identical are copied from the source to the target. Files and database tables present only on the target are not affected unless you select the “Remove missing files” option during copying.
- During copying, the target website enters maintenance mode and becomes temporarily unavailable.
- If the WordPress version on the target website is earlier than on the source website, WP Toolkit first upgrades WordPress on the target website to match the version installed on the source website, and then runs copying.
- If the WordPress version on the source website is earlier than on the target website, copying is aborted. To copy data, you need to upgrade WordPress on the source to the version installed on the target or a later version.
- If the database prefix on the source and the target differs, WP Toolkit will change the database prefix on the target website to match that on the source during copying.
- Copying of data between a regular WordPress installation and a multisite one is not supported. We recommend that you use cloning instead.
Note: During copying, files and database tables copied from the source overwrite those present on the target. Any changes made to the files and database tables on the target prior to copying will be discarded and lost without warning.
Note: If you have caching plugins installed on a WordPress website you want to copy from, clear the cache on the source website before copying. Otherwise, the target website might work incorrectly.
To copy data of one WordPress website to another:
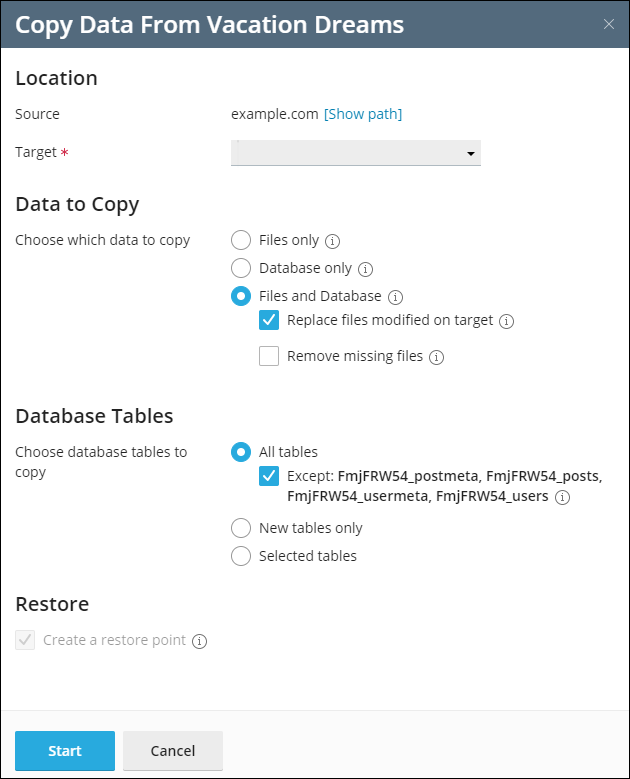
-
Go to WordPress and then click “Copy Data” on the card of the WordPress installation which data you want to copy.
-
Next to “Target”, select the target WordPress installation (under the same or another subscription) you want to copy the data to.
-
Under “Data to Copy”, select which data you want to copy to the target WordPress website:
-
“Files Only” - copies only the website files, including the WordPress core files and the files related to themes and plugins.
Note: By default, the
htaccess,web.config, andwp-config.phpfiles are not copied because modifying these files may disrupt the operation of WordPress. You can have WP Toolkit copy thewp-config.phpfile by selecting the “Copy wp-config.php” checkbox. To make the checkbox visible, go to WordPress, click “Settings”, select the “Allow to copy wp-config.php when using Copy Data feature” checkbox, and then click OK.Note: Even if you choose to copy the
wp-config.phpfile, the information related to the database will not be copied. This prevents the target WordPress installation from corruption. Custom settings specified in thewp-config.phpfile on the target will be overwritten with those from the source. -
“Database Only” - copies only the database. You can select to import all, new, or selected database tables (for details, see step 5 below).
-
“Files and Database” - copies both the website files and the database. You can choose to import all, new, or selected database tables (for details, see step 5 below).
-
-
If you selected “Files Only” or “Files and Database” during step 3, two more options become available:
-
“Replace files modified on target” - by default, if a file with the same name exists both on the source and the target, the file from the source will be copied and will replace the file on the target even if the source file is older. To prohibit overwriting files on the target with the files from the source that are older clear the checkbox.
-
“Remove missing files” - by default, if a file exists on the target but is missing from the source, the file is untouched. Select this checkbox to remove files on the target that are missing from the source.
Note: You can hide these options, making them unavailable to yourself and your customers. To do so, go to WordPress, click “Settings”, clear the “Use rsync for file copy operations” checkbox, and then click OK.
-
-
If you selected “Database only” or “Files and Database” during step 3, select which database tables you want to copy:
- “All Tables” (the default option). If you want to copy all changes except for pages, posts, and users, keep the “Except: _postmeta, _posts, _usermeta, _users” checkbox selected.
- New tables only
- Selected tables. Click “Select tables to copy”, select those tables you want to copy, and then click Select.
-
Before copying data, WP Toolkit suggests creating a restore point. You can use it to roll back the changes made during copying. If you do not want to create a restore point, clear the “Create a restore point” checkbox. Learn how you can recover your WordPress installation using the restore point in “Restoring a WordPress Installation” section below.
Note: Every WordPress installation can only have a single restore point. Creating a restore point overwrites the existing restore point, if any.
-
When you are satisfied with the selected options, click Start to start copying data.

Restoring a WordPress Installation from a Restore Point
When you update the WordPress core or copy data from one WordPress installation to another, WP Toolkit suggests creating a restore point before beginning the operation. If you are not happy with the results, you can use the restore point to roll back the changes and restore your installation to the state it was in before the operation.
Note: WP Toolkit suggests creating a restore point only when you update a single WordPress installation.
Making Full Restore Points
By default, a restore point contains only the data that will be affected when copying data or updating. You can have WordPress include all the target installation data, both files and the database, in the restore point. To do so, go to WordPress, click “Settings”, select the “Always make full website snapshots” checkbox, and then click OK. Full restore points provide the maximum chances of successful recovery, but take longer to create and take up more disk space than regular restore points.
To restore a WordPress installation from a restore point:
-
Go to WordPress and find the card of an installation you want to restore.
-
Click the
icon next to “Restore Point” and then click Continue.
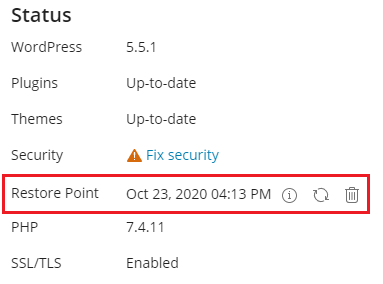
The restoration will begin. Your installation will be restored to the state it was in before the operation.
The restore point takes up disk space which is included in your allowed disk space quota. After you have restored your WordPress installation, or once you have determined that all is good and there is no need to restore, you can delete the restore point.
To delete a restore point:
- Go to WordPress and find the restore point you want to delete.
- Click the icon next to “Restore Point”, and then click Remove.
Note: Every WordPress installation can only have a single restore point. Creating a restore point overwrites the existing restore point, if any.
It is important to note that a restore point is not the same as a backup. Making any changes to the target installation after you copy data or update it may make restoring from the restore point impossible. If you are copying data or updating a live production WordPress installation, we recommend that you back it up beforehand in addition to creating a restore point.
Updating a Website URL
If you have moved a website from a different server, the website URL may change. In this case, your migrated WordPress installation will not work until the website URL is updated in WordPress. Previously, you had to do this manually. Now WP Toolkit can update the website URL automatically.
To update the website URL:
- Go to WordPress, choose the card of the website that you have migrated, click the icon,
and then click Update Site URL.
- WP Toolkit compares the actual website URL with the one specified in the WordPress database and in
wp-config.php:- If the URLs match, then your website URL is up to date. Click Back to return to the website card.
- If the URLs do not match, replace the URL specified in WordPress with the actual URL by clicking Update.
You have ensured that your website is online.
Updating the Hire a Developer Link
The “Hire a Developer” link lets you display a custom URL to hire WordPress developers in WP Toolkit. You can use this URL to, for example, streamline referral bonuses. By default, this link directs to <a href=”https://www.codeable.io/” target=”_blank”>Codeable</a>.
To change or hide this link:
- Go to WP Toolkit, then click the icon. The General Settings menu will appear.
- In the General Settings menu, under Customization of “Hire a developer” link, select any of the following options:
- Link hidden - The “Hire a Developer” link will not appear to any users.
- Default link (Codeable) - The “Hire a Developer” link will take users to Codeable.
- Link to custom URL - The “Hire a Developer” link will take users to your custom address.
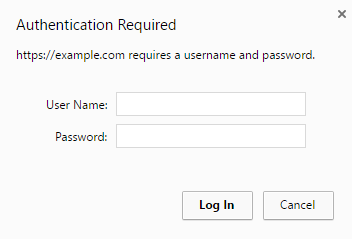
Protecting a Website with a Password
You can set a password to protect access to your WordPress website. Anyone visiting a password-protected website must enter the valid username and password to view the website content.
Password protection is useful in the following cases:
- The website is under development and you do not want anyone else to see it.
- You want to show a demo version of the website only to certain visitors.
To protect a WordPress website with a password:
- Go to WordPress, choose the installation you want to protect with a password, and then turn on “Password protection”.
- Create or generate a password. If desired, you can also change the username (the installation’s administrator username is used by default).
- Click Protect.
To disable “Password protection”, turn it off.
Setting up a Regular Run of wp-cron.php
The wp-cron.php file is a virtual cron job (or scheduled task) WordPress uses to automate certain operations,
for example, checking for plugins or themes updates, sending email notifications, and so on.
By default, WordPress runs the wp-cron.php task every time someone visits your website.
If you want WordPress operations to be performed regularly and on schedule,
you need to disable the default wp-cron.php execution.
If your website has high traffic, scheduled wp-cron.php execution may also improve the website load time.
To disable wp-cron.php on a particular WordPress installation:
-
Go to WordPress and choose the WordPress installation for which you want to disable the default
wp-cron.phpexecution. -
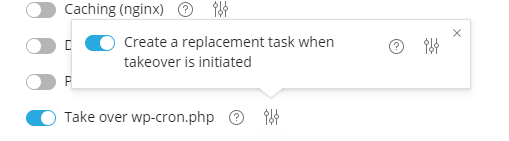
Turn on “Take over wp-cron.php” on the installation card.
The default
wp-cron.phpexecution is now disabled. -
By default, WP Toolkit automatically creates a replacement scheduled task. It will now run
wp-cron.phpevery 30 minutes.In the following cases, you may not need a replacement task:
- You already have or planning to have your own replacement task.
- You do not need any replacement task because running
wp-cron.phphas a negative impact on your website.
To choose not to create a replacement task or delete the one already created by WP Toolkit, click the
icon and then turn off “Create a replacement task when takeover is initiated”. -
(Optional) You may want to run
wp-cron.phpon a different schedule. To do so, click the icon and, next to “Create a replacement task…”, click the icon.
This will open a new Plesk tab with scheduled tasks. Change the default 30-minute interval, and then save changes.
You can also disable wp-cron.php on all new WordPress installations.
To do so, go to WordPress, click “Settings”, and then select the “Disable wp-cron.php on all new WordPress installations” checkbox.
Note: If you removed a replacement task by mistake, you can always recreate it.
To do so, click the ![]() icon, turn off, and then turn back on “Create a replacement task when takeover is initiated”.
icon, turn off, and then turn back on “Create a replacement task when takeover is initiated”.
Prior wp-cron.php Configurations
You may have already disabled wp-cron.php without WP Toolkit by using the following ways:
- Editing the
wp-config.phpfile. In this case, WP Toolkit will detect this change and adjust the “Take over wp-cron.php” toggle. - Creating your own replacement scheduled task. In this case, WP Toolkit can create another one once you turn on “Take over wp-cron.php” in the WP Toolkit interface.
You can choose between the following options:
- Keep two tasks (it will not much affect the performance).
- Delete your task and keep the task created by WP Toolkit.
- Keep your task and delete the task created by WP Toolkit. To do so, turn off “Create a replacement task when takeover is initiated”.
Logging Events of WordPress Installations
If your WordPress installation does not work as expected, you can view its logs to troubleshoot the issue. WP Toolkit logs important events it performs on managed websites, for example:
- Updating the website theme.
- Applying a security measure.
- Cloning a website.
Note: WP Toolkit version 5.5 (and higher) logs every single event it performs on a managed website. If you have WP Toolkit version 5.4, you’ll see only important events in the list.
WP Toolkit writes logs in plain text and for each individual WordPress installation.
To view logs of a WordPress installation:
-
Go to WordPress.
-
Click Logs next to the WordPress installation whose logs you want to view:
-
In the Logs of <site’s name> pop-up window, you can view the detailed information about logged events:

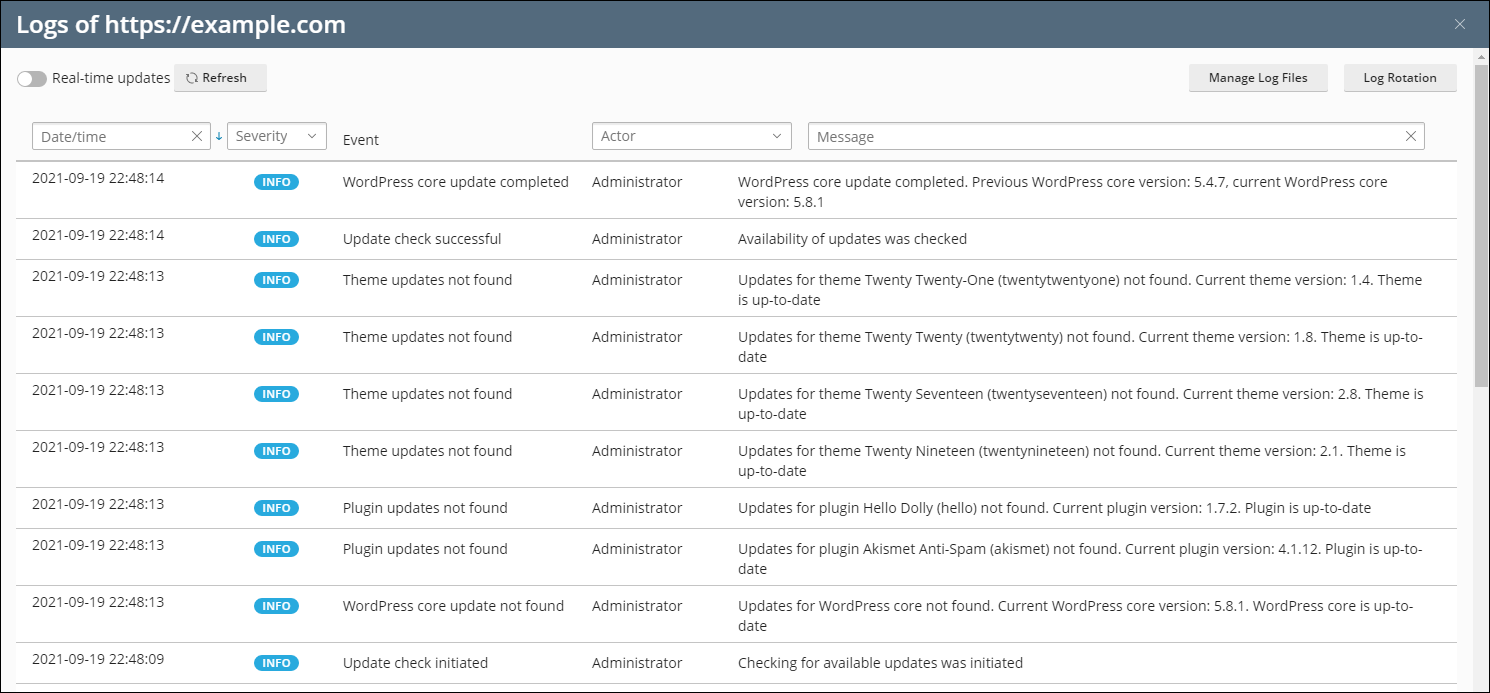
The pop-up window with the logs of the site appears. By default, the list updates only upon opening. You can also refresh the list by doing the following:
-
To get the latest logs once, click Refresh.
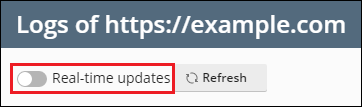
-
To get the list updated constantly while you’re viewing it, select the Real-time updates toggle button:
Note: When the toggle button is selected, logs are updated every five seconds. You can specify another update period in
actionLogRealTimeUpdatesPeriodvariable in thepanel.iniconfiguration file.
Filtering Logged Events
If you want to find particular events in the list, you can apply the following filters:

- Date/time of the event.
- Severity of the event. Possible values: Error, Warning, and Info.
- Actor of the event. It can be either a particular user or the system itself.
- Message used to describe the event.
After you’ve applied the filters, only events that match the filter criteria will be displayed.
Log Rotation
Starting from WP Toolkit version 5.5, you can configure log rotation for a particular WordPress installation. By default, log rotation is enabled for all WordPress installations. However, you can disable it or configure individual settings for each of the installations. Here’s how to do it:
-
Go to WordPress.
-
Click Logs next to the required WordPress installation.
-
In the upper right corner of the pop-up window, click Log Rotation.
-
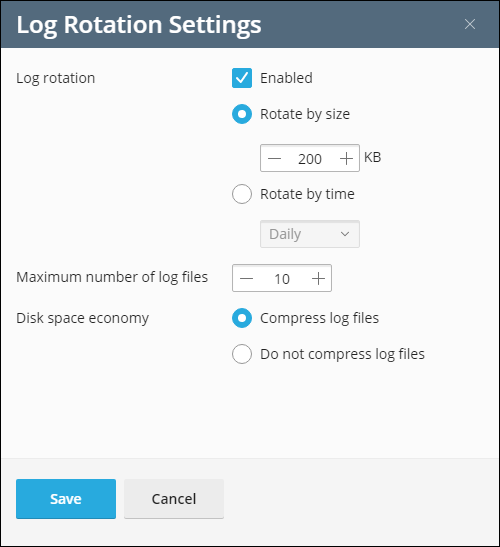
In the Log Rotation Settings pop-up window, configure the following parameters:
- Enabled checkbox. By default, the checkbox is selected. You can manually disable log rotation by clearing the checkbox.
- Rotate by size or Rotate by time radio buttons. Select the required option and specify the maximum log size or the rotation time.
- Maximum number of log files. When the number of log files reaches the specified value, WP Toolkit will compress the earliest uncompressed log file before creating a new one.
- Disk space economy. To save disk space, select the Compress log files radio button. If you want the log files to be available at any moment, select the Do not compress log files radio button.
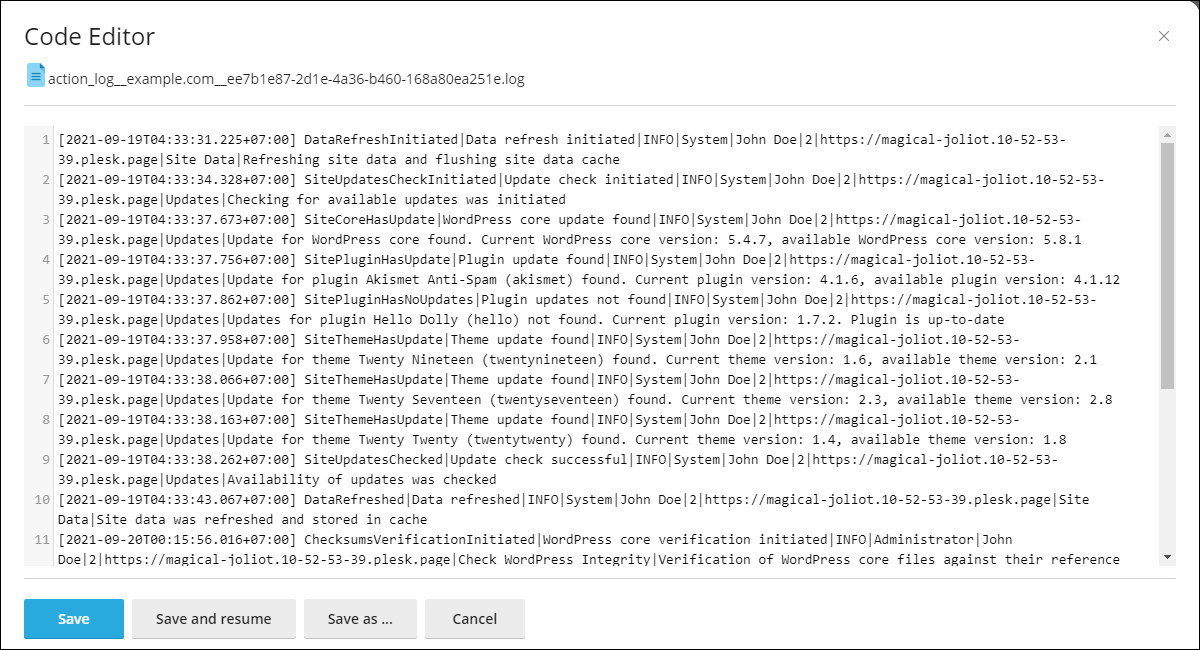
Log File Manager
In the log file manager, you can view, copy, or delete particular lines of the recorded events. WP Toolkit stores each log file in a separate folder and names the file according to the following pattern:
$HOME/logs/wpt_action_logs/action_log_#WEBSITE_UID#.log
where $HOME is your domain home directory and WEBSITE_UID is the website’s internal UID.
Here’s how the log editor can look:
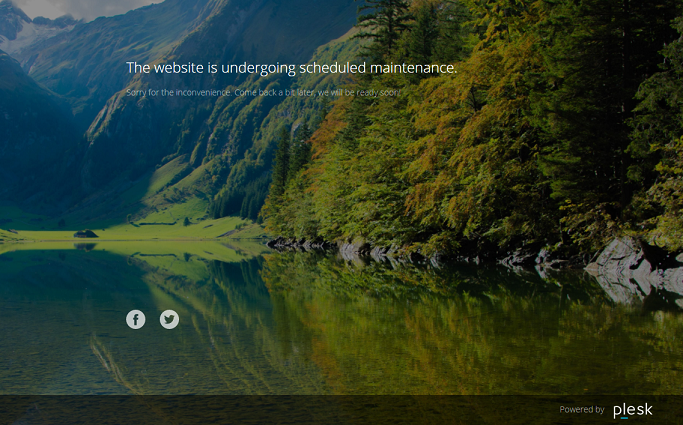
Maintenance Mode
When a WordPress website enters maintenance mode, the website’s content is hidden from visitors without being changed or otherwise affected. Visitors accessing your website when it is in maintenance mode see a maintenance screen webpage instead of the website content.
Turning on the maintenance mode
Your WordPress website enters maintenance mode automatically when you are:
- Upgrading your WordPress installation.
- Copying data from one WordPress installation to another.
If you are making changes to your website and want to temporarily hide it from visitors, you can manually put it into maintenance mode.
To put a WordPress website into maintenance mode:
-
Go to WordPress and choose the WordPress installation you want to put into maintenance mode.
-
Turn on “Maintenance mode” on the installation card.
To take your website out of maintenance mode, turn off “Maintenance mode”.
Customizing the maintenance page
With WP Toolkit, you can change certain attributes of the maintenance page to make it more informative. For example you can:
- Change the text displayed on the maintenance page.
- Add a countdown timer.
- Provide or remove links to social network pages.
To customize the maintenance page:
-
Go to WordPress, choose the WordPress installation whose maintenance page you want to customize, and then click the
icon next to
“Maintenance mode” on the installation card. -
In the “Screen Text” section, you can change the text displayed. Use HTML tags to format the text’s appearance.
-
In the “Timer” section, you can set up and turn on the countdown timer, which will be displayed on the maintenance page.
Note: The timer is only meant to inform visitors about the estimated duration of the remaining downtime. Your website is not taken out of maintenance when the countdown is finished; you must do that manually.
-
In the “Social Network Links” section, provide or remove links to social network pages (Facebook, Twitter, and Instagram).
-
(Optional) To see how the configured maintenance page looks, click Preview.
-
When you are satisfied with the changes made to the maintenance page, click OK.
If you have coding skills, you can customize the maintenance page beyond the options described above. You can do this for a particular WordPress website or for all WordPress websites hosted on the server.
To customize the maintenance page for a particular website:
- Go to WordPress, choose the WordPress installation whose maintenance
page you want to customize, and then click the icon next to
“Maintenance mode” on the installation card.
- Click Customize and edit the maintenance page template in Code Editor.
- Click OK.
To customize the maintenance page for all WordPress websites hosted on the server:
- Edit the server-wide maintenance page template:
- (Plesk for Linux)
/usr/local/psa/var/modules/wp-toolkit/maintenance/template.phtml - (Plesk for Windows)
%plesk_dir%var\modules\wp-toolkit\maintenance\template.phtml
- (Plesk for Linux)
- When you put a WordPress website in maintenance mode for the first time, the customized maintenance page template is applied automatically.
The customized server-wide maintenance page template is applied only to WordPress websites that had never been put in maintenance mode before. To apply it to a WordPress website that had already been put in maintenance mode, do the following:
- Go to WordPress and choose the WordPress installation to which you want to apply the customized server-wide maintenance page template.
- Click the icon next to “Maintenance mode” on the installation card and
then click Restore Default.
This replaces the website-specific maintenance page with a copy of the server-wide template.
Restoring the default maintenance page
If necessary, you can restore the default maintenance page. You do it differently depending on whether you have customized the server-wide template or not.
To restore the default maintenance page if the server-wide template has not been changed:
- Go to WordPress and choose the WordPress installation whose maintenance page you want to reset to default.
- Click the icon next to “Maintenance mode” on the installation card and
then click Restore Default.
To restore the default maintenance page if the server-wide template has been changed:
-
Revert the changes made to the server-wide maintenance page template by replacing the file:
- (Plesk for Linux)
usr/local/psa/var/modules/wp-toolkit/maintenance/template.phtml - (Plesk for Windows)
%plesk_dir%var\modules\wp-toolkit\maintenance\template.phtml
with the following file:
- (Plesk for Linux)
/usr/local/psa/admin/plib/modules/wp-toolkit/resources/maintenance/template.phtml - (Plesk for Windows)
%plesk_dir%admin\plib\modules\wp-toolkit\resources\maintenance\template.phtml
- (Plesk for Linux)
-
When you put a WordPress website in maintenance mode for the first time, the default maintenance page template is applied automatically.
The default server-wide maintenance page template is applied only to WordPress websites that had never been put in maintenance mode before. To apply it to a WordPress website that had already been put in maintenance mode, do the following:
- Go to WordPress and choose the WordPress installation whose maintenance page you want to reset to default.
- Click the icon next to “Maintenance mode” on the installation card and
then click Restore Default.
This replaces the website-specific maintenance page with a copy of the default server-wide template.
WordPress Core Checksum Verification
Note: The feature is supported in WP Toolkit version 5.6 or higher. Pay attention that it doesn’t check such files as index.php, wp-config.php, and other files that contain installation-specific data and don’t have a reference checksum.
When malicious software infects WordPress sites, it can embed itself in the WordPress .php core files. As a result, it can damage your Search Engine Optimization, illegally mine cryptocurrency, or force unauthorized redirects. The core files are not meant to be modified, so you can check their MD5 checksum against the checksum of the original core files provided by WordPress.
To verify the checksum of a WordPress installation, do the following:
-
Go to WordPress.
-
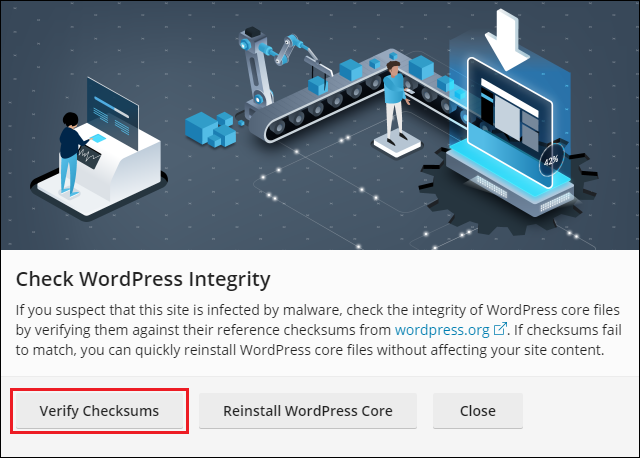
In the form of the required site, click Check WordPress Integrity.
-
In the pop-up window that appears, click Verify Checksums.
-
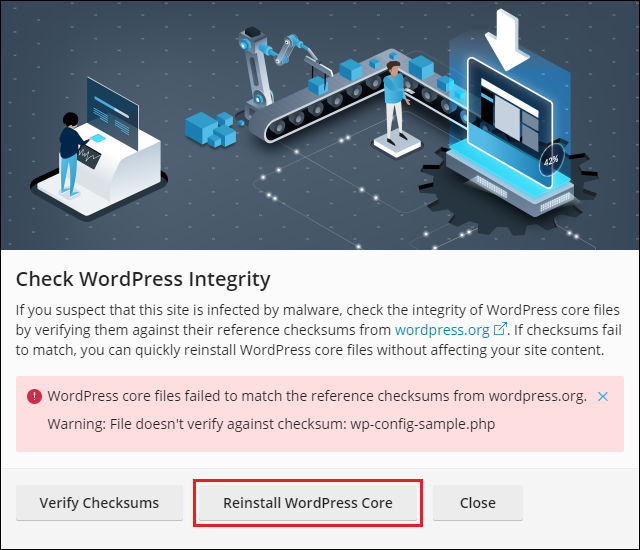
After WP Toolkit verifies the checksum, do one of the following:
-
If WordPress core files are successfully verified, click Close.
-
If some core files differ, click Reinstall WordPress Core:
Note: Reinstalling the WordPress core doesn’t affect the site content. However, we recommend that you create a backup of the site’s files as a protective measure.
After the core files are reinstalled, close the pop-up window.
-
As a result, the core files of the WordPress installation are checked and secured.
Access WP-CLI
WP-CLI is the official WordPress command-line interface for managing WordPress websites. See more information about WP-CLI.
You can access WP-CLI directly from the Plesk command-line interface
using the wp-toolkit utility with no need to install WP-CLI on the
server.
Read more about the wp-toolkit utility.
To call a WP-CLI command via the Plesk command-line interface:
Connect to your Plesk server via SSH (on Linux) or via RDP (on Windows) and, in the command line, run the command:
plesk ext wp-toolkit --wp-cli -instance-id [ID] [command] [options]
where:
-
[ID]is the ID of the WordPress installation in Plesk. To learn the ID, go to WordPress and click the name of the WordPress installation. The ID will be displayed at the end of the URL in the browser. For example, if the URL ends with/id/2, then the ID=2. -
[command]is a WP-CLI command prefixed by--(for example,-- core). -
[options]is the list of the WP-CLI command’s options.
The full list of WP-CLI commands and their options can be found here .
Examples:
To get the main WordPress information (a blog name, a website URL, a version, an update version, plugins, and themes):
plesk ext wp-toolkit --wp-cli -instance-id 4 -- core info
To get help for the core command:
plesk ext wp-toolkit --wp-cli -instance-id 4 -- help core
To install and activate the latest version of the bbPress plugin from wordpress.org:
plesk ext wp-toolkit --wp-cli -instance-id 4 -- plugin install bbpress --activate
To reset the WordPress administrator password:
plesk ext wp-toolkit --site-admin-reset-password
Note: To make the changes performed by running a WP-CLI command visible in
WP Toolkit, refresh the corresponding WordPress installation.
To do so, go to WordPress and then click the icon
on the installation card.