Managing Mail Accounts
Mail service enables Internet users to send email messages to each other. Plesk can function as your mail server. It also enables you to create mail accounts and manage them, including performing a number of common mail-related operations. Such operations include changing the password for a mail account, enabling automatic replies, and so on.
To create a mail account:
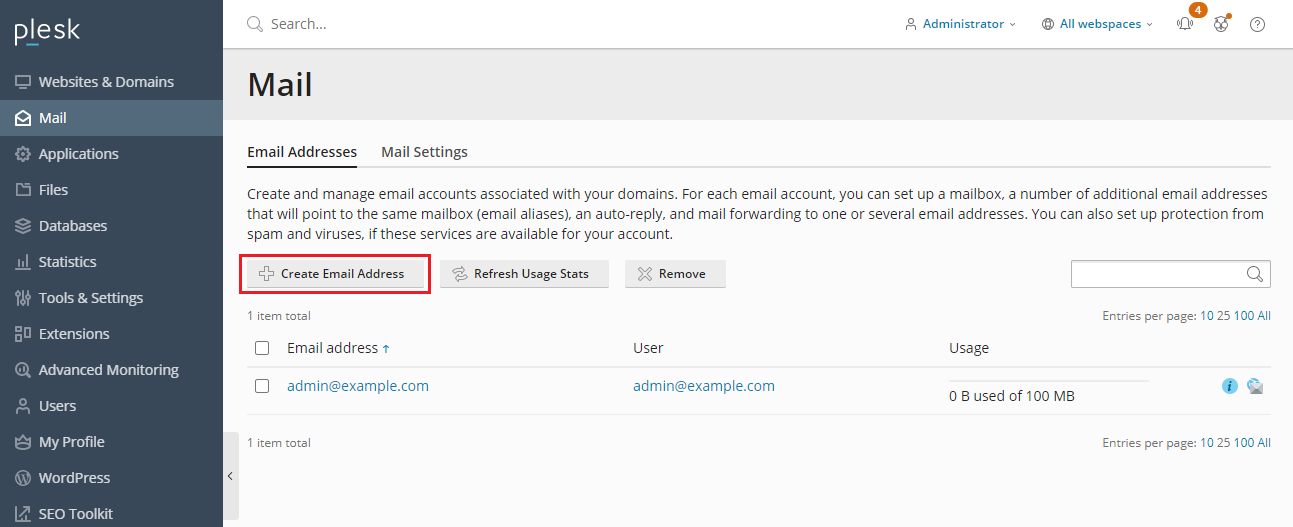
Go to Mail > Create Email Address.

To access your mail account using webmail:
- In a Web browser, visit the URL
webmail.example.com, whereexample.comis the Internet address of your website. When prompted, specify your full email address as the username (for example,mail@example.com), and specify the email address password. - When logged in to Plesk, go to Mail, and in the list of email
addresses, click the
icon next to the email address you need.
Note: If you cannot open the webmail page, make sure that a webmail solution is enabled. Go to Mail > Mail Settings, click the name of the domain for which webmail is inaccessible, and select a webmail client in the Webmail menu.
To access your mail account using a mail client:
Install a mail client program on your computer and start it. Typically, in such programs you should specify the following settings:
- Username. Specify your full email address in this field. For example, johndoe@example.com.
- Password. Specify the password to your email account here.
- Mail server protocol. This property defines whether you want to keep copies of messages on the server or not. To keep the copies on the server, select the IMAP option. If you do not want to keep them on the server, select POP3. Selecting IMAP also enables you to train the SpamAssassin spam filter on email messages you receive, if SpamAssassin is switched on on the server.
- Incoming mail server (POP3/IMAP). Specify your domain name here. For example, example.com. The default POP3 port is 110. The default IMAP port is 143.
- Outgoing mail server (SMTP). Specify your domain name here. For example, example.com. The default SMTP port is 25. Specify that the server requires authentication.
For detailed instructions on configuring your mail client, refer to your mail client documentation.
Note: If you cannot access your mailbox following the instructions in this section, make sure that mail autodiscover is enabled for your domain. For example, to enable mail autodiscover for the example.com domain, go to Domains > example.com > Mail Settings, and select the Enable mail autodiscover checkbox.
There may also be an issue with the mail server’s settings. For example, mail services may be listening on non-standard ports, or access to them may be blocked. Contact your hosting provider to resolve the issue.
 icon next to the email address
you need.