(Plesk for Linux)Plesk ファイアウォール
概要: Plesk ファイアウォールは、Plesk for Linux サーバとのネットワーク接続を制限することでサーバのセキュリティを強化するためのツールです。
このトピックでは、ファイアウォールルールとポリシーの追加・削除方法、特定の国からの接続をブロックする方法、ファイアウォールルールをエクスポート・インポートしてサーバ間でファイアウォール構成を簡単に複製する方法を学びます。
ご用心: Plesk ファイアウォールと firewalld は、いずれも iptables ファイアウォールを管理するためのツールです。両ツールを同時に使用すると競合が発生し、Plesk が動作するために必要なポートが閉じられてしまいます。一度にいずれか 1 つのツールだけ使用することをお勧めします。
ファイアウォールルールとポリシーを管理する
デフォルトで、Plesk ファイアウォールの設定はポリシーとルールで構成されています。
- ポリシーは適用範囲が広く、ポリシー自体に応じて、サーバとの間のすべての接続に影響します。たとえば、「着信トラフィックに対するシステムポリシー」を使用すると、サーバへのすべての着信接続を完全にブロックできます。
- ルールは適用範囲が狭く、SMTP や MySQL/MariaDB など、個々の Plesk サービスへの着信接続を制御します。
ルールはポリシーよりも優先されます。たとえば、グローバルポリシーですべての着信トラフィックを拒否する一方、ルールでは特定の IP からの着信トラフィックを許可する場合、ルールが優先されます。このメカニズムを使用して、サーバのセキュリティを強化したり、緩和したりできます。
たとえば、一部の許可された IP アドレスやポートを除き、サーバへの接続やサーバからの接続をすべて禁止するようにポリシーを設定すると、セキュリティは向上しますが、ネットワークの制限により一部のアプリケーションが動作しなくなる可能性があります。逆に、デフォルトですべての接続を許可し、ルールを使用して個々のサービスや個々の IP アドレスからのアクセスをブロックすると、サーバのセキュリティは低下しますが、接続の問題は発生しなくなります。使いやすさとセキュリティの最適なトレードオフを見つけるために、実験してみてください。
ファイアウォールは以下の 2 通りの方法で管理できます。
- デフォルトのものも含め、既存のポリシーやルールを変更する。
- カスタムルールを作成または削除する。
既存のポリシーまたはルールを変更する:
- Plesk にログインします。
- [ツールと設定] > [ファイアウォール]([セキュリティ]の下)に移動します。
- [ファイアウォール保護]のトグルボタンをクリックして、[有効]を表示させます。ファイアウォール保護を既に有効にしている場合、この手順はスキップしてください。
- 変更するポリシーまたはルールをクリックします。
- 必要な変更を加え、[保存]をクリックし、[変更を適用]をクリックして、[適用]をクリックします。
これで、ファイアウォールの設定の変更が有効になりました。
カスタムルールを作成する:
- Plesk にログインします。
- [ツールと設定] > [ファイアウォール]([セキュリティ]の下)に移動します。
- [ファイアウォール保護]のトグルボタンをクリックして、[有効]を表示させます。ファイアウォール保護を既に有効にしている場合、この手順はスキップしてください。
-
 ボタンをクリックします。
 - (オプション)ルールに名前を付けます。
- ルールを設定します。たとえば、IP アドレス 198.51.100.1 から SSH サービスへのすべての着信接続をブロックするには(デフォルトの SSH ポートが使用されていると仮定)、「一致方向」を「着信」に設定し、「アクション」を「拒否」に設定し、「ポート」を「TCP 22」に設定し、「ソース」フィールドに「198.51.100.1」と入力します。
- ルールを設定したら、[保存]をクリックし、[変更を適用]をクリックして、[適用]をクリックします。
これでファイアウォールの設定の変更が有効になりました。カスタムルールを作成する際は、誤って Plesk サービスが使用するポートへの接続をブロックしないように注意してください。
注釈: Docker コンテナ を使用している場合、Plesk ファイアウォールルールに Docker ファイアウォールルールが追加されません。
カスタムルールを削除する:
- Plesk にログインします。
- [ツールと設定] > [ファイアウォール]([セキュリティ]の下)に移動します。
- [ファイアウォール保護]のトグルボタンをクリックして、[有効]を表示させます。ファイアウォール保護を既に有効にしている場合、この手順はスキップしてください。
- 削除するカスタムルールを 1 つ以上選択します。削除できるのはカスタムルールだけです。
- [削除]をクリックし、[はい、削除します]をクリックし、[変更を適用]をクリックしてから、[適用]をクリックします。
これで、ファイアウォールの設定の変更が有効になりました。
国別ブロック
Plesk ファイアウォールを使用して、特定の国に属する IP アドレスとのアクセスをブロックできます。
特定の国からのアクセスをブロックする:
- Plesk にログインします。
- [ツールと設定] > [ファイアウォール]([セキュリティ]の下)に移動します。
- [ファイアウォール保護]のトグルボタンをクリックして、[有効]を表示させます。ファイアウォール保護を既に有効にしている場合、この手順はスキップしてください。
-
ボタンをクリックします。
- (オプション)ルールに名前を付けます。
- 「アクション」を「拒否」に設定します。
- [ソース]の下に、ブロックする国の 2 桁の ISO 3166 国コードを入力します(たとえば、アフガニスタンからの接続をすべてブロックする場合は AF と入力します)。
- (オプション)[もう 1 つ追加]をクリックして前の工程を繰り返すと、追加の国をブロックできます。国は必要な数だけブロックできます。
- ブロックする国をすべて追加したら、[保存]をクリックします。
- [変更を適用]をクリックして、[適用]をクリックします。
ファイアウォールの構成が適用された後は、ブロック対象の国からサーバへの接続がすべて拒否されるようになります。
デフォルトで、Plesk は DB-IP の無料データベース「IP to Country Lite」を使用します。代わりに MaxMind の無料または有料のデータベースを使用することもできます。その場合、事前に MaxMind から無料または有料ライセンスを取得してライセンスキーを受け取っておく必要があります。
有料の GeoIP2 データベースに切り替える:
-
panel.ini ファイルに以下の行を追加します。
[ext-firewall]
geoipDataSource = maxmind-lite
無料の GeoLite2 データベースを使用する場合
[ext-firewall]
geoipDataSource = maxmind
有料の GeoIP2 データベースを使用する場合
-
サーバに SSH ログインして、以下のコマンドを実行します。
LICENSE_KEY=<enter your license key here> plesk sbin modules/firewall/ipsets --configure --data-source maxmind-lite --force
または
LICENSE_KEY=<enter your license key here> plesk sbin modules/firewall/ipsets --configure --data-source maxmind --force
順に、MaxMind の無料または有料のデータベースを使用する場合
注釈: コマンドが
Set cannot be destroyedという警告で終了する場合がありますが、この警告は無視しても問題ありません。 -
[ツールと設定] > [ファイアウォール]([セキュリティ]の下)に移動します。
-
[変更を適用]をクリックして、[適用]をクリックします。
注釈: [変更を適用]ボタンがない場合、変更の適用を軌道するための新しいファイアウォールルールを作成します。このルールは後で削除できます。
ファイアウォールの構成が適用されたら、GeoIP2 データベースが GeoLite2 の代わりに使用されるようになります。
DB-IP の無料データベースに戻すには、panel.ini ファイルから geoipDataSource = maxmind-lite または geoipDataSource = maxmind の行を削除してから、ファイアウォールの構成をもう一度適用します。
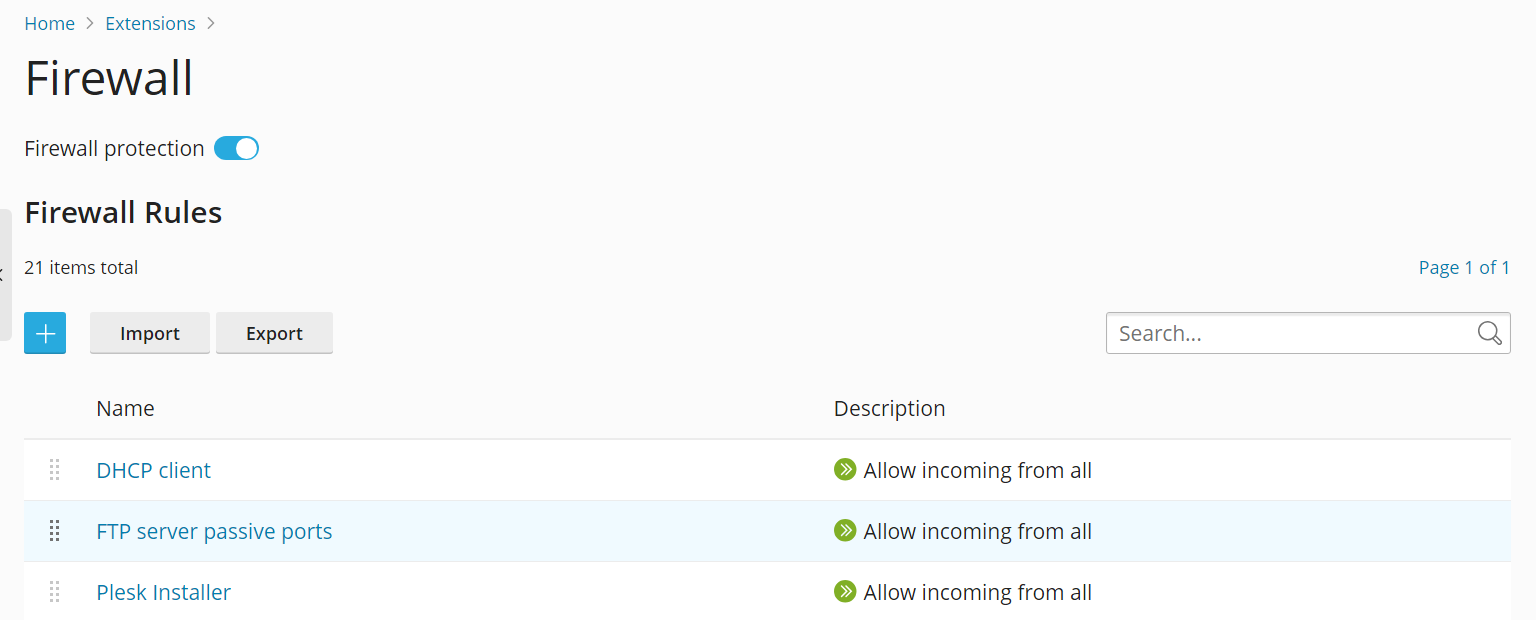
ファイアウォール構成をインポートまたはエクスポートする
Plesk for Linux サーバのファイアウォール構成を別の Plesk for Linux サーバで複製することができます。最も簡単なのは、ファイアウォール構成をファイルにエクスポートして、それぞれの Plesk for Linux サーバにインポートする方法です。ファイアウォール構成のインポートとエクスポートは、グラフィカルインターフェース経由でもコマンドライン経由でも可能です。
GUI 経由でファイアウォール構成をエクスポートする:
- ファイアウォール構成をコピーしたいサーバで Plesk にログインします。
- [ツールと設定] > [ファイアウォール]([セキュリティ]の下)に移動します。
- [ファイアウォール保護]のトグルボタンをクリックして[有効]を表示させてから、[適用]をクリックします。ファイアウォール保護を既に有効にしている場合、この手順はスキップしてください。
- [エクスポート]をクリックします。
ファイアウォール構成が .json ファイルに保存されます。このファイルはブラウザのダウンロードディレクトリで見つけることができます。
GUI 経由でファイアウォール構成をインポートする:
- 別のサーバからファイアウォール構成をコピーしたいサーバで Plesk にログインします。
- [ツールと設定] > [ファイアウォール]([セキュリティ]の下)に移動します。
- [ファイアウォール保護]のトグルボタンをクリックして[有効]を表示させてから、[適用]をクリックします。ファイアウォール保護を既に有効にしている場合、この手順はスキップしてください。
-
[インポート]をクリックして、ファイアウォール構成のコピー元サーバからエクスポートされた
.jsonファイルを探します。
このファイルからファイアウォール構成が適用されます。
CLI 経由でファイアウォール構成をエクスポートする:
-
ファイアウォール構成をコピーしたいサーバに SSH 経由でログインします。
-
以下のコマンドを実行してファイアウォール構成をエクスポートします。
plesk ext firewall --export > rules.jsonファイルの名前は自由に付けられます。「rules.json」は一例です。
指定したファイルにファイアウォール構成が保存されます。
CLI 経由でファイアウォール構成をインポートする:
-
他のサーバからファイアウォール構成をコピーしたいサーバに SSH 経由でログインします。ファイアウォール構成をインポートするためには、2 つの別々の SSH セッションを開く必要があります。
-
最初の SSH セッションでは、以下のコマンドを実行してファイアウォールによる保護を有効にします。既に有効になっている場合、この手順はスキップしてください。
plesk ext firewall --enable -
2 番目の SSH セッションでは、以下のコマンドを実行してファイアウォールによる保護を確認します。既に有効になっている場合、この手順はスキップしてください。
plesk ext firewall --confirm -
最初の SSH セッションで、以下のコマンドを実行してファイアウォール構成をインポートし、適用します。
plesk ext firewall --import -config <the file's URL or local path> && plesk ext firewall --apply例:
plesk ext firewall --import -config https://example.com/rules.json && plesk ext firewall --applyまたは
plesk ext firewall --import -config /tmp/rules.json && plesk ext firewall --apply -
新しいファイアウォール設定を適用した後、SSH 経由でサーバーに接続できることを確認します。接続できる場合は、2 番目の SSH セッションで次のコマンドを実行して、インポートされたファイアウォール設定を確認します。
plesk ext firewall --confirm注釈:
plesk ext firewall --applyコマンドを実行してから 60 秒以内にインポートしたファイアウォール設定を確認しないと、行った変更が自動的にロールバックされ、以前のファイアウォール設定が復元されます。
このファイルのファイアウォール構成がサーバに適用されます。