(Plesk pour Linux) Le pare-feu de Plesk
Résumé: Le pare-feu de Plesk est un outil que vous pouvez utiliser afin d’améliorer la sécurité de votre serveur Plesk pour Linux en restreignant les connexions réseau au serveur et/ou depuis le serveur.
Dans cette section, vous découvrirez comment ajouter et supprimer des règles et des politiques du pare-feu, comment bloquer des connexions entrantes de pays spécifiques et comment importer/exporter des règles du pare-feu afin de réutiliser la configuration du pare-feu sur différents serveurs.
Prudence: Le pare-feu de Plesk et firewalld sont des outils pour gérer le pare-feu iptables. Leur utilisation simultanée risque de générer des conflits et d’entraîner la fermeture de ports requis pour le fonctionnement de Plesk. Nous vous recommandons d’utiliser un seul outil.
Prérequis
Avant de commencer, l’extension « Firewall » doit être installée sur le serveur. Si l’extension n’est pas installée, alors installez l’extension depuis le Catalogue des extensions.
Gérer les règles et les politiques du pare-feu
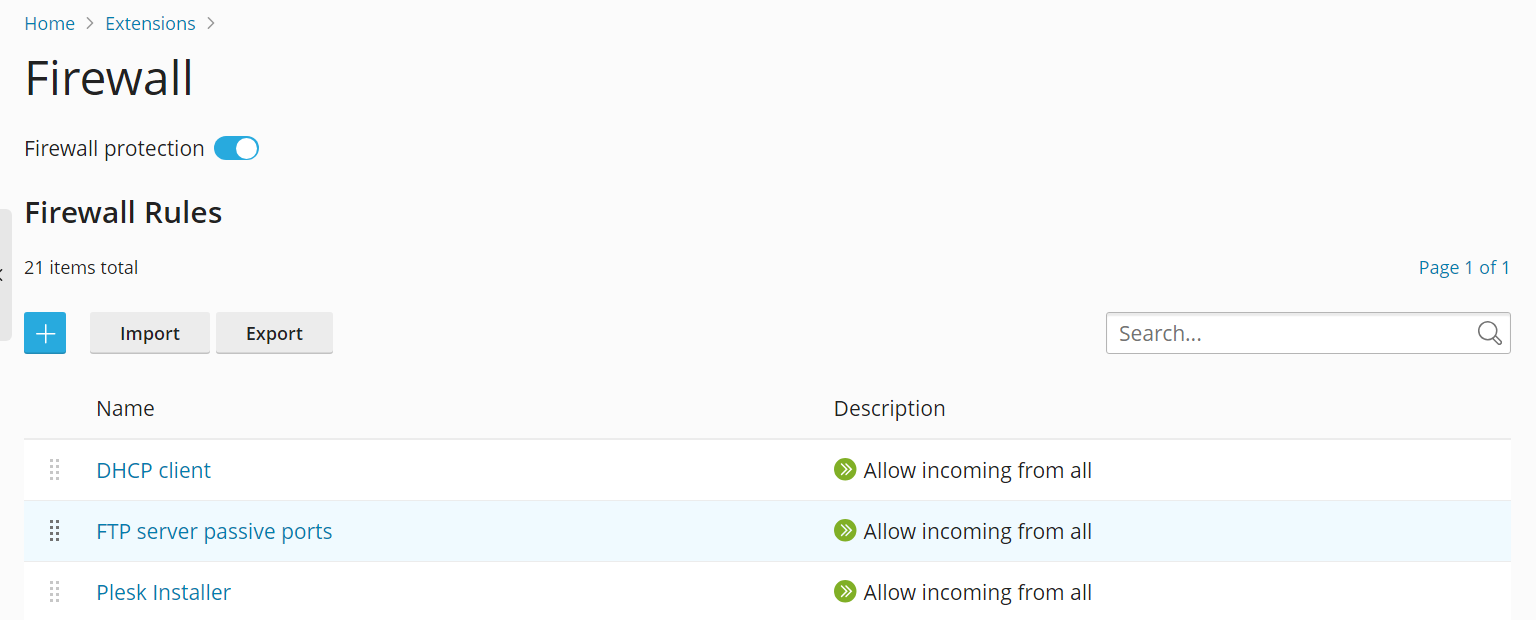
Par défaut, la configuration du pare-feu Plesk comprend des politiques et des règles :
- Les politiques ont une portée étendue et affectent toutes les connexions vers ou depuis le serveur, en fonction de la politique elle-même. Par exemple, vous pouvez utiliser la « Politique système pour le trafic entrant » pour bloquer complètement toutes les connexions entrantes vers le serveur.
- Les règles ont une portée plus restreinte et régissent les connexions entrantes vers des services Plesk individuels, comme MySQL/MariaDB ou le protocole SMTP.
Les règles prévalent sur les politiques. Par exemple, si la politique globale consiste à refuser tout le trafic entrant, mais qu’une règle autorise le trafic entrant en provenance d’une adresse IP spécifique, la règle prévaut. Vous pouvez utiliser ce mécanisme pour renforcer ou assouplir la sécurité du serveur.
Par exemple, la configuration de politiques interdisant toutes les connexions depuis et vers le serveur, à l’exception de quelques adresses IP ou ports autorisés, améliorera la sécurité. Toutefois, certaines applications risquent de ne pas fonctionner en raison des restrictions du réseau. À l’inverse, autoriser toutes les connexions par défaut et utiliser des règles pour bloquer l’accès à des services individuels ou à partir d’adresses IP individuelles risque de diminuer la sécurité de votre serveur, mais vous éviterez tout problème de connexion. Nous vous invitons à essayer diverses configurations afin de trouver le meilleur compromis entre facilité d’utilisation et sécurité.
Vous pouvez gérer le pare-feu de deux manières :
- Modifier les politiques et règles existantes, y compris celles par défaut.
- Créer et supprimer des règles personnalisées.
Pour modifier une politique ou une règle existante :
- Connectez-vous à Plesk.
- Allez dans Outils & Paramètres > Pare-feu (sous « Sécurité »).
- Cliquez sur le bouton « Protection par pare-feu » pour le passer sur « Activé ». Si la protection par pare-feu est déjà activée, ignorez cette étape.
- Cliquez sur la politique ou la règle que vous souhaitez modifier.
- Apportez les modifications souhaitées. Ensuite, cliquez sur Enregistrer, puis sur Appliquer les modifications et sur Appliquer.
Les modifications apportées à la configuration du pare-feu sont désormais en vigueur.
Pour créer une règle personnalisée :
- Connectez-vous à Plesk.
- Allez dans Outils & Paramètres > Pare-feu (sous « Sécurité »).
- Cliquez sur le bouton « Protection par pare-feu » pour le passer sur « Activé ». Si la protection par pare-feu est déjà activée, ignorez cette étape.
- Cliquez sur le bouton
 .
. - (Facultatif) Donnez un nom à votre règle.
- Configurez la règle. Par exemple, pour bloquer toutes les connexions entrantes au service SSH à partir de l’adresse IP 198.51.100.1 (en supposant que le port SSH par défaut est utilisé), définissez « Direction correspondante » sur « Entrante », « Action » sur « Refuser » et » Port » sur « TCP 22 ». Ensuite, saisissez « 198.51.100.1 » dans le champ « Sources ».
- Une fois que vous avez configuré la règle, cliquez sur Enregistrer, puis sur Appliquer les modifications et sur Appliquer.
Les modifications apportées à la configuration du pare-feu sont désormais en vigueur. Lorsque vous créez des règles personnalisées, veillez à ne pas bloquer par inadvertance les connexions aux ports utilisés par les services Plesk.
Note: Si vous utilisez des conteneurs Docker, les règles du pare-feu Docker ne sont pas ajoutées aux règles du pare-feu Plesk.
Pour supprimer des règles personnalisées :
- Connectez-vous à Plesk.
- Allez dans Outils & Paramètres > Pare-feu (sous « Sécurité »).
- Cliquez sur le bouton « Protection par pare-feu » pour le passer sur « Activé ». Si la protection par pare-feu est déjà activée, ignorez cette étape.
- Sélectionnez une ou plusieurs règles personnalisées que vous souhaitez supprimer. Seules les règles personnalisées peuvent être supprimées.
- Cliquez sur Supprimer, puis sur Oui, supprimer. Ensuite, cliquez sur Appliquer les modifications, puis sur Appliquer.
Les modifications apportées à la configuration du pare-feu sont désormais en vigueur.
Blocage par pays
Vous pouvez utiliser le pare-feu de Plesk pour bloquer l’accès vers ou depuis des adresses IP d’un pays spécifique.
Bloquer l’accès depuis un pays spécifique:
- Connectez-vous à Plesk.
- Allez dans Outils & Paramètres > Pare-feu (sous « Sécurité »).
- Cliquez sur le bouton « Protection par pare-feu » pour le passer sur « Activé ». Si la protection par pare-feu est déjà activée, ignorez cette étape.
- Cliquez sur le bouton .
- (Facultatif) Donnez un nom à votre règle.
- Définissez « Action » sur « Refuser ».
- Dans « Sources », saisissez le code pays ISO 3166 à deux lettres du pays que vous voulez bloquer. Par exemple, pour bloquer toutes les connexions entrantes depuis l’Afghanistan, saisissez AF.
- (Facultatif) Cliquez sur « Add one more » (« Ajouter un autre ») et répétez l’étape précédente pour bloquer tout autre pays. Vous pouvez bloquer autant de pays que vous le souhaitez.
- Cliquez sur Enregistrer lorsque vous aurez ajouté tous les pays que vous voulez bloquer.
- Cliquez sur Appliquer les modifications, puis sur Appliquer.
Une fois que la configuration du pare-feu a été appliquée, toutes les connexions entrantes vers votre serveur depuis le ou les pays bloqués seront refusées.
Par défaut, Plesk utilise la base de données gratuite « IP to Country Lite » de DB-IP. Vous pouvez également utiliser à la place une base de données gratuite ou payante de MaxMind. Avant cela, vous devez disposer d’une licence gratuite ou payante de MaxMind et recevoir votre clé de licence.
Passer à une base de données GeoIP2 payante:
-
Ajoutez les lignes suivantes dans le fichier panel.ini :
[ext-firewall]
geoipDataSource = maxmind-lite
pour utiliser une base de données GeoLite2 gratuite ou
[ext-firewall]
geoipDataSource = maxmind
pour utiliser une base de données GeoIP2 payante.
-
Connectez-vous au serveur via SSH, puis exécutez la commande suivante :
LICENSE_KEY=<enter your license key here> plesk sbin modules/firewall/ipsets --configure --data-source maxmind-lite --force
ou
LICENSE_KEY=<enter your license key here> plesk sbin modules/firewall/ipsets --configure --data-source maxmind --force
pour utiliser la base de données gratuite ou payante de MaxMind, respectivement.
Note: La commande peut terminer par l’avertissement Set cannot be destroyed`. Vous pouvez ignorer cet avertissement sans problème.
-
Allez dans Outils & Paramètres > Pare-feu (sous « Sécurité »).
-
Cliquez sur Appliquer les modifications, puis sur Appliquer.
Note: Si le bouton Appliquer les modifications est absent, créez une nouvelle règle de pare-feu pour déclencher l’option afin d’appliquer les modifications. Vous pourrez supprimer cette règle par la suite.
Une fois que la configuration du pare-feu aura été appliquée, la base de données GeoIP2 sera utilisée à la place de la base de données GeoLite2.
Pour revenir à la base de données gratuite de DB-IP, supprimez la ligne geoipDataSource = maxmind-lite ou geoipDataSource = maxmind du fichier et appliquez à nouveau la configuration du pare-feu.
Importer et exporter la configuration du pare-feu
Vous aurez peut-être besoin de dupliquer la configuration du pare-feu d’un serveur Plesk pour Linux sur d’autres serveurs Plesk pour Linux. Le plus simple est d’exporter la configuration du pare-feu vers un fichier et de l’importer sur chacun des serveurs Plesk pour Linux. Vous pouvez importer et exporter la configuration du pare-feu via l’interface graphique et la ligne de commande.
Exporter la configuration du pare-feu via la GUI:
- Connectez-vous à Plesk sur le serveur dont vous voulez copier la configuration du pare-feu.
- Allez dans Outils & Paramètres > Pare-feu (sous « Sécurité »).
- Cliquez sur le bouton « Protection par pare-feu » pour le passer sur « Activé ». Ensuite, cliquez sur Appliquer. Si la protection par pare-feu est déjà activée, ignorez cette étape.
- Cliquez sur Exporter.
La configuration du pare-feu sera enregistrée dans un fichier .json. Vous pouvez le trouver dans le répertoire de téléchargements de votre navigateur.
Importer la configuration du pare-feu via la GUI:
- Connectez-vous à Plesk sur le serveur sur lequel vous voulez copier la configuration du pare-feu.
- Allez dans Outils & Paramètres > Pare-feu (sous « Sécurité »).
- Cliquez sur le bouton « Protection par pare-feu » pour le passer sur « Activé ». Ensuite, cliquez sur Appliquer. Si la protection par pare-feu est déjà activée, ignorez cette étape.
- Cliquez sur Importer. Puis, cherchez le fichier
.jsonexporté sur le serveur dont vous voulez copier la configuration du pare-feu.
La configuration du pare-feu du fichier sera appliquée.
Exporter la configuration du pare-feu via la CLI:
-
Connectez-vous via SSH au serveur dont vous voulez copier la configuration.
-
Exécutez la commande suivante pour exporter la configuration du pare-feu :
plesk ext firewall --export > rules.jsonVous pouvez nommer ce fichier comme vous le souhaitez. « rules.json » est seulement un exemple.
La configuration du pare-feu sera enregistrée dans le fichier spécifié.
Importer la configuration du pare-feu via la CLI:
-
Connectez-vous via SSH au serveur sur lequel vous voulez copier la configuration du pare-feu d’un autre serveur. Vous devez ouvrir deux sessions SSH distinctes pour importer la configuration du pare-feu.
-
Dans la première session SSH, exécutez la commande suivante pour activer la protection par pare-feu. Si la protection par pare-feu est déjà activée, ignorez cette étape.
plesk ext firewall --enable -
Dans la deuxième session SSH, exécutez la commande suivante pour confirmer la protection par pare-feu. Si la protection par pare-feu est déjà activée, ignorez cette étape.
plesk ext firewall --confirm -
Dans la première session SSH, exécutez la commande suivante pour importer et activer la configuration du pare-feu :
plesk ext firewall --import -config <the file's URL or local path> && plesk ext firewall --applyPar exemple
plesk ext firewall --import -config https://example.com/rules.json && plesk ext firewall --applyou
plesk ext firewall --import -config /tmp/rules.json && plesk ext firewall --apply -
Vérifiez que vous pouvez vous connecter au serveur via SSH après avoir appliqué la nouvelle configuration du pare-feu. Si vous le pouvez, lors de la deuxième session SSH, exécutez la commande suivante pour confirmer la configuration du pare-feu importée.
plesk ext firewall --confirmNote: Si vous ne confirmez pas la configuration du pare-feu importée dans les 60 secondes suivant l’exécution de la commande
plesk ext firewall --apply, les modifications que vous avez apportées seront automatiquement annulées et la configuration précédente du pare-feu sera restaurée.
La configuration du pare-feu du fichier sera appliquée au serveur.