Использование Docker
Содержание: Docker – это платформа для запуска приложений внутри контейнеров. Она позволяет вам использовать определенное программное обеспечение, например, Redis или MongoDB, или определенные его версии, которые могут не поддерживаться вашей операционной системой или требовать преобразований.
Docker is available as a Plesk extension. With it, you can run and manage containers based on specific Docker images, and to use Docker both on the local host and on remote servers.
In this topic, you will learn how to create, configure, and manage Docker containers in Plesk. You will also learn how to control remote Docker hosts from Plesk.
Требования и ограничения
Предупреждение: Расширение Docker загружает образы с Docker Hub в их первоначальном виде без какой-либо предварительной настройки. Некоторые контейнеры Docker или установленное в них программы предназначены для использования только в безопасных средах и могут требовать дополнительной настройки безопасности. Перед запуском этих загруженных образов в Plesk вам необходимо повысить их безопасность самостоятельно. Конкретные инструкции можно найти в документации производителя контейнера или программы. Например, смотрите главу о безопасности в документации Redis.
-
Docker is supported in Plesk for the following operating systems: CentOS 7, Red Hat Enterprise Linux 7, Debian 10, Debian 11, Debian 12, Ubuntu 18.04, Ubuntu 20.04, Ubuntu 22.04, Ubuntu 24.04, AlmaLinux 8.x, AlmaLinux 9.x, Rocky Linux 8.x, and Virtuozzo 7 with Update 1 Hotfix 1 (7.0.1-686) or later.
В Plesk для Windows можно использовать Docker, установленный на удаленном компьютере (смотрите далее в этом разделе **Использование удаленного Docker**).
-
Вы не можете использовать Docker в Plesk, развернутом в контейнере Docker.
-
Чтобы удаленно воспользоваться службой Docker в Plesk, вам необходима дополнительная лицензия. Ее можно купить отдельно или как часть комплекта Hosting Pack, Power Pack или Developer Pack.
-
Docker работает только на x64 системах.
-
Контейнеры Docker в Plesk невозможно переносить на другой сервер или создавать с ними резервные копии. Однако вы можете создать резервную копию данных, используемых контейнерами (смотрите далее Определение томов), или скачать моментальные снимки.
-
Поддерживается Virtuozzo 7 с обновлением 1 исправлением 1 (7.0.1-686) или выше. Обратите внимание на то, что, начиная с этого обновления, новые контейнеры на базе CentOS 7 создаются с включенным по умолчанию брандмауэром согласно требованиям повышения безопасности Virtuozzo. Администратору Plesk необходимо вручную настроить брандмауэр таким образом, чтобы порты, необходимые для работы Plesk, были открыты.
Предварительные требования
Прежде чем вы сможете начать использовать Docker, на сервере Plesk должно быть установлено расширение Docker:
- Если вы являетесь администратором Plesk, установите расширение из Каталога расширений.
- В противном случае обратитесь к своему хостинг-провайдеру и попросите его установить расширение для вас.
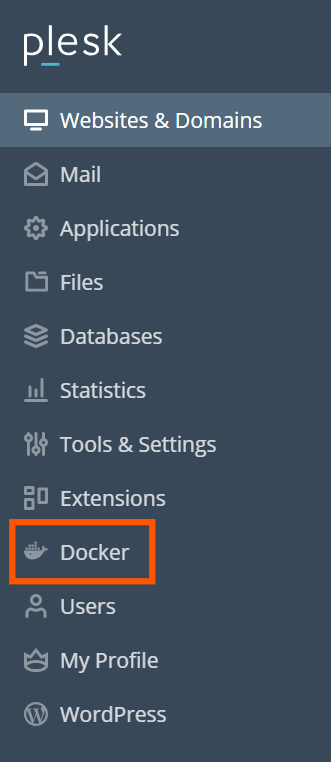
Once the extension is installed, you are ready to begin. You will see the Docker option in the Navigation Pane.
Containers
You can access images from Docker Hub in the Run Container catalog (Docker > Containers > Run Container).
To access the catalog:
- if you have not previously installed a container, in Docker > Containers, click Run Container.
- if you have previously installed a container, in Docker > Containers, click the plus icon
.
To view available images, use the search box.
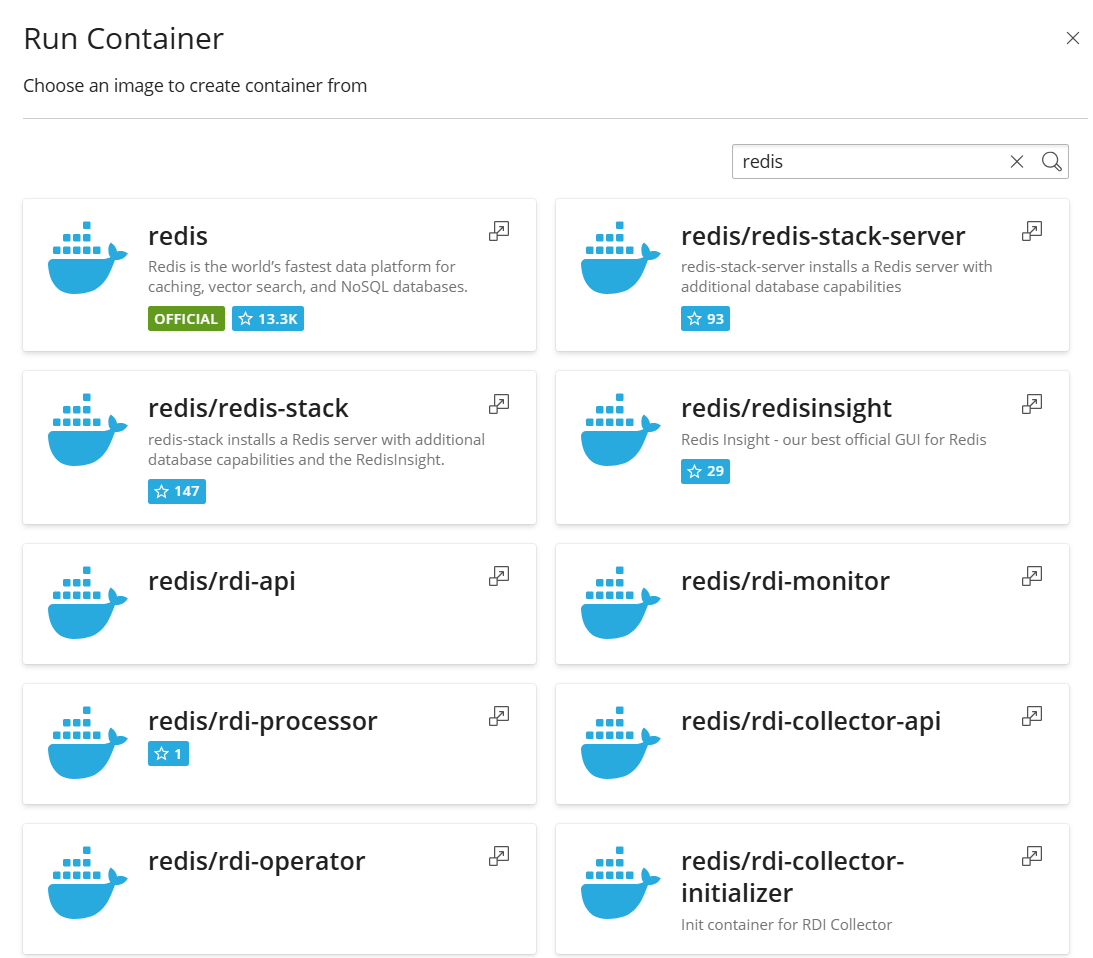
Specify the image name, the repository, or both.
These repositories are available to search:
- В локальном репозитории содержатся локальные образы. Это образы, которые уже были скачаны и хранятся на сервере с Docker. Подробнее смотрите в разделе Управление локальными образами далее в этом разделе.
- Docker Hub.
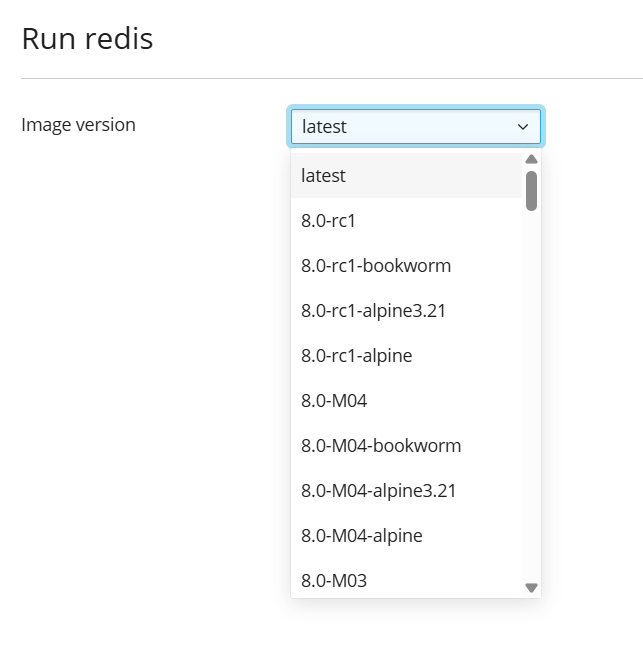
Multiple versions may be available for each application. You can run a specific version by selecting the appropriate tag, as shown below:
Чтобы запустить контейнер:
-
Go to Docker > Containers > Run Container.
-
Use the search box to find images in the catalog. If the image is stored locally, (local) appears after the version.
-
To view the image description and documentation on Docker Hub, click the more info icon
.
This does not apply to local images. -
Click the image card.
- To run a specific version, select the image version you want to run from the Image version drop-down and click Next.
- To run the latest version of the selected application, click Next.
Plesk создает контейнер и предлагает вам указать его настройки, такие как переменные окружения, а затем запускает его. Вы можете отменить запуск, нажав Отмена на экране Настройки. Подробнее о настройках смотрите в разделе Настройки контейнера далее на этой странице.
-
After you tweak the settings, click Run. The container appears in the list of containers in the Containers tab.
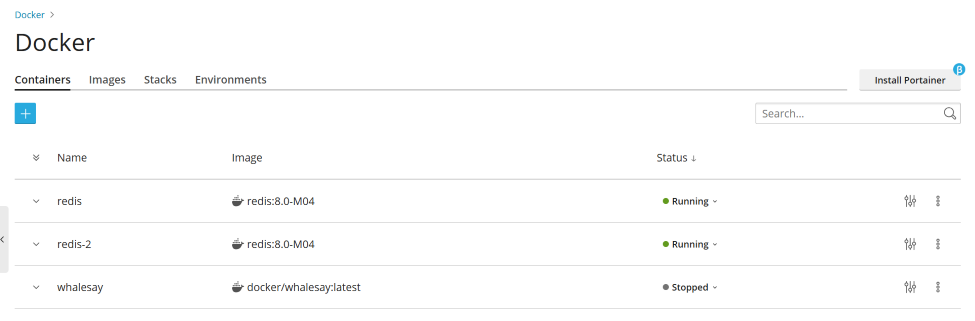
See the Console Log to find out if the container runs without issues.
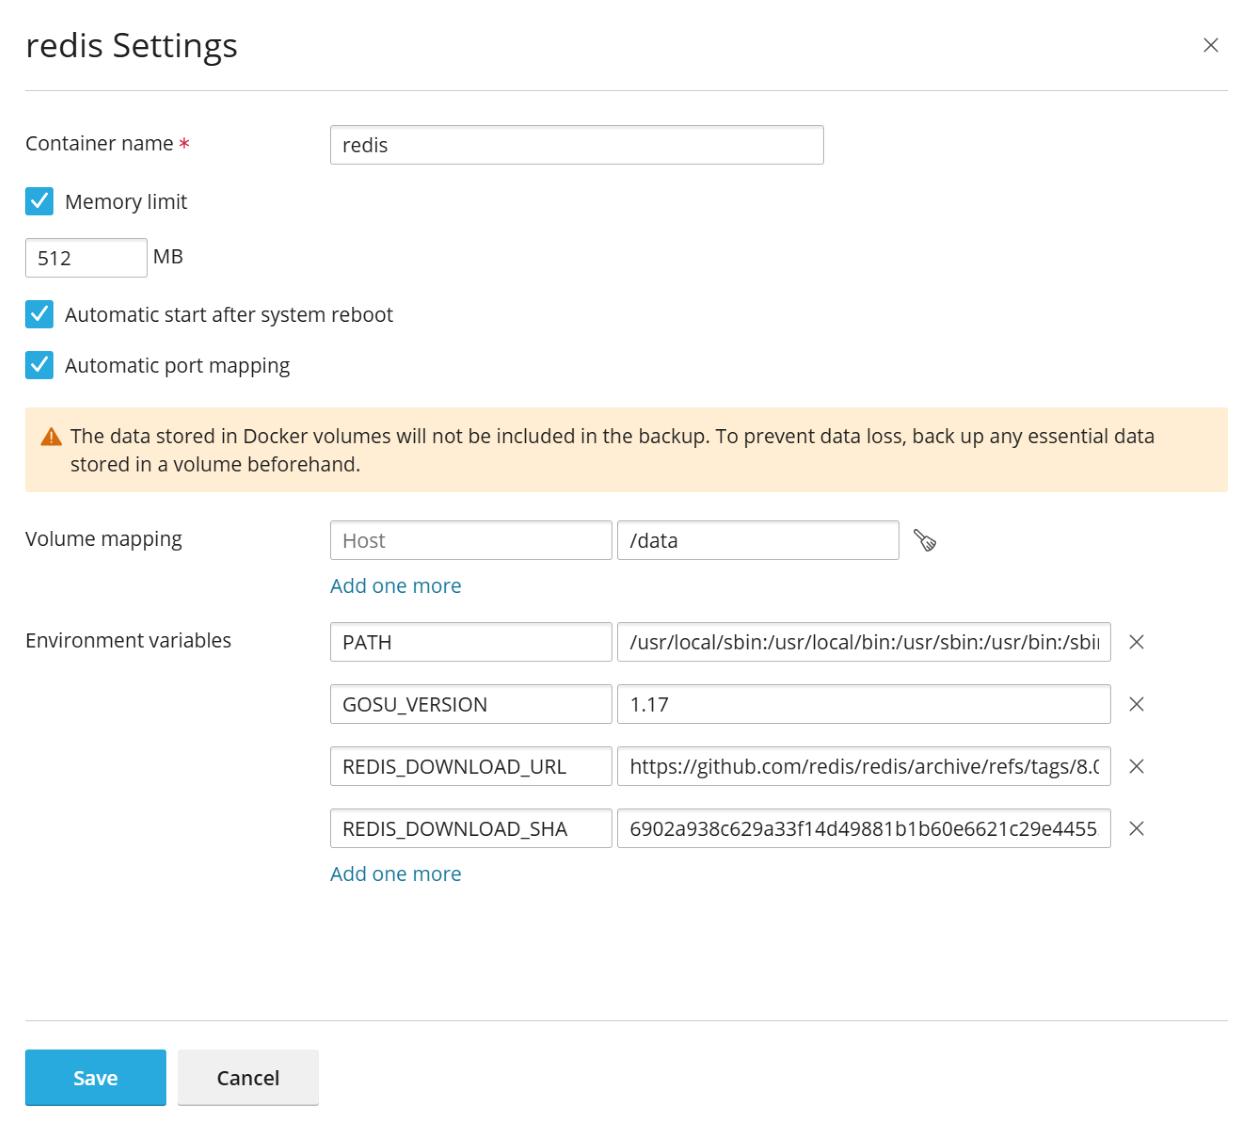
Настройки контейнера
Примечание: Чтобы изменить настройки контейнера, не обязательно его останавливать: при сохранении новых настроек Plesk заново создаст контейнер.
To edit container settings, go to the Containers tab and click the
settings icon ![]() next to the container you want to edit.
next to the container you want to edit.
Ограничение памяти
By default, using RAM in a Docker container is unlimited. To limit using RAM, select the Memory limit checkbox and enter the limit value in megabytes in the MB field.
Примечание: В настоящее время для контейнеров Docker не может быть ограничено использование процессора и диска.
Примечание: Контейнеры Docker являются объектами, доступными на уровне администратора, и для них не применяются ограничения ресурсов (процессора, памяти, использования диска), заданные с помощью Cgroups Manager на уровне подписки.
Автоматический запуск
Если не включена опция Автоматический запуск после перезагрузки системы, то после перезагрузки системы сайты, использующие этот контейнер, могут не работать, и вам придется запустить контейнер вручную.
Преобразование портов
По умолчанию опция Автоматическое преобразование портов включена и внутренний порт контейнера преобразовывается в случайный порт основной системы (например, 32768).
To change the port on the host system, deselect Automatic port mapping and specify another external port in Manual mapping. If Manual mapping does not appear when you deselect the option, it means that the container does not expose ports.
When using manual mapping, by default Docker only binds to the specified port on the host system’s localhost interface (127.0.0.1). This way, the port is inaccessible from the Internet, and the application inside the container is safe from attacks. To have Docker bind to the specified port on all network interfaces of the host system, deselect Make the port inaccessible from the Internet. If you do this, the application inside the container becomes accessible from the Internet, and can be reached on the specified port via any of the host system’s IP addresses.
Предупреждение: Docker presumes that authentication is carried out by the application itself, but sometimes it is not so (for example, MySQL/MariaDB does not allow anonymous access by default, but redis does). Making the application inside a container accessible from the Internet may result in the application being attacked by a malicious actor.
Определение томов
Docker volumes are directories on your server mounted to a Docker container. This is how you have persistent storage that can be accessed from your host system. The data in Docker volumes is not deleted when you stop or delete a container.
Предупреждение: The data stored in Docker volumes will not be included in the Plesk backup. To prevent data loss, back up any essential data stored in a volume with a third-party backup tool.
Подробнее о данных в контейнерах читайте в документации к Docker.
Чтобы добавить определение тома, укажите следующее:
- In the Host field - the absolute path to the directory on the server that you want to mount in the container.
- In the Container field - the absolute path to a directory inside the container.
To map more directories, click Add one more.
Настройка переменных окружения
Переменные окружения используются приложением внутри контейнера. Вам может понадобиться добавить новые переменные или изменить существующие. В Plesk вы можете добавлять столько переменных, сколько нужно.
Операции с контейнерами
Вы можете сделать с контейнерами следующее:
-
Stop (Stop), start (Start) or restart (Restart) a container. In these cases, the container will be recreated with the current settings.
Примечание: Если данные не были сохранены в подключенных томах (смотрите далее раздел Определение томов), они будут утеряны.
-
Click the arrow
next to the container to view logs and resource consumption. -
Click the settings icon
next to the container to change container settings, such as environment variables or volume mapping (Settings). -
Переименовать контейнер (Настройки > Имя контейнера).
Click the more options icon ![]() next to the container to do one or more of the following:
next to the container to do one or more of the following:
- Recreate a container using the same or another version of the image (Recreate).
- Create an image based on a container with your custom settings (Save as Image).
- Take a snapshot of a container (Download Snapshot).
- Remove a container (Remove).
Повторное создание контейнера
Обычно бывает нужно пересоздать контейнер, когда вы хотите обновить приложение до более новой версии. Вообще, вы можете пересоздать контейнер, используя любую версию приложения, имеющуюся в каталоге, не только более новую.
Персональные настройки сохраняются во время пересоздания. Чтобы сохранить данные, используемые приложением внутри контейнера, вам нужно определить тома до пересоздания контейнера. Определение томов позволяет вам иметь доступ к папкам, использующимся внутри контейнера (смотрите Определение томов в настройках контейнера).
Чтобы заново создать контейнер:
#. Go to Docker and click the more options icon ![]() next to
the container you want to recreate.
#. Click Recreate in the container settings and specify the image
version and whether to use default environment variables.
next to
the container you want to recreate.
#. Click Recreate in the container settings and specify the image
version and whether to use default environment variables.
Использование удаленного Docker
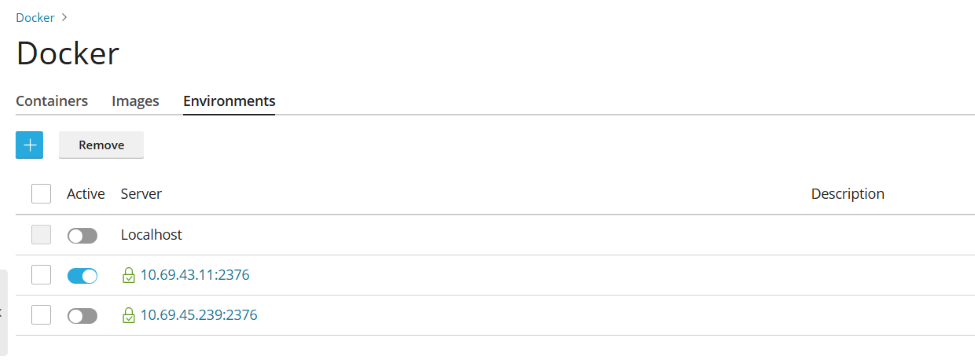
By default, Plesk uses Docker installed as a local service. However, you can use one or more Docker services installed outside of Plesk. Note that you can use only one service at a time. You can see which server is active in the Environments tab of the Docker settings page in Plesk.
Примечание: Для управления удаленной службой Docker вам потребуется дополнение к лицензии Plesk. Без этого дополнения вы сможете управлять только локальной службой Docker, работающей на сервере Plesk.
Настройка удаленного сервиса
Настройте удаленный сервер с Docker, как описано в документации Docker, чтобы его можно было использовать как удаленный сервер в Plesk.
Управление удаленным сервисом
You can establish a connection between a Plesk server with the Docker extension and a remote node with Docker service.
Следующие шаги применимы и к Plesk для Linux, и к Plesk для Windows.
These steps must be performed on the remote host:
#. Create the /etc/docker/daemon.json configuration file for Docker
with the following content:
1 2 3 4 5 6 7 8 |
{ "hosts": ["tcp://0.0.0.0:2376", "unix:///var/run/docker.sock"], "tls": true, "tlsverify": true, "tlscacert": "/root/ca.pem", "tlscert": "/root/server-cert.pem", "tlskey": "/root/server-key.pem" } |
#. Prepare .pem files. You can use the following example. Replace the IP on
line 4 with the IP address of your remote node and run each command:
1 2 3 4 5 6 7 8 9 10 |
openssl genrsa -aes256 -out ca-key.pem 4096 openssl req -new -x509 -days 365 -key ca-key.pem -sha256 -out ca.pem openssl genrsa -out server-key.pem 4096 openssl req -subj "/CN=192.0.2.1" -new -key server-key.pem -out server.csr openssl x509 -req -days 365 -sha256 -in server.csr -CA ca.pem -CAkey ca-key.pem -CAcreateserial -out server-cert.pem openssl genrsa -out key.pem 4096 openssl req -subj '/CN=client' -new -key key.pem -out client.csr openssl x509 -req -days 365 -sha256 -in client.csr -CA ca.pem -CAkey ca-key.pem -CAcreateserial -out cert.pem chmod 0400 ca-key.pem server-key.pem key.pem chmod 0444 ca.pem server-cert.pem cert.pem |
- Run the following commands to modify the current Docker service so it starts after host configuration:
1 2 3 4 |
cp /lib/systemd/system/docker.service /etc/systemd/system/ sed -i 's/\ -H\ fd:\/\///g' /etc/systemd/system/docker.service systemctl daemon-reload systemctl restart docker |
- Save the outputs of the following files on your local machine for use by the client to connect remotely:
1 2 3 |
cat key.pem cat cert.pem cat ca.pem |
On the local server, configure the Docker remote host:
- Go to Docker > Environments.
- Click Add Server and specify the settings of the remote server
with Docker.
- Чтобы начать использовать этот сервис Docker в Plesk, оставьте галочку Активировать.
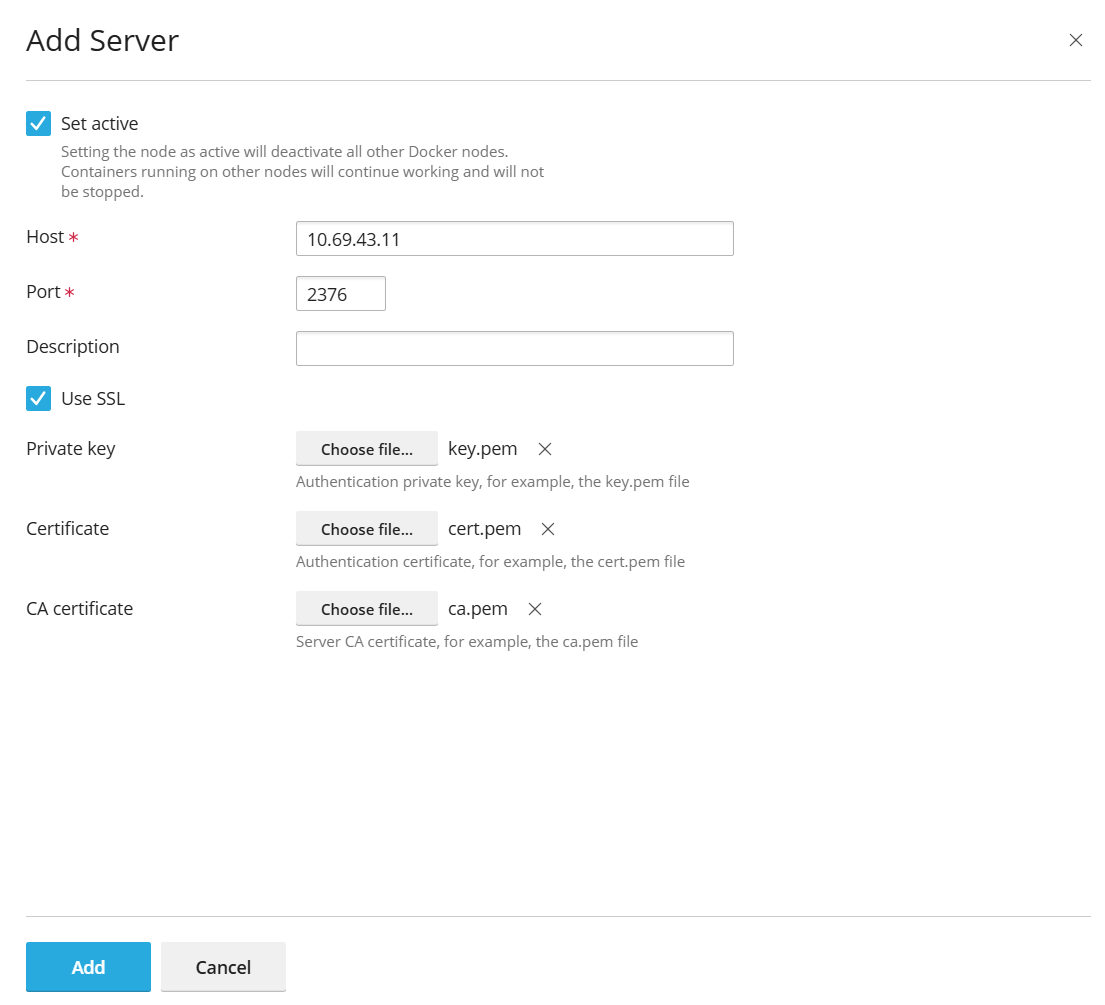
The link to Docker will appear in the Navigation Pane.
Чтобы переключиться между сервисами Docker:
- Go to Docker > Environments.
- In the list of servers, select the Docker node that you are going to use and click Set Active.
Alternatively, you can set the Docker node as active while editing its settings.
Создание образов с персональными настройками
Если вы хотите создать новый образ на основе изменений контейнера, используйте команду Сохранить как образ. Она создаст моментальный снимок вашего контейнера, который появится как новый образ в каталоге образов. Таким образом можно создавать образы с персональными настройками, такими как переменные окружения.
Чтобы создать образ на основе одного из ваших контейнеров:
Go to Docker > Containers, click the more options icon ![]() next to the container and click > Save as Image. In the Save <container name> as Image
side panel, specify:
next to the container and click > Save as Image. In the Save <container name> as Image
side panel, specify:
- Image name.
- An optional Tag. You can specify the image version here. By default, the version will be «latest».
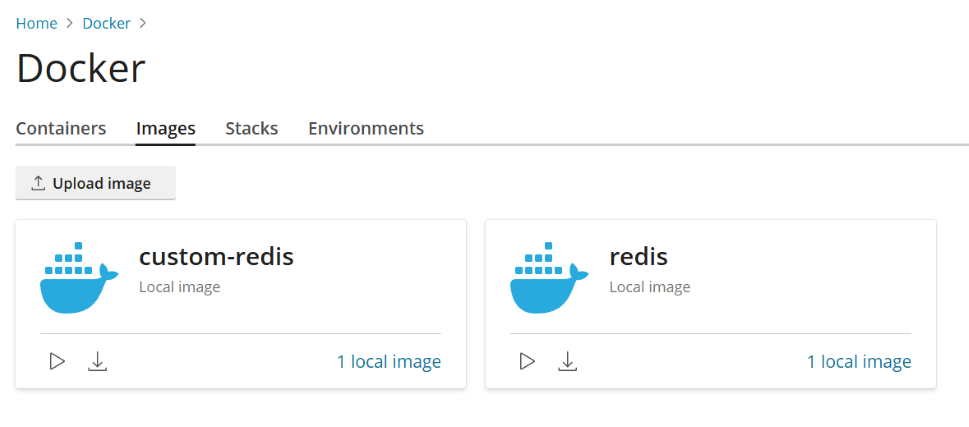
The created image appears in the Images tab and is marked Local image.
Управление локальными образами
Локальные образы ― это образы, сохраненные Docker на локальном диске, так что их не нужно скачивать из Каталога образов.
Образ становится локальным в следующих случаях:
- Вы выбрали любую версию (тег) образа, и образ начал скачиваться. Если вы затем запускаете контейнер или отменяете запуск (на экране Настройки), образ сохраняется локально.
- You upload an image to Docker in Plesk (Upload image in the Docker Images tab).
- Вы создали собственный образ из контейнера (смотрите Создание образов с персональными настройками).
- Вы создали образ через интерфейс командной строки.
To download another version of an image from the online catalog, click
the Pull icon ![]() , choose the version you want to pull from the drop-down,
and click Pull.
, choose the version you want to pull from the drop-down,
and click Pull.
If Docker has at least one downloaded version from a group of versions belonging to an image, this image is marked Local image in the catalog. Plesk also shows how many local images exist for a product.
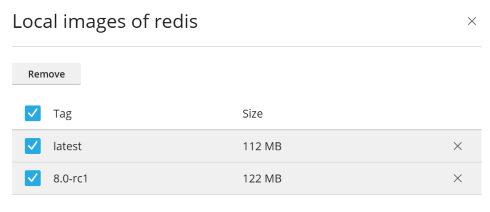
Чтобы просмотреть локальные образы и удалить устаревшие локальные образы:
-
Go to Docker > Images.
-
To find a specific local image, use the Search bar.
-
Чтобы просмотреть все локальные образы определенного продукта, нажмите ссылку под названием продукта. Будут показаны все теги локальных образов и занимаемое пространство на диске.
-
Select the specific image(s) you want to remove and click Remove.
Настройка nginx для проксирования запросов от доменов к контейнеру
Некоторые контейнеры Docker открывают порты, чтобы приложения в контейнерах были доступны по этим портам.
При использовании приложения из контейнера Docker на вашем сайте вам может показаться неудобным указывать нестандартный порт в URL. Чтобы избежать этого, вы можете настроить nginx на проксирование запросов от доменов к этому порту, тогда домены смогут использовать стандартный порт (например, 80) и не придется явно указывать порт в URL.
Требования
- В Plesk должен работать nginx.
- You must map the port inside a container to a port on the host system (for example, 32768) manually
To map the port inside a container:
- Go to Docker > Containers and click the settings icon
next to the container you want to edit.
- Turn off Automatic port mapping.
- Map the port inside the container manually to a specific port on your system (for example, 32768). You can make this port inaccessible from the Internet.
You can set up nginx to proxy requests from domains to that port, so domains can use a standard port on nginx (for example, 80). To make this possible, add a rule for nginx in the domain settings.
To add a rule for nginx in the domain settings:
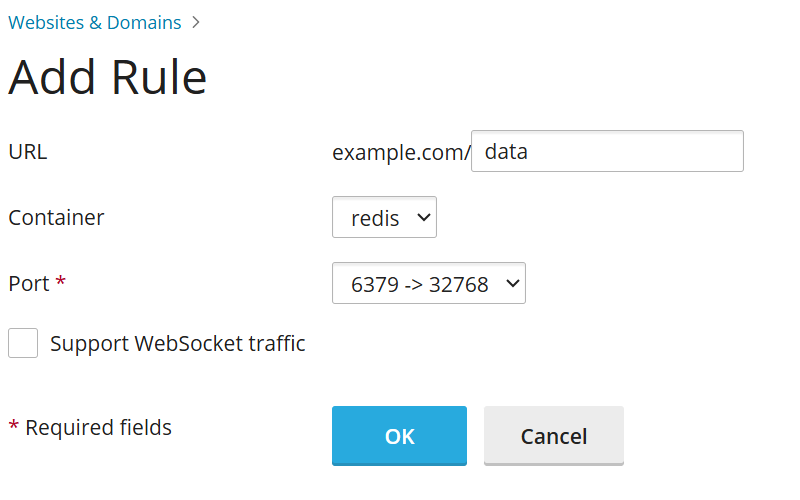
Перейдите на страницу Сайты и домены > домен > Правила проксификации Docker > Добавить правило и укажите следующее:
- URL компании. Укажите URL сайта, использующего приложение, работающее в контейнере. Это может быть как основной сайт, так и его часть.
- Контейнер. Выберите приложение, работающее как контейнер Docker.
- Порт. Выберите одно из соответствий, указанных в настройках контейнера (между портом внутри контейнера и портом вашей системы). Nginx будет проксировать запросы на порт системы.
Правила проксификации задаются в конфигурации веб-сервера, например, в файле nginx.conf сайта (в /var/www/vhosts/system/$domain/conf/):
#extension docker begin
location ~ ^/.* {
    proxy_pass http://0.0.0.0:9080;
    proxy_set_header Host             $host;
    proxy_set_header X-Real-IP        $remote_addr;
    proxy_set_header X-Forwarded-For  $proxy_add_x_forwarded_for;
}
#extension docker end
Правила проксификации должны успешно работать на серверах под управлением NAT.
Примечание: Контейнеры Docker, подключенные по правилам проксификации к сайту, не учитываются при подсчете расхода дискового пространства подпиской. Исключением может быть случай, когда директория сайта подключена к контейнеру как том, так как в этой ситуации все файлы, расположенные в контейнере, будут приниматься во внимание при подсчете расхода дискового пространства сайтом.
Deploying Docker Compose YAML files
You can deploy Docker Compose YAML files using the online text editor, uploading a file from
local storage, or using a Docker Compose file stored inside a website’s Home directory. Typical
operations on stacks are supported, such as up (including pull and force-recreate),
stop, and down. You can modify and update the stacks after creation.
Примечание: You cannot deploy Dockerfiles or any other files required by an application using this section.
To deploy a Docker Compose file:
-
Go to Docker > Stacks > Add Stack.
-
Fill in a project name and choose one of the methods for deploying the docker-compose file:
- Editor: Define or paste the content of your Compose file.
- Upload: Upload a Compose file from local storage.
- Webspace: Select a Compose file stored in a domain’s Home directory. For Webspace, choose the domain where the file is located. For Compose File, browse to the Compose file location.
You can declare and build custom containers. Any artifacts created during the build process will be placed inside the website’s Home directory.
For more information about the Compose file format, refer to the Docker documentation.
Deploying Portainer containers in Docker
Portainer is a container management software that makes it easier to deploy containers and stacks, view a container’s status and logs, create users and teams, secure your environments, and more.
To install Portainer, go to Docker > Install Portainer. After installation is complete, to manage Portainer containers inside Docker, go to Docker > Go to Portainer.
Примечание: Portainer is currently a beta feature.
For more information about Portainer, refer to the Portainer documentation.