在 VMware Workstation Player 上部署 Plesk
summary: In this topic, you will learn how to deploy Plesk from a QCOW2 image on VMware Workstation Player.
We will use Plesk running on Ubuntu 22 as an example, but you can also deploy Plesk running on CentOS 7 the same way.
Deploying Plesk Using a Converted QCOW2 Image
To deploy Plesk on VMware Workstation Player using a QCOW2 image converted to the VMDK format, create a virtual server. Here’s how to do it:
-
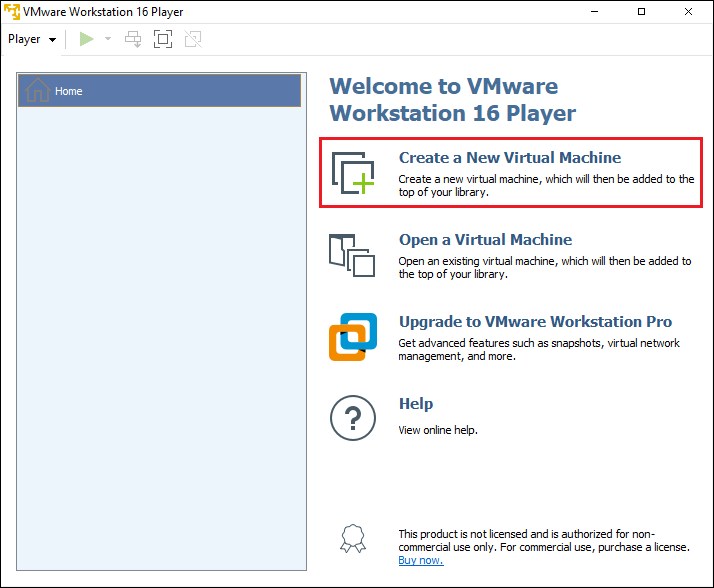
在VMware Workstation Player中,按一下**創建新虛擬機器**:

-
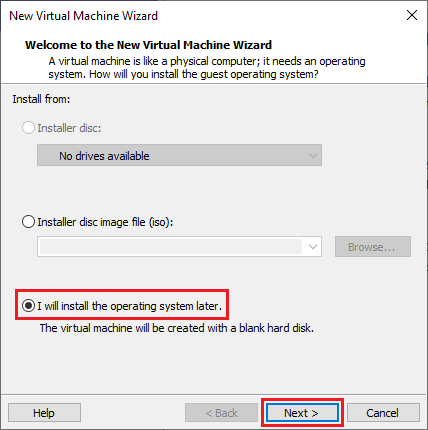
在打開的“新虛擬機器嚮導”視窗中,選擇**我稍後安裝作業系統**:
-
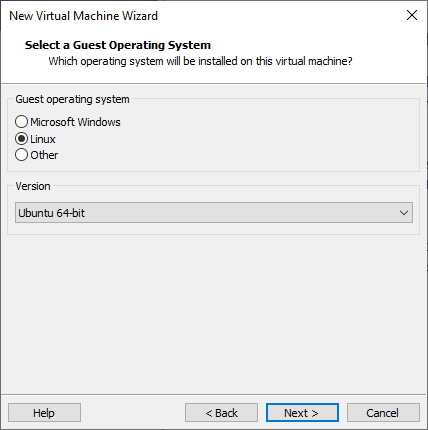
選擇客戶機作業系統。操作步驟是,選擇 Linux 和 Ubuntu 64-bit:
-
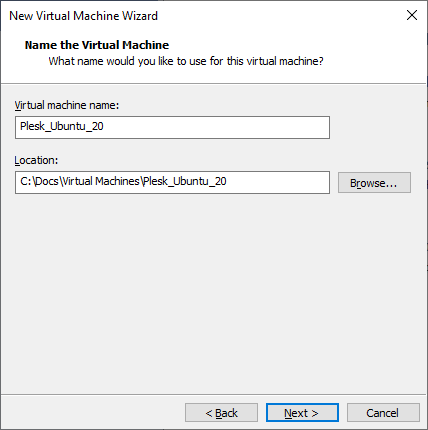
指定虛擬伺服器的名稱,並選擇存儲檔的位置:
-
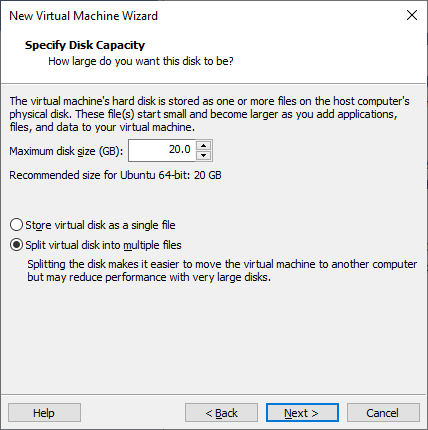
指定虛擬伺服器的磁片大小:
有關磁片大小要求的更多資訊,請參見`硬體要求<https://docs.plesk.com/release-notes/obsidian/hardware-requirements/>`__。
-
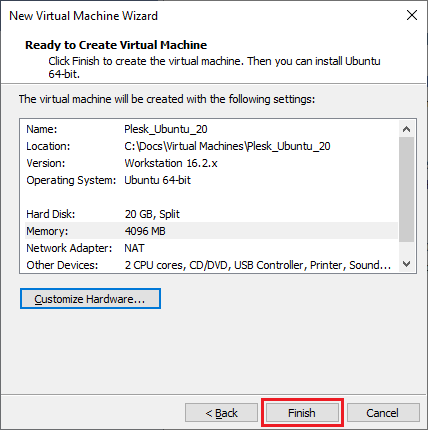
按一下 完成 。
現在,已創建了新的虛擬伺服器。
備註: 預設情況下,使用NAT網路類型。這意味著虛擬網路介面卡會共用主機的IP位址。這些設定可能不符合您的網路基礎架構的要求。有關更多資訊,請參閱 VMware Workstation Player 文檔或聯繫VMware支持團隊。
-
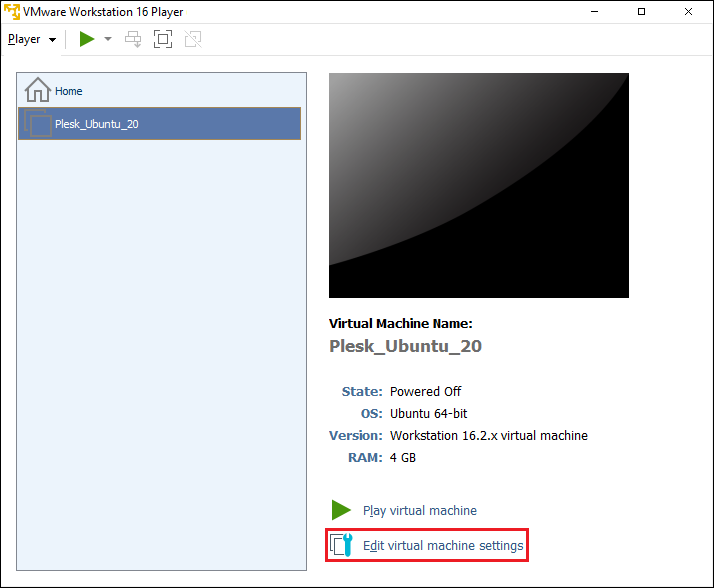
通過按一下**編輯虛擬機器設定**來配置虛擬伺服器的參數:
-
添加具有VMDK格式的Plesk鏡像的硬碟。具體操作是,在虛擬機器設定中,按一下**添加**:
-
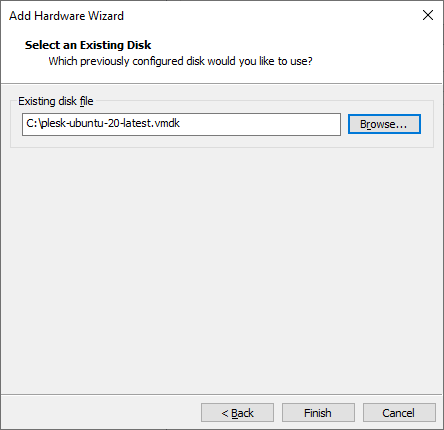
在“添加硬體嚮導”視窗中,配置如下參數:
-
“硬體類型”:硬碟
-
“虛擬磁片類型”:SCSI
-
“磁片”:使用現有的虛擬磁片
-
“現有磁片檔”:選擇VMDK格式的Plesk鏡像:
備註: 我們建議您將QCOW2鏡像放置到虛擬伺服器的目錄中,或者創建一個包含虛擬磁片的單獨目錄。
-
-
按一下 完成 。
-
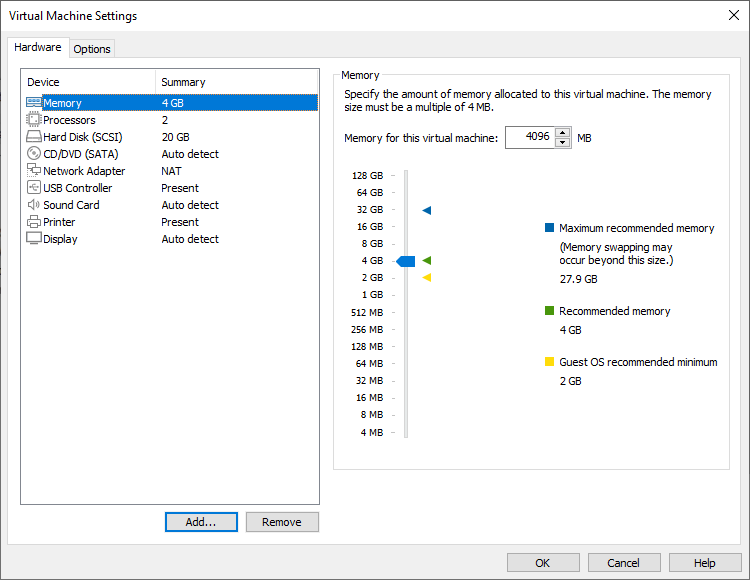
選擇預設情況下創建的硬碟,按一下**移除”。
-
按一下 確定 以保存您的更改。
-
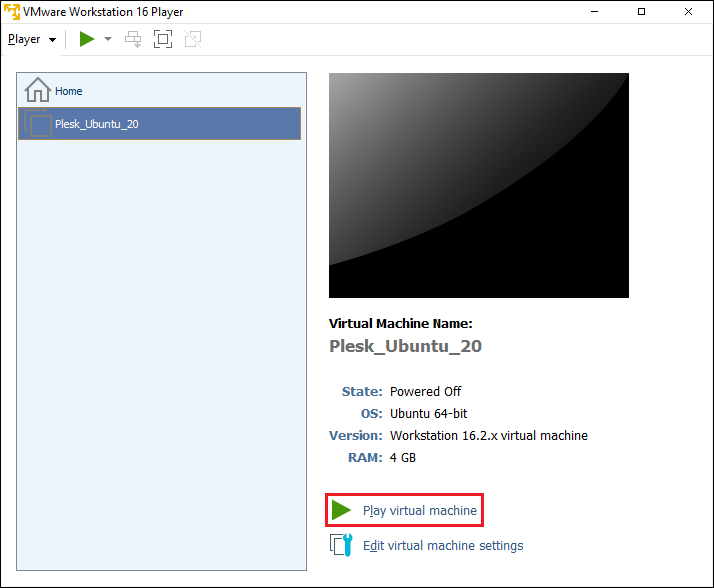
按一下**播放虛擬機器**,打開已創建的虛擬機器:
-
選擇**Ubuntu**,然後按ENTER鍵:
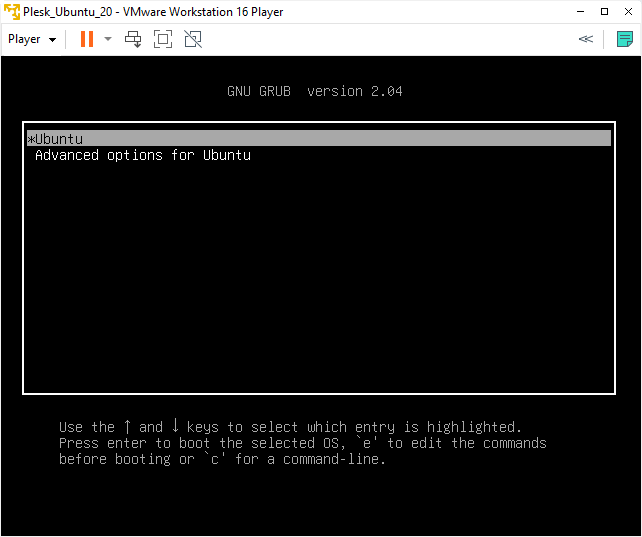
等候直到部署好作業系統和Plesk。
Logging in to the Created Virtual Machine
A virtual machine with Plesk created from a converted QCOW2 image does not have a preconfigured SSH password. There are two ways to log in to the virtual machine:
-
Boot into recovery mode and set the
rootpassword. You need to do this for every virtual machine with Plesk you create. -
Use the 「cloud-init」 utility shipped with the Plesk QCOW2 image to preconfigure the server and set the
rootpassword. For example, you can use the 「NoCloud」 datasource to create an ISO image or a virtual hard drive containing theuser-datafile. Connect this ISO image or a virtual hard drive to the virtual machine before booting it up, and thecloud-initutility should configure the SSH user so that you can log in. You can then use that ISO image or a virtual hard drive with every virtual machine you create.