Installing Plesk on Linode
Installing Plesk on Linode
-
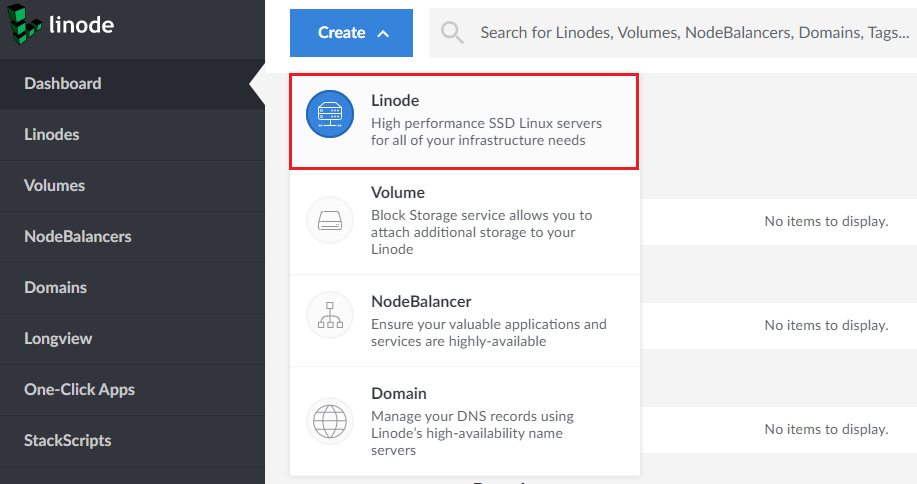
Click Create > Linode > the “One-Click” tab.

-
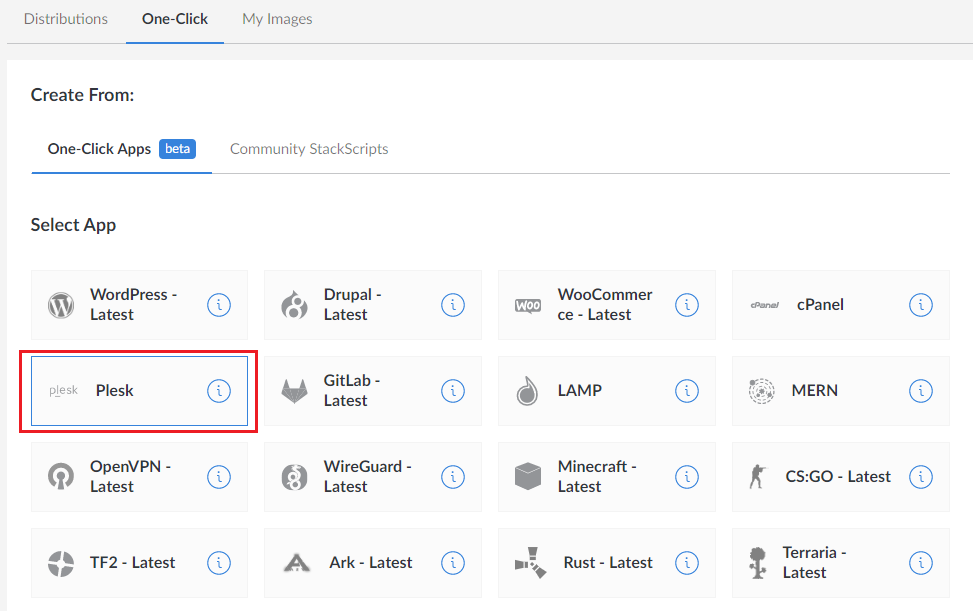
Select “Plesk”.
-
Specify the server hostname, for example, servername.example.com.
-
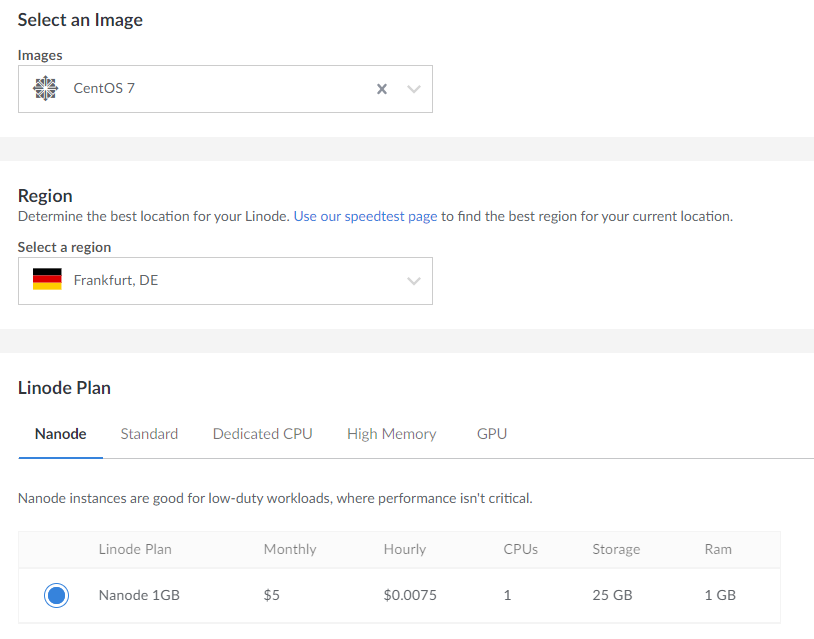
Select a desired OS image.
-
Select a region. If you plan to host small business websites, we recommend choosing the zone closest to their geographic location to reduce page load times for local visitors.
To choose the closest zone, use the Linode speed test.
-
Choose a plan paying attention to the amount of memory it comes with.
The more websites you intend to host and the more traffic the hosted websites generate, the more memory you will need. Estimate the amount of memory your setup will require.
To try Plesk on Linode, you can choose the smallest possible plan Nanode 1GB, which is sufficient for testing. If later you find yourself running out of resources, you can resize your instance.
To choose a plan best suited for your website, see the overview of Linode plans (the “Use Cases” section in particular).
-
Give your instance a label (a name that helps you find the instance within the Linode Dashboard).
-
Choose or create a tag to organize and group your Linode resources.
-
Choose how to log in to your instance. The easiest way is by using the
rootusername and a password, which you set here. You can also use an SSH key for logging in. To do so, add a new SSH key by clicking Add an SSH Key or select a previously added key (if you have any). -
Adding backups is not necessary for Plesk to operate. You can skip this option and go to the next step.
-
Adding a private IP address is not necessary for Plesk to operate. You can skip this option and go to the next step.
Adding a private IP address is necessary if you plan to have multiple instances located in the same data center and you want to connect them fast and secure over the private network. In this case, select the “Private IP” checkbox and also set up firewall rules for your instance to secure its network traffic (once the instance is deployed).
-
Click Create.
Your Plesk instance is being deployed. You can start working in Plesk once the deployment is finished.
Accessing Plesk for the First Time
If you use the root username and password, you can log in to Plesk
the fastest and easiest way possible: via the browser address bar.
To access Plesk for the first time via the browser address bar:
- Go to the
https://<your-linode-IP>link. - On the Plesk login page, enter the
rootusername and the password you have specified earlier for your instance. - You will be redirected to the Plesk welcome screen. Provide your contact name and email, accept the End-User License Agreement, and set an administrator password (you will then log in to Plesk using that password).
- Once you have finished, click Enter Plesk to log in to Plesk.
If you log in to Plesk using an SSH key, access the instance command line to log in to Plesk for the first time.
To access Plesk for the first time using the command line:
-
Access the instance command line using:
- SSH or any SSH client, for example, PuTTY.
- The Linode console (to do so, click Launch Console).
-
Run the following command to generate a one-time login link:
sudo plesk login
-
Plesk will generate two login links. Go to the second login link
https://<public-ip-address>/login?secret=<session_token>, for example,https://192.0.2.1/login?secret=hlHH450sx%2FAlSJHj1VWJC2qKxK6gqVxtsMkYG6bf6wc%3D -
You will be redirected to the Plesk welcome screen. Provide your contact name and email, accept the End-User License Agreement, and set an administrator password (you will then log in to Plesk using that password).
-
Once you have finished, click Enter Plesk to log in to Plesk.
Configuring Sending Email
To send emails, you do not need to additionally configure your instance because Linode does not block any mail related ports. If your emails do not reach recipients, your instance may be blacklisted because of sending spam. In this case, identify the source of the spam and contact the mail provider. Learn more in the Linode article about mail.