Развертывание Plesk на VirtualBox
summary: In this topic, you will learn how to deploy Plesk from a QCOW2 image on Oracle VirtualBox.
We will use Plesk running on Ubuntu 22 as an example, but you can also deploy Plesk running on CentOS 7 the same way.
Прежде чем вы начнете
Перед развертыванием Plesk сделайте следующее:
- Скачайте и установите VirtualBox на свой компьютер.
- Скачайте образ plesk-ubuntu-latest.qcow2 со страницы https://autoinstall.plesk.com/images/.
- Преобразуйте образ QCOW2 в формат VMDK.
Deploying Plesk Using a Converted QCOW2 Image
To deploy Plesk on VirtualBox using a QCOW2 image converted to the VMDK format, create a virtual server. Here’s how to do it:
-
В VirtualBox щелкните значок New (Новый):

-
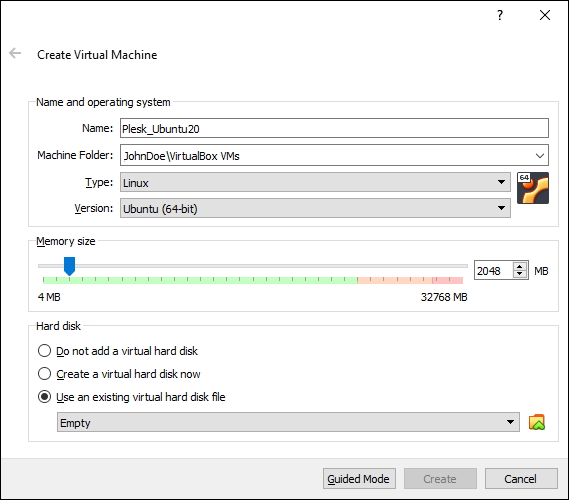
В окне «Create Virtual Machine» (Создать виртуальную машину) укажите имя виртуальной машины и операционную систему, а также размер оперативной памяти:
Дополнительные сведения о требованиях к оперативной памяти смотрите в разделе Требования к оборудованию.
-
Выберите Use an existing virtual hard disk file (Использовать существующий файл виртуального жесткого диска), а затем щелкните значок
. -
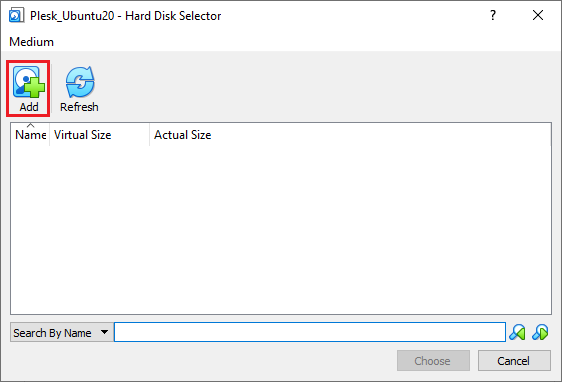
В окне «Hard Disk Selector» (Выбор жесткого диска) нажмите Add (Добавить):
-
Select the QCOW2 image you downloaded and converted to the VMDK format, and then click Choose.
-
Нажмите Create (Создать).
-
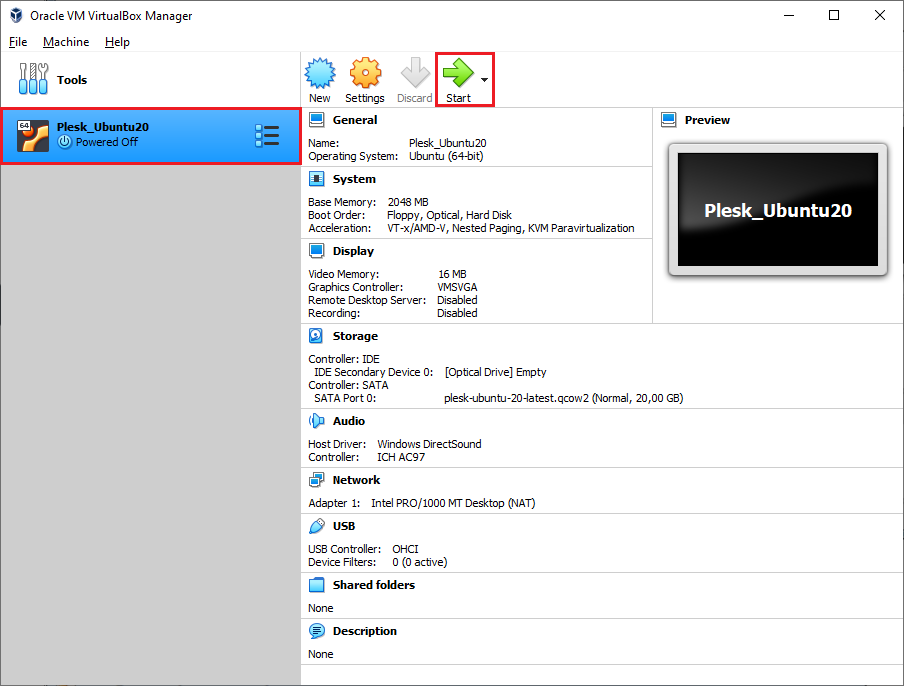
Включите созданную вами виртуальную машину, нажав Start (Пуск):
-
Выберите Ubuntu и нажмите клавишу ввода:

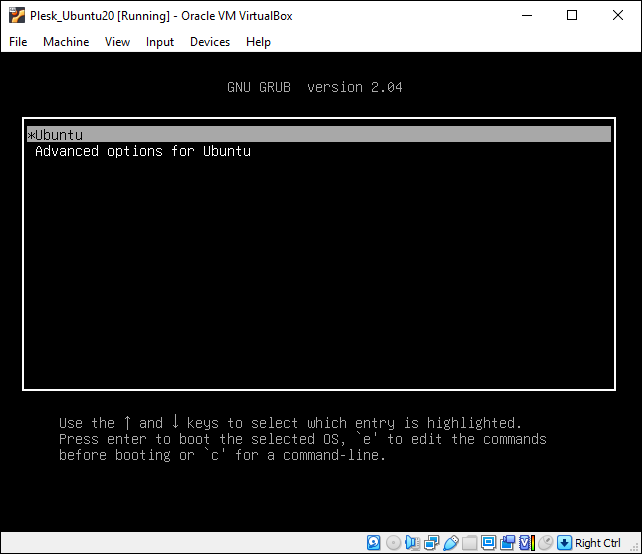
Подождите, пока операционная система и Plesk не будут развернуты.
Logging in to the Created Virtual Machine
A virtual machine with Plesk created from a converted QCOW2 image does not have a preconfigured SSH password. There are two ways to log in to the virtual machine:
-
Boot into recovery mode and set the
rootpassword. You need to do this for every virtual machine with Plesk you create. -
Use the «cloud-init» utility shipped with the Plesk QCOW2 image to preconfigure the server and set the
rootpassword. For example, you can use the «NoCloud» datasource to create an ISO image or a virtual hard drive containing theuser-datafile. Connect this ISO image or a virtual hard drive to the virtual machine before booting it up, and thecloud-initutility should configure the SSH user so that you can log in. You can then use that ISO image or a virtual hard drive with every virtual machine you create.