(Plesk für Linux) Die Plesk Firewall
Inhalt: Mit der Plesk Firewall lässt sich die Sicherheit Ihres Servers mit Plesk für Linux erhöhen, indem Netzwerkverbindungen zum und/oder vom Server eingeschränkt werden.
In diesem Thema erfahren Sie, wie Sie Firewall-Regeln und -Richtlinien hinzufügen und entfernen können, wie sich eingehende Verbindungen aus bestimmten Ländern blockieren lassen und wie Sie Firewall-Regeln exportieren und importieren können, um die Firewall-Konfiguration auf andere Server zu übertragen.
Vorsicht: Sowohl die Plesk Firewall als auch firewalld sind Tools für die Verwaltung der iptables-Firewall. Wenn beide Tools gleichzeitig verwendet werden, kann es zu Konflikten kommen. Zur Ausführung von Plesk benötigte Ports werden eventuell geschlossen. Wir empfehlen, jeweils nur ein Tool zu verwenden.
Voraussetzungen
Bevor Sie beginnen können, muss die Erweiterung „Firewall“ auf dem Server installiert sein. Wenn dies nicht der Fall ist, installieren Sie die Erweiterung aus dem Katalog der Erweiterungen.
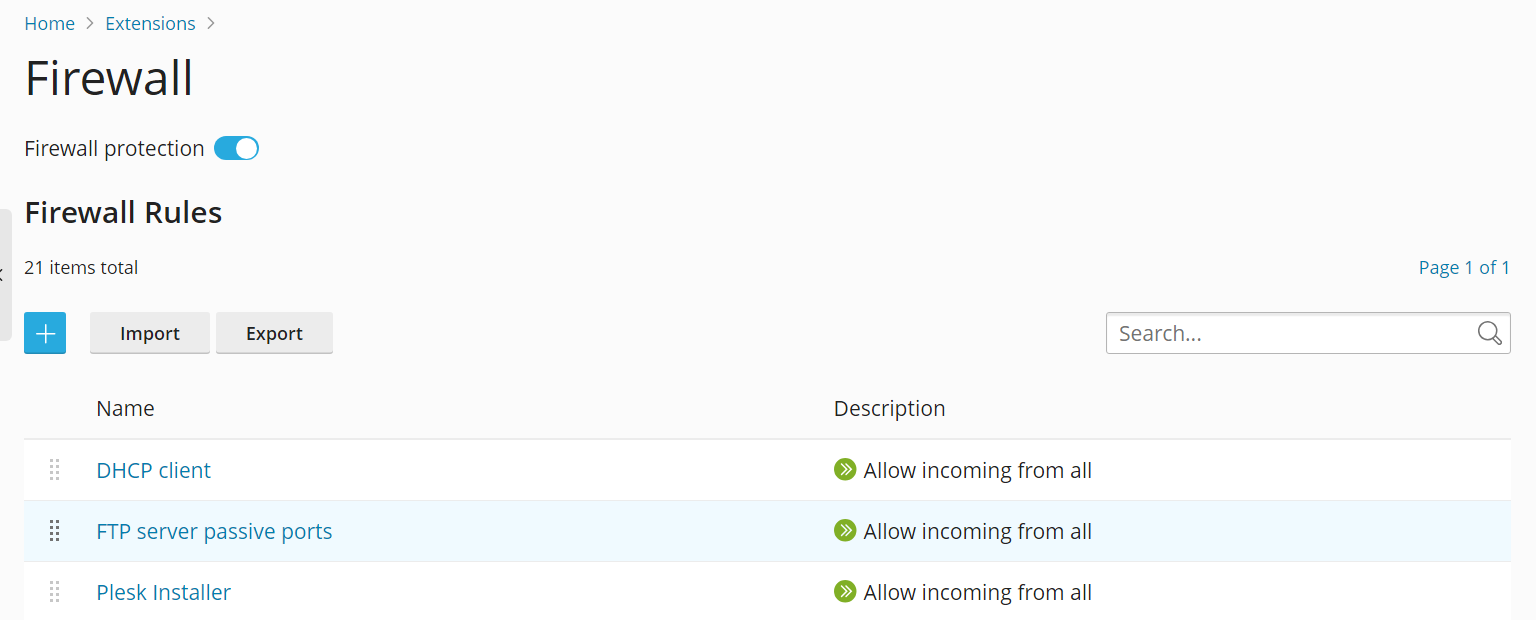
Firewall-Regeln und -Richtlinien verwalten
Standardmäßig besteht die Firewall-Konfiguration von Plesk aus Richtlinien und Regeln:
- Richtlinien haben einen breiten Geltungsbereich und wirken sich abhängig von der Richtlinie selbst auf alle Verbindungen zum oder vom Server aus. Beispielsweise können Sie mit der „Systemrichtlinie für eingehenden Datenverkehr“ alle eingehenden Verbindungen zum Server vollständig blockieren.
- Regeln haben einen engeren Geltungsbereich und steuern eingehende Verbindungen zu einzelnen Diensten von Plesk wie SMTP oder MySQL/MariaDB.
Regeln haben Vorrang vor Richtlinien. Wenn die globale Richtlinie beispielsweise vorsieht, den gesamten eingehenden Datenverkehr abzulehnen, eine Regel den eingehenden Datenverkehr von einer bestimmten IP jedoch zulässt, hat die Regel Vorrang. Mit diesem Mechanismus können Sie die Serversicherheit erhöhen oder lockern.
Wenn Sie zum Beispiel die Richtlinien so einrichten, dass alle Verbindungen zum und vom Server blockiert werden, einige wenige IP-Adressen oder Ports jedoch davon ausgenommen sind, erhöhen Sie die Sicherheit. Einige Anwendungen funktionieren aber möglicherweise nicht aufgrund der Netzwerkeinschränkungen. Wenn Sie im Gegensatz dazu alle Verbindungen standardmäßig zulassen und Regeln zum Blockieren einzelner Dienste oder individueller IP-Adressen einsetzen, ist Ihr Server zwar nicht so sicher, aber Sie vergewissern sich, dass es zu keinen Verbindungsproblemen kommt. Probieren Sie verschiedene Varianten aus, bis Sie eine zufriedenstellende Balance zwischen Nutzbarkeit und Sicherheit gefunden haben.
Für die Verwaltung der Firewall stehen Ihnen zwei Optionen zur Verfügung:
- Bestehende Richtlinien und Regeln ändern, einschließlich der Standardrichtlinien
- Benutzerdefinierte Regeln erstellen und entfernen
Bestehende Richtlinie oder Regel ändern:
- Melden Sie sich in Plesk an.
- Gehen Sie zu Tools & Einstellungen > Firewall (unter „Sicherheit“).
- Klicken Sie auf die Umschaltfläche „Firewall-Schutz“, sodass sie „Aktiviert“ anzeigt. Wenn der Firewall-Schutz bereits aktiviert ist, überspringen Sie diesen Schritt.
- Klicken Sie auf die Richtlinie oder Regel, die Sie ändern möchten.
- Nehmen Sie die gewünschten Änderungen vor, klicken Sie auf Speichern, klicken Sie auf Änderungen übernehmen und dann auf Übernehmen.
Die Änderungen an der Firewall-Konfiguration wurden jetzt umgesetzt.
Benutzerdefinierte Regel erstellen:
- Melden Sie sich in Plesk an.
- Gehen Sie zu Tools & Einstellungen > Firewall (unter „Sicherheit“).
- Klicken Sie auf die Umschaltfläche „Firewall-Schutz“, sodass sie „Aktiviert“ anzeigt. Wenn der Firewall-Schutz bereits aktiviert ist, überspringen Sie diesen Schritt.
- Klicken Sie auf die Schaltfläche
 .
. - (Optional) Geben Sie der Regel einen Namen.
- Konfigurieren Sie die Regel. Um beispielsweise alle eingehenden Verbindungen zum SSH-Dienst von der IP-Adresse 198.51.100.1 zu blockieren (vorausgesetzt, der Standard-SSH-Port wird verwendet), legen Sie für „Übereinstimmende Richtung“ die Option „Eingehend“ fest, geben Sie für „Aktion“ die Option „Ablehnen“ an, setzen Sie „Port“ auf „TCP 22“ und geben Sie dann „198.51.100.1“ im Feld „Quellen“ ein.
- Nachdem Sie die Regel konfiguriert haben, klicken Sie auf Speichern, auf Änderungen übernehmen und dann auf Übernehmen.
Die Änderungen an der Firewall-Konfiguration sind nun in Kraft. Achten Sie beim Erstellen von benutzerdefinierten Regeln darauf, dass Sie nicht versehentlich Verbindungen zu Ports, die von Plesk-Diensten verwendet werden, blockieren.
Bemerkung: Wenn Sie Docker-Container verwenden, werden die Docker-Firewallregeln nicht zu den Firewallregeln von Plesk hinzugefügt.
Benutzerdefinierte Regeln entfernen:
- Melden Sie sich in Plesk an.
- Gehen Sie zu Tools & Einstellungen > Firewall (unter „Sicherheit“).
- Klicken Sie auf die Umschaltfläche „Firewall-Schutz“, sodass sie „Aktiviert“ anzeigt. Wenn der Firewall-Schutz bereits aktiviert ist, überspringen Sie diesen Schritt.
- Wählen Sie eine oder mehrere benutzerdefinierte Regeln aus, die Sie entfernen möchten. Nur benutzerdefinierte Regeln können entfernt werden.
- Klicken Sie auf Entfernen, dann auf Ja, entfernen und anschließend auf Änderungen übernehmen und Übernehmen.
Die Änderungen an der Firewall-Konfiguration wurden jetzt umgesetzt.
Ländersperre
Mit der Plesk Firewall können Sie den Zugriff von oder auf IP-Adressen blockieren, die einem bestimmten Land zugeordnet werden.
Zugriff aus einem bestimmten Land sperren:
- Melden Sie sich in Plesk an.
- Gehen Sie zu Tools & Einstellungen > Firewall (unter „Sicherheit“).
- Klicken Sie auf die Umschaltfläche „Firewall-Schutz“, sodass sie „Aktiviert“ anzeigt. Wenn der Firewall-Schutz bereits aktiviert ist, überspringen Sie diesen Schritt.
- Klicken Sie auf die Schaltfläche .
- (Optional) Geben Sie der Regel einen Namen.
- Wählen Sie unter „Aktion“ die Option „Verweigern“ aus.
- Geben Sie unter „Quellen“ den ISO 3166-Code des zu blockierenden Landes bestehend aus zwei Buchstaben ein. Wenn Sie zum Beispiel alle eingehenden Verbindungen aus Afghanistan blockieren möchten, geben Sie AF ein.
- (Optional) Klicken Sie auf „Add one more“ (Weiteres hinzufügen) und wiederholen Sie den zuvor beschriebenen Schritt, um ein weiteres Land zu blockieren. Sie können so viele Länder blockieren, wie Sie möchten.
- Klicken Sie auf Speichern, nachdem Sie alle Länder hinzugefügt haben, die Sie blockieren möchten.
- Klicken Sie auf Änderungen übernehmen und dann auf Übernehmen.
Nachdem die Firewall-Konfiguration angewendet wurde, werden alle aus den blockierten Ländern auf Ihren Server eingehenden Verbindungen verweigert.
Standardmäßig verwendet Plesk die kostenlose Datenbank „IP to Country Lite“ von DB-IP. Sie können stattdessen eine kostenlose oder kostenpflichtige Datenbank von MaxMind verwenden. Dazu müssen Sie eine kostenlose oder kostenpflichtige Lizenz von MaxMind erwerben und einen Lizenzschlüssel abrufen.
Zur kostenpflichtigen GeoIP2-Datenbank wechseln:
-
Fügen Sie die folgenden Zeilen in der Datei panel.ini hinzu:
[ext-firewall]
geoipDataSource = maxmind-lite
Damit wird die kostenlose GeoLite2-Datenbank verwendet.
[ext-firewall]
geoipDataSource = maxmind
Damit wird die kostenpflichtige GeoIP2-Datenbank verwendet.
-
Melden Sie sich über SSH im Server an und führen Sie dann den folgenden Befehl aus:
LICENSE_KEY=<enter your license key here> plesk sbin modules/firewall/ipsets --configure --data-source maxmind-lite --force
oder
LICENSE_KEY=<enter your license key here> plesk sbin modules/firewall/ipsets --configure --data-source maxmind --force
Damit wird jeweils die kostenlose oder die kostenpflichtige Datenbank von MaxMind verwendet.
Bemerkung: Auf den Befehl wird möglicherweise die Fehlermeldung
Set cannot be destroyedzurückgegeben. Diese Warnung kann ignoriert werden. -
Gehen Sie zu Tools & Einstellungen > Firewall (unter „Sicherheit“).
-
Klicken Sie auf Änderungen übernehmen und dann auf Übernehmen.
Bemerkung: Falls die Schaltfläche Änderungen übernehmen nicht angezeigt wird, erstellen Sie eine neue Firewall-Regel, mit der das Übernehmen von Änderungen ausgelöst wird. Sie können die Regel dann wieder entfernen.
Nachdem die Firewall-Konfiguration angewendet wurde, wird die GeoIP2-Datenbank anstelle von GeoLite2 verwendet.
Wenn Sie wieder zur kostenlosen Datenbank von DB-IP wechseln möchten, entfernen Sie die Zeile geoipDataSource = maxmind-lite oder geoipDataSource = maxmind aus der Datei panel.ini. Wenden Sie die Firewall-Konfiguration dann erneut an.
Firewall-Konfiguration importieren und exportieren
Eventuell möchten Sie die Firewall-Konfiguration eines Servers mit Plesk für Linux auf anderen Servern duplizieren. Exportieren Sie dazu einfach die Firewall-Konfiguration in eine Datei und importieren Sie sie dann auf jedem der Server mit Plesk für Linux. Sie können die Firewall-Konfiguration sowohl über die grafische Oberfläche als auch über die Befehlszeile importieren und exportieren.
Firewall-Konfiguration über die grafische Benutzeroberfläche exportieren:
- Melden Sie sich auf dem Server in Plesk an, dessen Firewall-Konfiguration Sie kopieren möchten.
- Gehen Sie zu Tools & Einstellungen > Firewall (unter „Sicherheit“).
- Klicken Sie auf die Schaltfläche „Firewall-Schutz“, sodass sie „Aktiviert“ anzeigt. Klicken Sie dann auf Übernehmen. Wenn der Firewall-Schutz bereits aktiviert ist, überspringen Sie diesen Schritt.
- Klicken Sie auf Exportieren.
Die Firewall-Konfiguration wird im Format .json gespeichert. Sie finden die Datei im Download-Ordner Ihres Browsers.
Firewall-Konfiguration über die grafische Benutzeroberfläche importieren:
- Melden Sie sich auf dem Server in Plesk an, auf den Sie die Firewall-Konfiguration eines anderen Servers kopieren möchten.
- Gehen Sie zu Tools & Einstellungen > Firewall (unter „Sicherheit“).
- Klicken Sie auf die Schaltfläche „Firewall-Schutz“, sodass sie „Aktiviert“ anzeigt. Klicken Sie dann auf Übernehmen. Wenn der Firewall-Schutz bereits aktiviert ist, überspringen Sie diesen Schritt.
- Klicken Sie auf Importieren und suchen Sie dann die
.json-Datei, die Sie auf dem Server exportiert haben, dessen Firewall-Konfiguration Sie kopieren möchten.
Die Firewall-Konfiguration aus der Datei wird übernommen.
Firewall-Konfiguration über die Befehlszeilenschnittstelle exportieren:
-
Melden Sie sich via SSH auf dem Server in Plesk an, dessen Firewall-Konfiguration Sie kopieren möchten.
-
Führen Sie den folgenden Befehl aus, um die Firewall-Konfiguration zu exportieren:
plesk ext firewall --export > rules.jsonSie können der Datei einen beliebigen Namen geben. „rules.json“ ist nur ein Beispiel.
Die Firewall-Konfiguration wird in die angegebene Datei gespeichert.
Firewall-Konfiguration über die Befehlszeilenschnittstelle importieren:
-
Melden Sie sich via SSH auf einem Server an, auf den Sie die Firewall-Konfiguration eines anderen Servers kopieren möchten. Sie müssen zwei separate SSH-Sitzungen öffnen, um die Firewall-Konfiguration zu importieren.
-
Führen Sie in der ersten SSH-Sitzung den folgenden Befehl aus, um den Firewall-Schutz zu aktivieren. Wenn der Firewall-Schutz bereits aktiviert ist, überspringen Sie diesen Schritt.
plesk ext firewall --enable -
Führen Sie in der zweiten SSH-Sitzung den folgenden Befehl aus, um den Firewall-Schutz zu überprüfen. Falls der Firewall-Schutz bereits aktiviert ist, überspringen Sie diesen Schritt.
plesk ext firewall --confirm -
Führen Sie in der ersten SSH-Sitzung den folgenden Befehl aus, um die Firewall-Konfiguration zu importieren und anzuwenden:
plesk ext firewall --import -zopfig <the file's URL or local path> && plesk ext firewall --applyZum Beispiel
plesk ext firewall --import -config https://example.com/rules.json && plesk ext firewall --applyoder
plesk ext firewall --import -config /tmp/rules.json && plesk ext firewall --apply -
Überprüfen Sie, ob Sie nach der Anwendung der neuen Firewall-Konfiguration über SSH eine Verbindung zum Server herstellen können. Wenn dies der Fall ist, führen Sie in der zweiten SSH-Sitzung den folgenden Befehl aus, um die importierte Firewall-Konfiguration zu bestätigen.
plesk ext firewall --confirmBemerkung: Wenn Sie die importierte Firewall-Konfiguration nicht innerhalb von 60 Sekunden nach Ausführung des Befehls
plesk ext firewall --applybestätigen, werden die vorgenommenen Änderungen automatisch rückgängig gemacht und die vorherige Firewall-Konfiguration wird wiederhergestellt.
Die Firewall-Konfiguration aus der Datei wird auf dem Server übernommen.