Deploying Plesk on VirtualBox
summary: In this topic, you will learn how to deploy Plesk from a QCOW2 image on Oracle VirtualBox.
We will use Plesk running on Ubuntu 22 as an example, but you can also deploy Plesk running on CentOS 7 the same way.
Before You Begin
Before deploying Plesk, do the following:
- Download and install VirtualBox on your computer.
- Download the plesk-ubuntu-latest.qcow2 image from https://autoinstall.plesk.com/images/.
- Convert the QCOW2 image to the VMDK format.
Deploying Plesk Using a Converted QCOW2 Image
To deploy Plesk on VirtualBox using a QCOW2 image converted to the VMDK format, create a virtual server. Here’s how to do it:
-
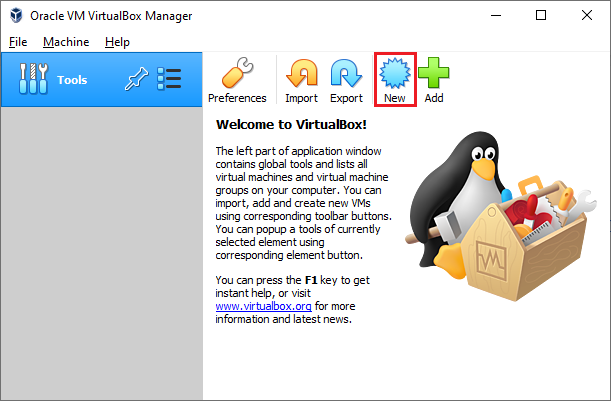
In VirtualBox, сlick the New icon:

-
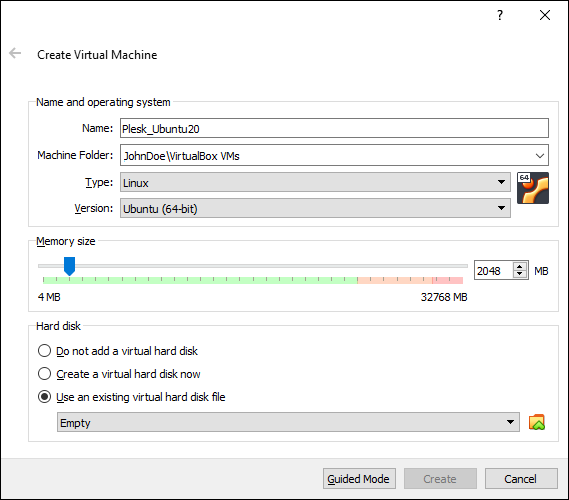
In the “Create Virtual Machine” window, specify the name for the virtual machine and the operating system, and the RAM size:
For more information about the RAM requirements, see the Hardware Requirements.
-
Select Use an existing virtual hard disk file and then click the
icon. -
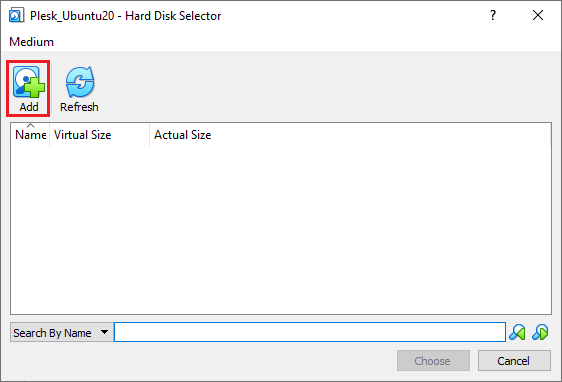
In the “Hard Disk Selector” window, click Add:
-
Select the QCOW2 image you downloaded and converted to the VMDK format, and then click Choose.
-
Click Create.
-
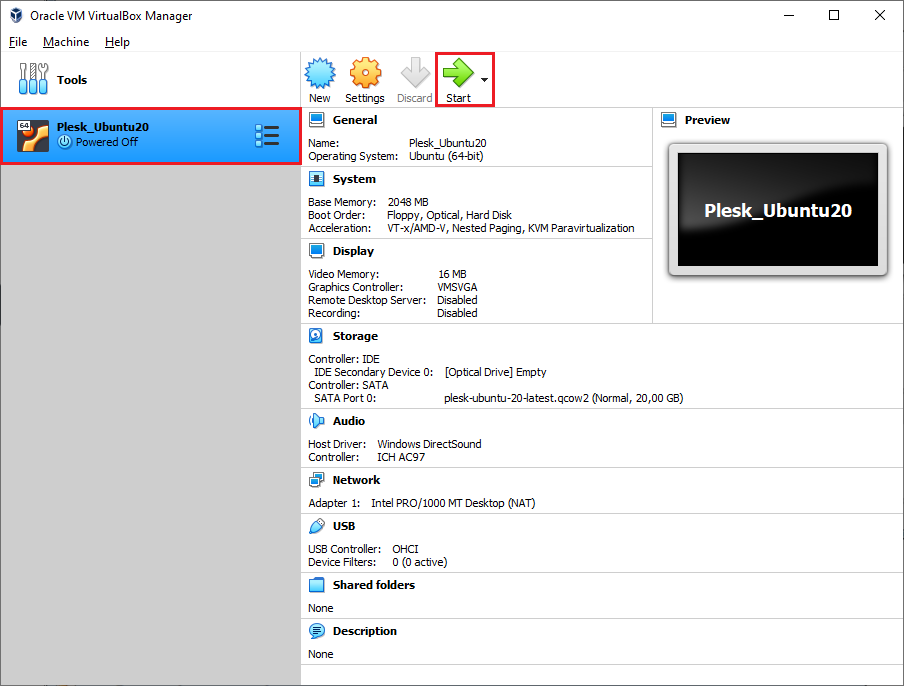
Power on the virtual machine you have created by clicking Start:
-
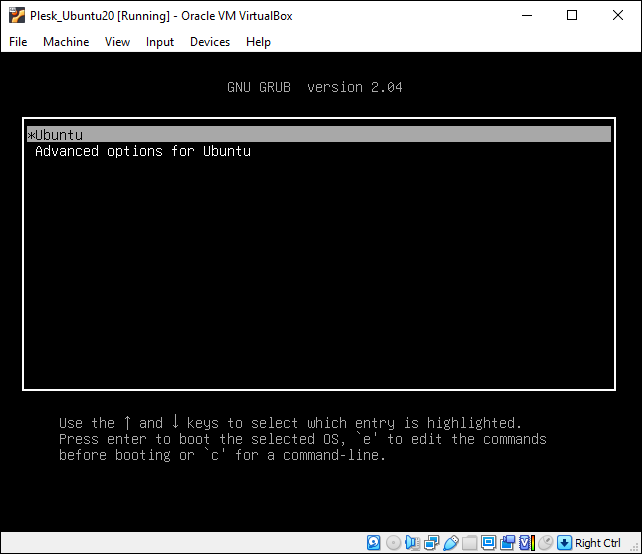
Select Ubuntu and press ENTER:
Wait till the operating system and Plesk are deployed.
Logging in to the Created Virtual Machine
A virtual machine with Plesk created from a converted QCOW2 image does not have a preconfigured SSH password. There are two ways to log in to the virtual machine:
-
Boot into recovery mode and set the
rootpassword. You need to do this for every virtual machine with Plesk you create. -
Use the “cloud-init” utility shipped with the Plesk QCOW2 image to preconfigure the server and set the
rootpassword. For example, you can use the “NoCloud” datasource to create an ISO image or a virtual hard drive containing theuser-datafile. Connect this ISO image or a virtual hard drive to the virtual machine before booting it up, and thecloud-initutility should configure the SSH user so that you can log in. You can then use that ISO image or a virtual hard drive with every virtual machine you create.