(Plesk for Linux) The Plesk Firewall
summary
The Plesk firewall is a tool you can use to improve the security of your Plesk for Linux server by restricting network connections to and/or from the server.
In this topic, you will learn how to add and remove firewall rules and policies, how to block incoming connections from specific countries, and also how to export and import firewall rules to easily replicate firewall configuration between servers.
Caution
Both the Plesk firewall and firewalld are tools for managing the iptables firewall. Using both tools simultaneously can result in conflicts and in ports required for Plesk to operate being closed. We recommend only using one tool at a time.
Prerequisites
Before you can begin, the “Firewall” extension must be installed on the server. If it is not, install the extension from the Extensions Catalog.
Managing Firewall Rules and Policies
By default, the Plesk firewall configuration consists of policies and rules:
Policies are broad in scope and affect all connections to or from the server, depending on the policy itself. For example, you can use “System policy for incoming traffic” to completely block all incoming connections to the server.
Rules are narrower in scope and govern incoming connections to individual Plesk services, such as SMTP or MySQL/MariaDB.
Rules override policies. For example, if the global policy is to deny all incoming traffic, but a rule allows incoming traffic from a specific IP, the rule takes precedence. You can use this mechanism to tighten or relax the security of the server.
For example, setting up the policies to forbid all connections to and from the server except for a few allowed IP addresses or ports will result in improved security, but some applications may not be able to work due to the network restrictions. Conversely, allowing all connections by default and using rules to block access to individual services or from individual IP addresses will make your server less secure, but will ensure that you do not run into connection issues. Experiment to find the optimal trade-off between usability and security.
You can manage the firewall in two ways:
Modifying existing policies and rules, including the default ones.
Creating and removing custom rules.
Modifying an existing policy or rule:
Log in to Plesk.
Go to Tools & Settings > Firewall (under “Security”).
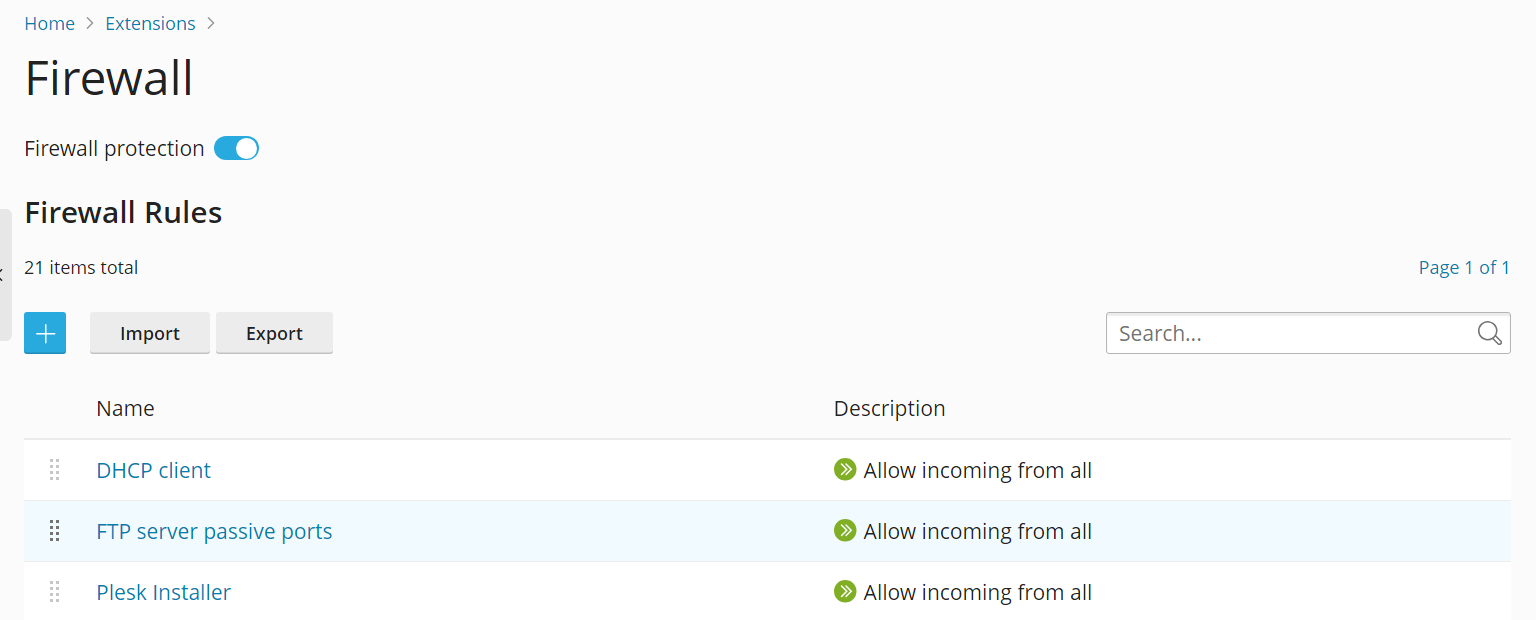
Click the “Firewall protection” toggle button so that it shows “Enabled”. If firewall protection is already enabled, skip this step.
Click the policy or rule you want to modify.
Make the desired changes, click Save, click Apply Changes, and then click Apply.
The changes to the firewall configuration are now in effect.
Creating a custom rule:
Log in to Plesk.
Go to Tools & Settings > Firewall (under “Security”).
Click the “Firewall protection” toggle button so that it shows “Enabled”. If firewall protection is already enabled, skip this step.
Click the
 button.
(Optional) Give your rule a name.
Configure the rule. For example, to block all incoming connections to the SSH service from IP address 198.51.100.1 (assuming the default SSH port is being used), set “Match direction” to “Incoming”, set “Action” to “Deny”, set “Port” to “TCP 22”, and then enter “198.51.100.1” in the “Sources” field.
Once you have configured the rule, click Save, click Apply Changes, and then click Apply.
The changes to the firewall configuration are now in effect. When creating custom rules, be careful not to block connections to ports used by Plesk services by mistake.
Note
If you are using Docker containers, Docker firewall rules will not be added to Plesk firewall rules.
Removing custom rules:
Log in to Plesk.
Go to Tools & Settings > Firewall (under “Security”).
Click the “Firewall protection” toggle button so that it shows “Enabled”. If firewall protection is already enabled, skip this step.
Select one or more custom rules you want to remove. Only custom rules can be removed.
Click Remove, click Yes, remove, click Apply Changes, and then click Apply.
The changes to the firewall configuration are now in effect.
Country Blocking
You can use the Plesk firewall to block access to or from IP addresses belonging to a particular country.
Blocking access from a specific country:
Log in to Plesk.
Go to Tools & Settings > Firewall (under “Security”).
Click the “Firewall protection” toggle button so that it shows “Enabled”. If firewall protection is already enabled, skip this step.
Click the
button.(Optional) Give your rule a name.
Set “Action” to “Deny”.
Under “Sources”, enter the two letter ISO 3166 country code of the country you want to block (for example, to block all incoming connections from Afghanistan, enter AF).
(Optional) Click “Add one more”, and repeat the previous step to block an additional country. You can block as many countries as you want.
Click Save once you have added all countries you want to block.
Click Apply Changes, and then click Apply.
Once the firewall configuration has been applied, all incoming connections to your server from the blocked country or countries will be denied.
By default, Plesk uses the free “IP to Country Lite” database from DB-IP. You can instead use a free or paid database from MaxMind. Before you can do so, you need to obtain a free or paid license from MaxMind and receive your license key.
Switching to the paid GeoIP2 database:
-
Add the following lines to the panel.ini file:
[ext-firewall]
geoipDataSource = maxmind-lite
to use the free GeoLite2 database, or
[ext-firewall]
geoipDataSource = maxmind
to use the paid GeoIP2 database.
-
Log in to the server via SSH, and then run the following command:
LICENSE_KEY=<enter your license key here> plesk sbin modules/firewall/ipsets --configure --data-source maxmind-lite --force
or
LICENSE_KEY=<enter your license key here> plesk sbin modules/firewall/ipsets --configure --data-source maxmind --force
to use the free or paid database from MaxMind, respectively.
Note
The command may finish with a
Set cannot be destroyedwarning. The warning can be safely ignored. Log in to Plesk.
Go to Tools & Settings > Firewall (under “Security”).
-
Click Apply Changes, and then click Apply.
Note
If the Apply Changes button is missing, create a new firewall rule to trigger the ability to apply changes. You can remove that rule afterwards.
Once the firewall configuration has been applied, the GeoIP2 database will be used instead of GeoLite2.
To switch back to the free database from DB-IP, remove the geoipDataSource = maxmind-lite or geoipDataSource = maxmind line from the panel.ini file, and then reapply the firewall configuration.
Importing and Exporting Firewall Configuration
You may want to duplicate one Plesk for Linux server’s firewall configuration on other Plesk for Linux servers. The easiest way to do so is to export the firewall configuration to a file, and then to import it on each of those Plesk for Linux servers. You can import and export the firewall configuration both via the graphical interface and the command line.
Exporting the firewall configuration via the GUI:
Log in to Plesk on the server whose firewall configuration you want to copy.
Go to Tools & Settings > Firewall (under “Security”).
Click the “Firewall protection” toggle button so that it shows “Enabled”, and then click Apply. If firewall protection is already enabled, skip this step.
Click Export.
The firewall configuration will be saved to a .json file. You can find it in your browser’s downloads directory.
Importing the firewall configuration via the GUI:
Log in to Plesk on a server you want to copy another server’s firewall configuration to.
Go to Tools & Settings > Firewall (under “Security”).
Click the “Firewall protection” toggle button so that it shows “Enabled”, and then click Apply. If firewall protection is already enabled, skip this step.
Click Import, and then locate the
.jsonfile exported on the server whose firewall configuration you want to copy.
The firewall configuration from the file will be applied.
Exporting the firewall configuration via the CLI:
Log in via SSH to the server whose firewall configuration you want to copy.
-
Run the following command to export the firewall configuration:
plesk ext firewall --export > rules.jsonYou can give the file any name you want, “rules.json” is just an example.
The firewall configuration will be saved to the specified file.
Importing the firewall configuration via the CLI:
Log in via SSH to a server you want to copy another server’s firewall configuration to. You need to open two separate SSH sessions to import the firewall configuration.
-
In the first SSH session, run the following command to enable firewall protection. If firewall protection is already enabled, skip this step.
plesk ext firewall --enable -
In the second SSH session, run the following command to confirm firewall protection. If firewall protection is already enabled, skip this step.
plesk ext firewall --confirm -
In the first SSH session, run the following command to import and apply the firewall configuration:
plesk ext firewall --import -config <the file's URL or local path> && plesk ext firewall --applyFor example
plesk ext firewall --import -config https://example.com/rules.json && plesk ext firewall --applyor
plesk ext firewall --import -config /tmp/rules.json && plesk ext firewall --apply -
Verify that you can connect to the server via SSH after applying the new firewall configuration. If you can, in the second SSH session, run the following command to confirm the imported firewall configuration.
plesk ext firewall --confirmNote
If you do not confirm the imported firewall configuration within 60 seconds of running the
plesk ext firewall --applycommand, the changes you made will be rolled back automatically, and the previous firewall configuration will be restored.
The firewall configuration from the file will be applied to the server.