系统日期和时间
概要: You can set your Plesk server date and time manually. You can also set up automatic synchronization with Network Time Protocol (NTP) servers to make sure that the date and time on your server is always correct.
In this topic, you will learn how to set the date and time on your Plesk server manually. You will also learn how to set up automatic time synchronization using NTP.
Setting the Date and Time Manually
Use this approach to manually set the date and time on your Plesk server.
注解: Take care not to misconfigure the date and time. Doing so may cause issues with Plesk or Plesk services. For example, 2FA may stop working, scheduled tasks may run not when you expect them to, or you may even become unable to log in to Plesk.
To set the date and time on a Plesk server manually:
- 登录到 Plesk。
- 进入 工具与设置 > 系统时间(在 “常规设置”下)。
- Select the “Update system time” checkbox.
- Set the date and time to the desired values. You can also select your time zone.
- (Plesk for Windows) 如果您不希望 Plesk 自动调整服务器时钟,可清空“自动调整夏令时时钟更改” 复选框。
- 单击 保存 。
The changes to the server date, time, and time zone take effect immediately.
Setting up Automatic Synchronization of Date and Time Using NTP
To make sure that the date and time on your server is always correct, you can set up automatic synchronization with one or more NTP servers.
In Plesk for Linux, before you can do so, the free NTP Timesync extension must be installed on the Plesk server:
- 如果您是Plesk管理员,请 从扩展目录安装扩展。
- 否则,请联系您的主机提供商,并要求他们为您安装该扩展。
(Plesk for Linux) To set up automatic synchronization with the default NTP servers:
- 登录到 Plesk。
- Go to Extensions, go to the “My Extensions” tab, locate the “NTP Timesync” extension, and then click Open.
- Select the desired NTP implementation from the “NTP Service” menu. If you are not sure which one to choose, select the one marked as “recommended”.
- (Optional) If one or more default NTP servers were removed from the list, click Set default OS NTP servers to reset the list of servers to the default ones.
- 单击 应用 。
The date and time on the server will now be synchronized with the default NTP servers every 64 seconds. This will override any manual changes to the date and time you may have made.
If you want, you can replace some or all of the default NTP servers with custom ones. If you do, it is recommended to have between four and nine NTP servers on the list.
注解: It is your responsibility to make sure that the custom servers you add are valid NTP servers.
(Plesk for Linux) To set up automatic synchronization with custom NTP servers:
- 登录到 Plesk。
- Go to Extensions, go to the “My Extensions” tab, locate the “NTP Timesync” extension, and then click Open.
- Select the desired NTP implementation from the “NTP Service” menu. If you are not sure which one to choose, select the one marked as “recommended”.
- (Optional) Remove one or more default NTP servers. To remove a server from the list, click the corresponding
 icon.
icon. - Add one or more custom NTP servers. To do so, click Add one more, and then enter the hostname or IP address of a valid NTP server into the blank field that appears at the bottom of the list.
- Once you are done removing and adding servers, click Apply.
The date and time on the server will now be synchronized with the custom NTP servers every 64 seconds. This will override any manual changes to the date and time you may have made.
(Plesk for Windows) To set up automatic synchronization with a custom NTP server:
-
进入 工具与设置 > 系统时间(在 “常规设置”下)。
-
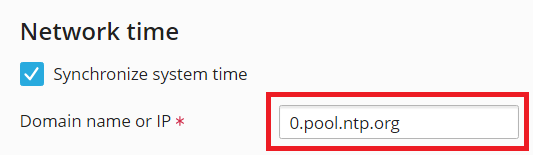
Select the “Synchronize system time” checkbox.
-
Enter the hostname or IP address of a valid NTP server into the “Domain name or IP” field.
注解: If you do not know what NTP server to use, you can specify one of the NTP Pool Project servers. Namely, “0.pool.ntp.org”, “1.pool.ntp.org”, “2.pool.ntp.org”, or “3.pool.ntp.org”.
-
单击 保存 。
The date and time on the server will now be synchronized with the specified NTP server every hour. This will override any manual changes to the date and time you may have made.
(Plesk for Linux) To disable automatic synchronization with NTP servers:
- 登录到 Plesk。
- Go to Extensions, go to the “My Extensions” tab, locate the “NTP Timesync” extension, and then click Open.
- Select “None” from the “NTP Service” menu, and then click Apply.
The date and time on the server will no longer be synchronized with NTP servers.
(Plesk for Windows) To disable automatic synchronization with the NTP server:
- 登录到 Plesk。
- 进入 工具与设置 > 系统时间(在 “常规设置”下)。
- Clear the “Synchronize system time” checkbox, and then click Save.
The date and time on the server will no longer be synchronized with the specified NTP server.